Quick 15-Minute Full-Body Home Workout for Busy Days

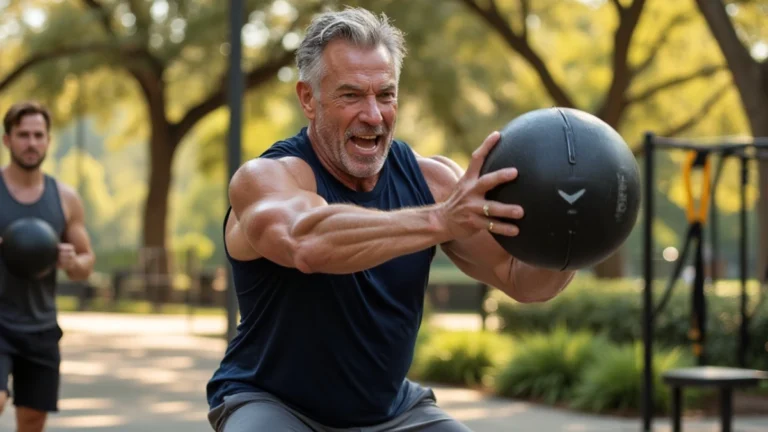
The modern schedule is a relentless force, a cascade of work deadlines, family obligations, and personal commitments that leaves little room for anything else. In this high-demand environment, the intention to exercise often becomes the first casualty.
This personal struggle is a microcosm of a staggering global public health crisis. According to the World Health Organization (WHO), a staggering 1 in 3 adults—totaling 1.8 billion people—and over 80% of adolescents fail to meet the recommended levels of physical activity.
The consequences of this widespread inactivity are dire. Projections indicate that if current trends persist, nearly 500 million new cases of preventable noncommunicable diseases (NCDs) like heart disease, type 2 diabetes, and some cancers will emerge between 2020 and 2030.
The solution, however, is not to magically create more hours in the day. The solution is to fundamentally redefine what constitutes an effective workout. This guide presents the definitive answer to the time scarcity problem:
A 15-minute, no-equipment, full-body workout that can be performed from the comfort of home. This is not merely a list of exercises; it is a comprehensive plan rooted in robust physiological science.

The Science of “Less Is More”: Why 15 Minutes Works
To invest precious time with confidence, it is essential to understand the powerful physiological principles that make a 15-minute workout so effective. The efficacy of this routine is not based on wishful thinking but is anchored in two pillars of exercise science:
High-Intensity Interval Training (HIIT) and the use of Compound Movements. Together, they create a potent combination that maximizes results in minimal time.
Primed for Performance: The 2-Minute Dynamic Warm-Up
A dynamic warm-up is a non-negotiable component of any effective workout, especially one involving high intensity. Its purpose extends far beyond simply “getting warm.” A proper warm-up prepares the body for the demands to come by increasing blood flow to the muscles, lubricating the joints with synovial fluid, and activating the central nervous system for improved reaction time and coordination.
The Protocol (2 Minutes Total)
Perform the following exercises in sequence to fully prepare your body for the main circuit.
- 1. Inchworms (40 seconds) This is an exceptional full-body primer. It simultaneously stretches the hamstrings, calves, and lower back while actively engaging and warming up the core, shoulders, and chest muscles.
- 2. Leg Swings (Forward & Sideways) (20 seconds per leg, each direction) This movement is excellent for increasing dynamic flexibility and mobility in the hip joints. Forward swings target the hamstrings and hip flexors, while side-to-side swings warm up the adductors (inner thigh) and abductors (outer thigh).
- Arm Circles (20 seconds forward, 20 seconds backward) A simple yet vital movement, arm circles warm up the entire shoulder girdle, including the rotator cuff muscles, as well as the chest and upper back. This prepares the upper body for the demands of push-ups and planks.
The Main Event: Your 15-Minute Full-Body Circuit
Understanding the Circuit Format
This workout is structured as a circuit to maximize intensity and efficiency. The protocol is simple yet demanding: perform each of the five exercises for 45 seconds of continuous work, followed immediately by 15 seconds of rest. This 60-second block is repeated for all five exercises to complete one full circuit. The goal is to complete three full circuits within the 15-minute timeframe.
This 45/15 work-to-rest ratio is specifically designed to push your body toward its anaerobic threshold during the work phase, stimulating significant metabolic and cardiovascular adaptations.
The 15-second rest period is just long enough to allow for a brief recovery, enabling you to maintain proper form and high intensity for the subsequent exercise. To keep track of these intervals accurately and maintain focus, using a dedicated timer app such as “Timer Plus” or “Seconds Interval Timer” is highly recommended.
The 15-Minute Workout Protocol
For a clear, at-a-glance guide, follow this protocol. This table can be easily referenced during the workout to minimize transition time and maintain momentum.
Exercise 1: Bodyweight Squat

- What & Why: The squat is the foundational compound movement for the lower body. It is a highly functional exercise that targets the glutes, quadriceps, hamstrings, and core, directly improving your ability to perform daily tasks like sitting, standing, and lifting objects from the floor.
- Master the Move:
- Stand with your feet slightly wider than hip-width apart, with your toes pointed slightly outward.
- Brace your core and keep your chest upright. Initiate the movement by hinging at your hips, pushing your butt backward as if you are about to sit in a chair.
- Continue to lower by bending your knees, ensuring they track in line with your toes.
- Descend until your thighs are at least parallel to the floor, or as low as you can go while maintaining good form.
- Drive forcefully through your heels and mid-foot to return to the starting position, squeezing your glutes at the top.
- Form Check (Mistakes to Avoid): Allowing your knees to cave inward, lifting your heels off the floor, or rounding your lower back. Keep your gaze forward to help maintain a neutral spine.
- Scale Back (Beginner): Perform squats to a chair or bench. This helps control the depth of the movement and builds confidence in the form.
Exercise 2: Push-Up
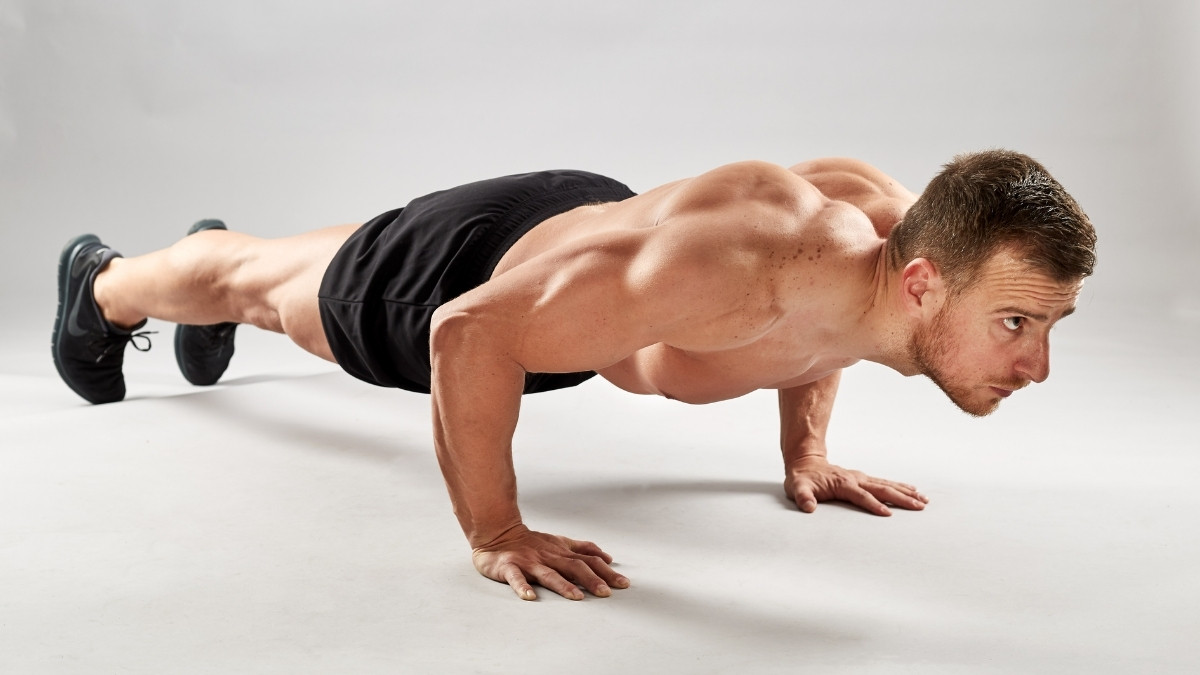
- What & Why: The push-up is the quintessential upper-body and core-strengthening exercise. It effectively targets the chest (pectorals), shoulders (deltoids), triceps, and the entire core musculature, which must work to stabilize the body.
- Master the Move:
- Start in a high plank position with your hands placed firmly on the floor, slightly wider than your shoulders.
- Your body should form a straight, rigid line from your head to your heels. Engage your core and glutes to prevent your hips from sagging.
- Lower your body in a controlled manner by bending your elbows, keeping them at a 45-degree angle to your torso—not flared out to the sides.
- Descend until your chest is a few inches from the floor.
- Press explosively through your hands to return to the starting high plank position.
- Form Check (Mistakes to Avoid): Letting your hips sag, flaring your elbows out wide (which strains the shoulders), or placing your hands too far forward.
- Scale Back (Beginner): Perform incline push-ups with your hands on a sturdy table, countertop, or wall. The higher the incline, the less bodyweight you have to lift. This is often a superior modification to knee push-ups because it teaches full-body tension.
Exercise 3: Reverse Lunge
- What & Why: The reverse lunge is a unilateral (single-leg) exercise that is excellent for building strength, balance, and stability. It targets the glutes, quads, and hamstrings of each leg independently. Stepping backward is often more stable and easier on the knees than a traditional forward lunge.
- Master the Move:
- Stand tall with your feet hip-width apart and your hands on your hips for balance.
- Engage your core. Take a large step backward with your right foot.
- Lower your hips until both knees are bent at approximately a 90-degree angle. Your front thigh should be parallel to the floor, and your back knee should hover just above the ground.
- Keep your torso upright and your weight primarily in your front heel.
- Push off your back foot to return to the starting position. Alternate legs with each repetition.
- Form Check (Mistakes to Avoid): Allowing your front knee to travel far past your toes, leaning your torso too far forward, or pushing off your toes instead of your front heel.
- Scale Back (Beginner): Reduce the range of motion by only lowering halfway down. You can also hold onto a wall or chair for additional support.
Exercise 4: Plank
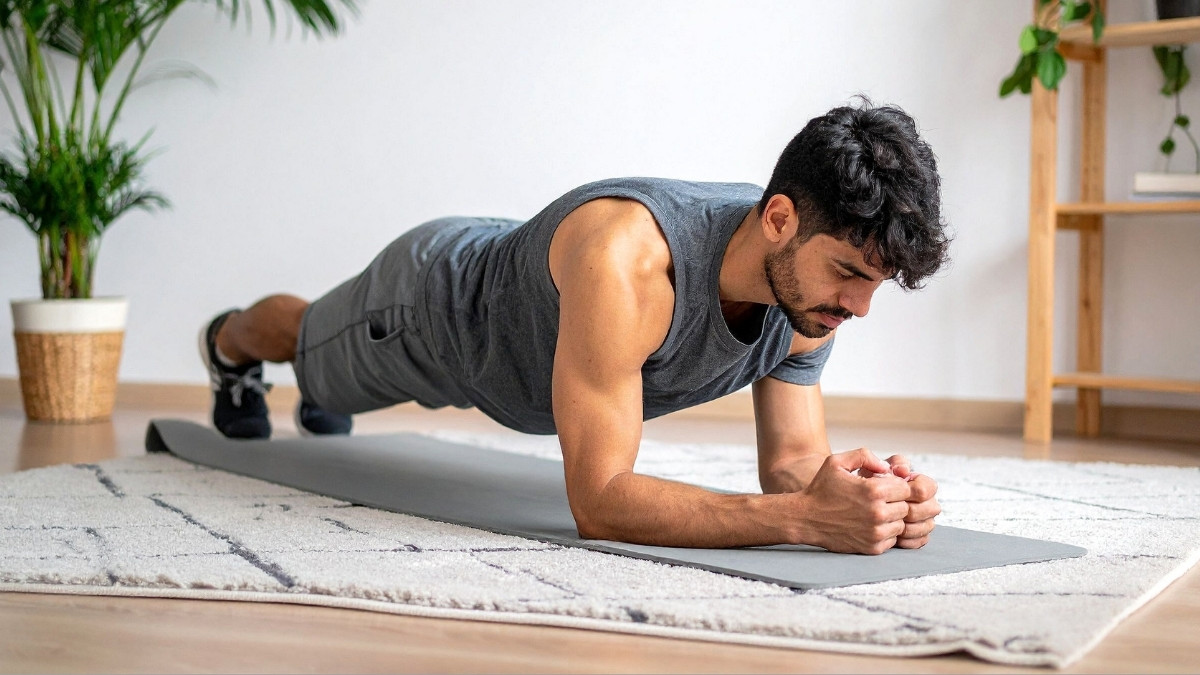
- What & Why: The plank is a premier isometric exercise for building deep core strength and endurance. A strong core is essential for stabilizing the spine, improving posture, and transferring power between the upper and lower body. The plank works the rectus abdominis, obliques, transverse abdominis, as well as the shoulders and glutes.
- Master the Move:
- Place your forearms on the floor with your elbows positioned directly beneath your shoulders. Your arms should be parallel to each other.
- Extend your legs straight behind you, feet hip-width apart.
- Lift your hips so your body forms a straight, rigid line from your head to your heels.
- Engage your core by pulling your belly button in toward your spine. Squeeze your glutes and quadriceps to maintain tension throughout your body.
- Form Check (Mistakes to Avoid): Allowing your hips to sag toward the floor or piking them up too high in the air, which breaks the straight line and disengages the core. Also, avoid letting your head drop.
- Scale Back (Beginner): Perform a knee plank. Keep your forearms on the floor but drop your knees to the ground. Maintain a straight line from your knees to your head.
Exercise 5: Glute Bridge
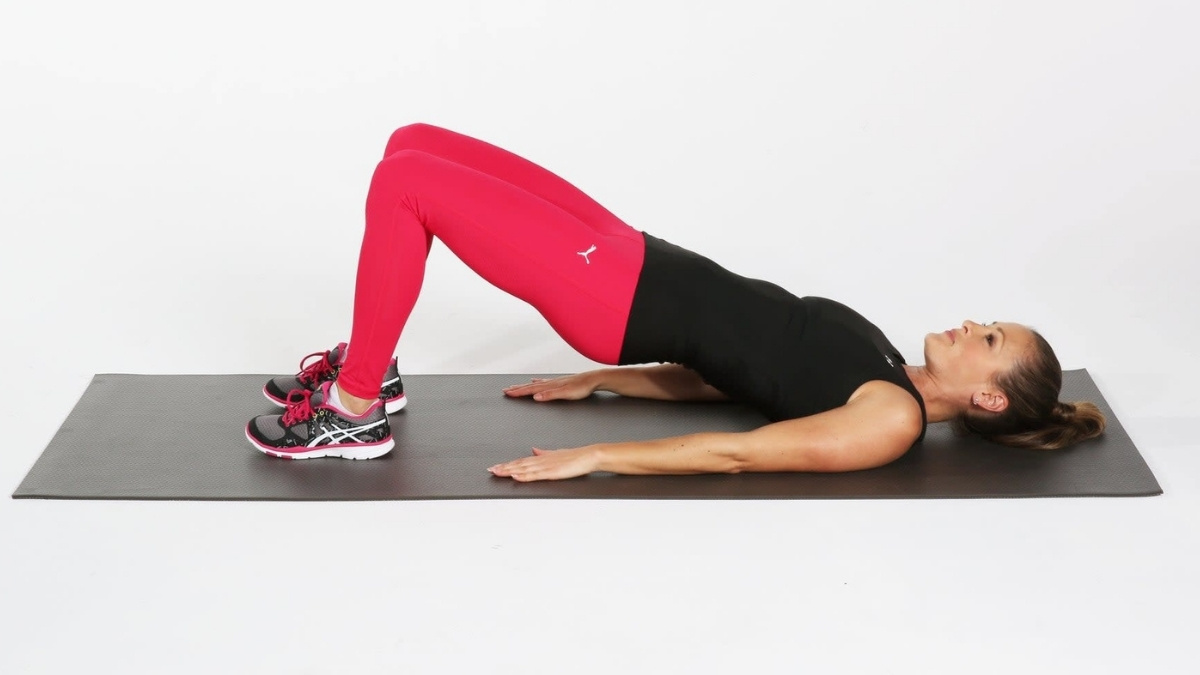
- What & Why: This exercise specifically targets and activates the posterior chain—the glutes and hamstrings. These muscles often become underactive and weak from prolonged sitting, which can contribute to poor posture and lower back pain. Strengthening them is crucial for pelvic stability and overall functional strength.
- Master the Move:
- Lie on your back with your knees bent and your feet flat on the floor, about hip-width apart and close enough to your glutes that you can touch your heels with your fingertips.
- Place your arms at your sides with your palms facing down.
- Engage your core and squeeze your glutes. Press through your heels to lift your hips off the floor until your knees, hips, and shoulders form a straight line.
- Pause and squeeze your glutes at the top for a second.
- Slowly lower your hips back to the starting position with control.
- Form Check (Mistakes to Avoid): Overarching (hyperextending) your lower back at the top of the movement. The lift should come from hip extension driven by the glutes, not from arching the spine. Also, ensure your hips remain level.
- Scale Back (Beginner): Reduce the range of motion by only lifting your hips partway off the floor. Focus on mastering the glute squeeze.
(Optional) Finisher: Burpees
- What & Why: If you have any time and energy left after three circuits, the burpee is the ultimate finisher. It is a high-intensity, full-body conditioning exercise that builds explosive power, elevates the heart rate, and challenges nearly every muscle in the body.7
- Master the Move:
- From a standing position, squat down and place your hands on the floor in front of you.
- Jump your feet back into a high plank position.
- Perform a push-up, lowering your chest to the floor.
- Jump your feet back toward your hands, landing in a low squat.
- Explode upward into a jump, reaching your hands overhead.40
- Scale Back (Beginner): Remove the push-up and/or the jump at the end. For a lower-impact version, step your feet back and forward one at a time instead of jumping.42
The Essential Finish: The 2-Minute Static Cool-Down
The “Why”: Invest in Tomorrow’s Workout
Just as a warm-up prepares the body for exercise, a cool-down is vital for transitioning it back to a state of rest. This phase involves static stretching—holding a stretch for an extended period (20-30 seconds)—to help improve long-term flexibility, reduce the potential for post-exercise muscle soreness, and gradually bring the heart rate and breathing back to their resting rates. Skipping the cool-down can hinder recovery and leave muscles feeling tight.16
The Protocol (2 Minutes Total)
Hold each of the following stretches for 30 seconds, breathing deeply to promote relaxation and muscle release.
1. Standing Quad Stretch (30 seconds per side)
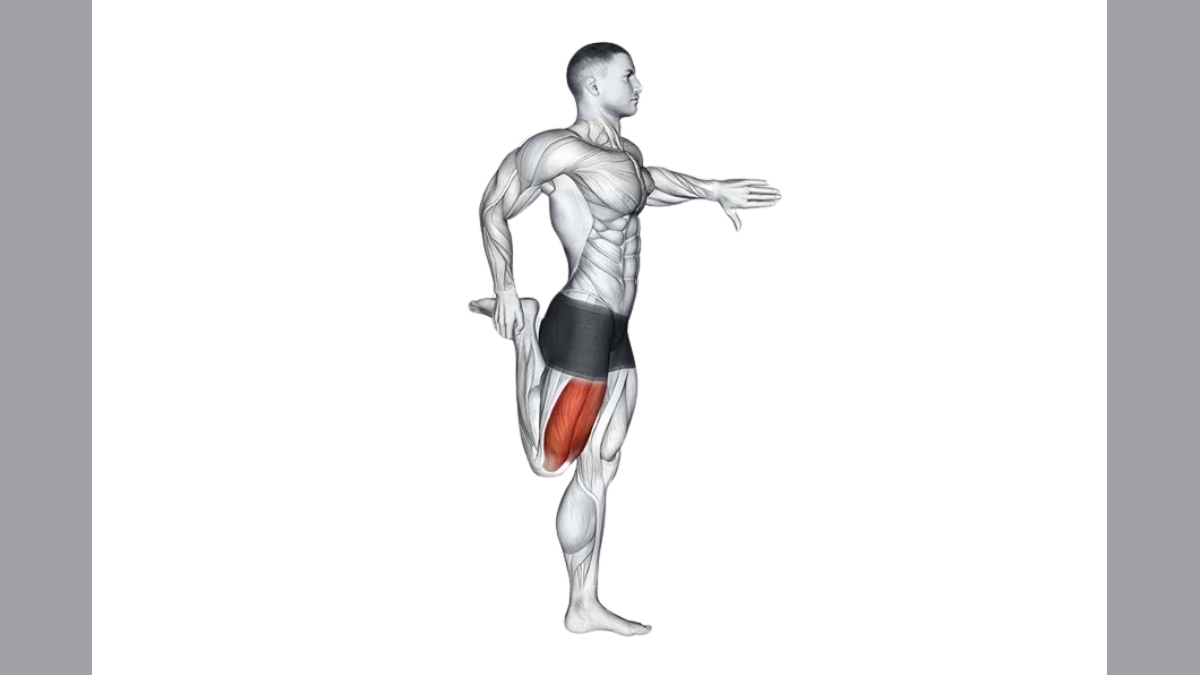
This stretch targets the quadriceps, the large muscles on the front of your thighs.
- How to: Stand tall, holding onto a wall or chair for balance if needed. Bend your right knee and grab your right foot with your right hand. Gently pull your heel toward your glute, keeping your knees together. You should feel a stretch along the front of your right thigh. Hold, then repeat on the left side.
2. Seated Hamstring Stretch (30 seconds per side)
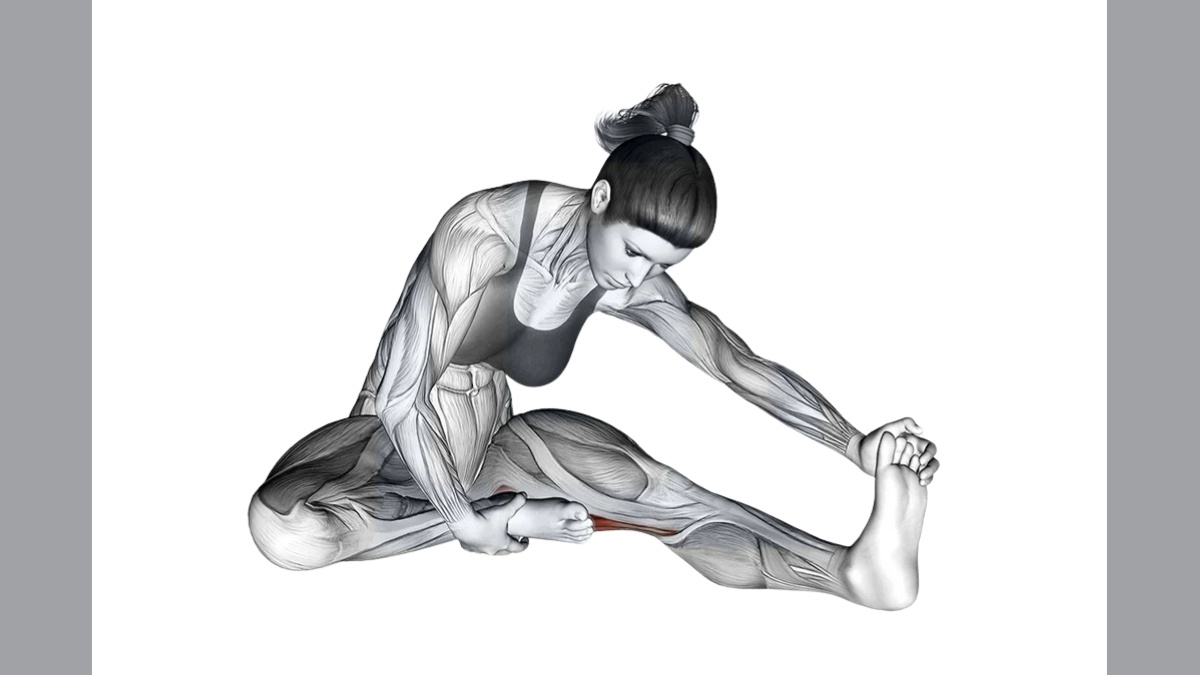
This targets the hamstrings, the muscles on the back of your thighs.
- How to: Sit on the floor with your right leg extended straight in front of you. Bend your left knee and place the sole of your left foot against your right inner thigh. Gently hinge forward at your hips, reaching toward your right foot until you feel a stretch in your hamstring. Keep your back straight. Hold, then switch sides.
3. Figure-Four Stretch (30 seconds per side)
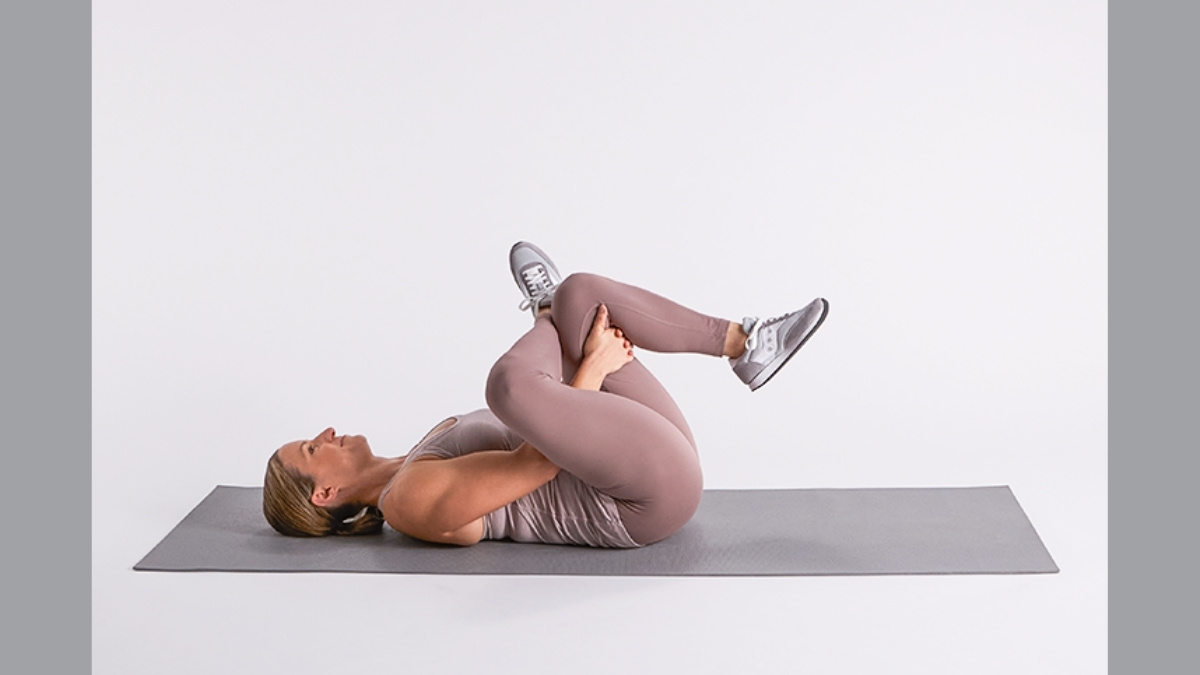
This stretch is excellent for targeting the glutes and the piriformis muscle, which can help alleviate hip tightness.
- How to: Lie on your back with your knees bent and feet flat on the floor. Cross your right ankle over your left thigh, just above the knee. Reach through your legs and grasp the back of your left thigh with both hands. Gently pull your left leg toward your chest until you feel a stretch in your right glute. Hold, then repeat on the other side.
4. Chest Stretch in Doorway (30 seconds)
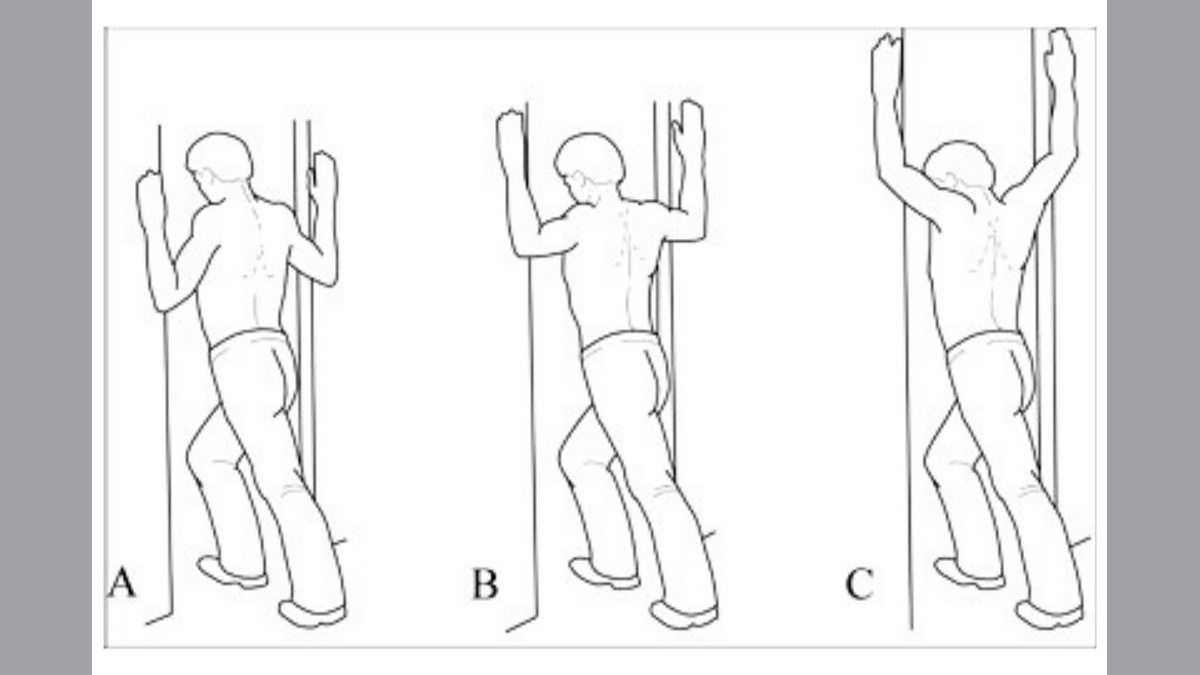
This stretch opens up the chest and shoulders, helping to counteract the forward-hunch posture common in daily life and from exercises like push-ups.
- How to: Stand in a doorway and place your forearms on the frame, with your elbows bent at a 90-degree angle and slightly below shoulder height. Step forward with one foot until you feel a gentle stretch across your chest and the front of your shoulders. Hold for 30 seconds.44
Section 5: From a Single Workout to a Lifelong Habit
Consistency Over Intensity: The Real Secret to Success
The ultimate goal is not to complete one perfect, grueling workout, but to build a consistent, sustainable habit. True transformation is the result of small, repeated efforts over time. Three consistent 15-minute workouts per week will yield far greater long-term results than one sporadic 60-minute session. The power is in the routine.
To integrate this workout into a busy life, consider these actionable strategies:
- Schedule It: At the beginning of each week, identify and block out three 15-minute slots in your calendar. Treat these as non-negotiable appointments with your health. This simple act of scheduling dramatically increases the likelihood of adherence.
- Piggyback on Existing Habits: Link your workout to an established part of your daily routine. For example, commit to doing it immediately after your morning coffee, right before your shower, or as soon as you log off from work. This practice, known as habit stacking, uses the momentum of an existing habit to launch a new one.
- Prepare in Advance: Eliminate decision fatigue and reduce friction by laying out your workout clothes and clearing a space the night before. When the time comes, you can begin without hesitation.
The Art of Progression: How to Keep Getting Stronger
To continue seeing results, the body must be continually challenged through a principle known as progressive overload. As you get stronger, the workout must evolve to remain effective. Here is a simple pathway for progression:
- Phase 1 (Weeks 1-4): Master the Form. Your primary focus should be on learning and mastering the correct form for the standard or beginner variations of each exercise. Concentrate on completing all three circuits with high-quality movements, even if it means moving more slowly.
- Phase 2 (Weeks 5-8): Increase the Intensity. Once your form is solid, begin to increase the intensity. Aim to complete more repetitions within each 45-second work interval. Experiment with introducing a “Level Up” variation for one or two exercises where you feel most confident.
- Phase 3 (Weeks 9+): Embrace the Challenge. Continue to incorporate more “Level Up” variations into your circuits. On days when you have slightly more time and energy, consider adding a fourth circuit, extending the workout to 20 minutes. This structured progression ensures you are always adapting and improving.
Conclusion: Reclaim Your Time, Transform Your Health

The evidence is clear: time is not the ultimate barrier to fitness; an outdated mindset is. A 15-minute, scientifically designed workout, performed consistently, is an incredibly potent tool for transforming physical and mental health.
By leveraging the principles of high-intensity interval training and compound bodyweight movements, this routine delivers a comprehensive, full-body stimulus that drives fat loss, improves cardiovascular health, and builds functional strength.
The revolution in your fitness begins not tomorrow, but with the next 15 minutes you choose to claim as your own. Start today.