The Neck & Shoulder Yoga Stretches That Melt Away Daily Tension
That familiar tightness creeping up your neck after hours at your desk isn’t just annoying—it’s your body’s urgent signal that something needs to change.
Americans spend an average of 7 hours every day staring at screens. Your neck wasn’t built for this. When you look down at your phone or laptop at a 45-degree angle, your neck muscles work as if they’re lifting a 50-pound weight. That’s the weight of a 7-year-old child sitting on your shoulders all day.
Add workplace stress and poor posture to the mix. Now you’ve got chronic shoulder tension, headaches that won’t quit, and a neck that barely turns. Millions of people wake up every day feeling like their neck is made of concrete. This is tech neck, and it’s getting worse.
But here’s the good news. You don’t need expensive treatments or hours of therapy. Simple neck and shoulder yoga stretches can release that tension in minutes. These aren’t random exercises someone made up. They’re evidence-based stretches proven to work for yoga for neck pain relief.
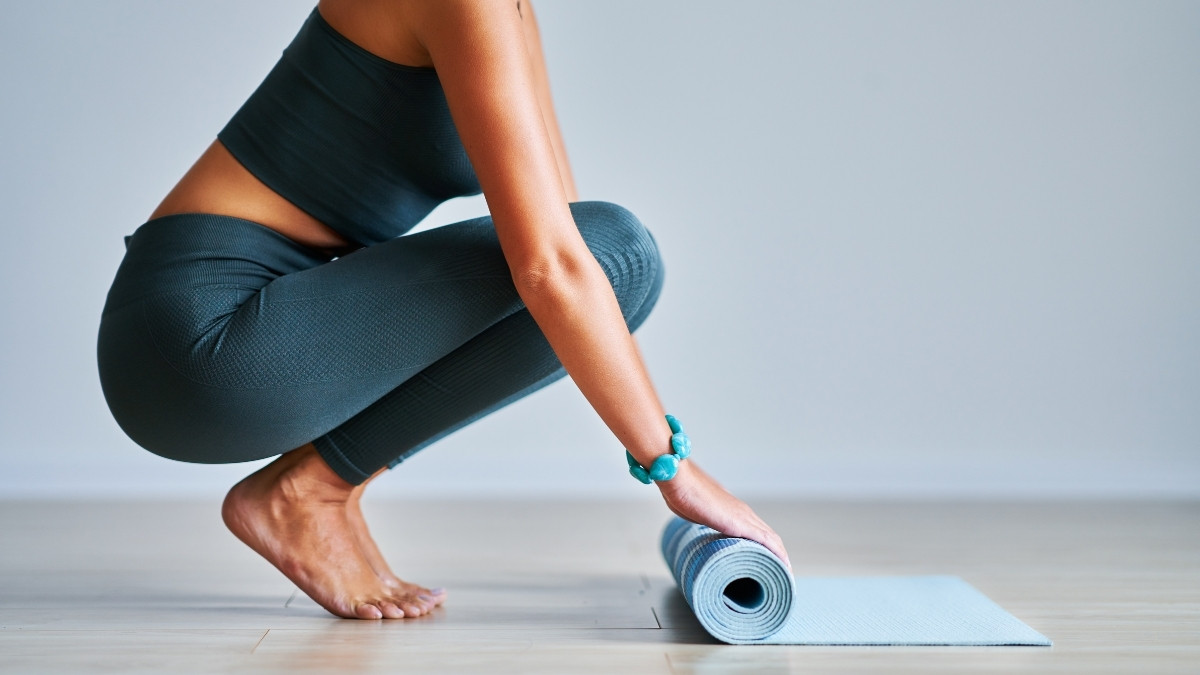
Each stretch takes under 2 minutes. You can do them at your desk, in your bedroom, or even in a hotel room. No yoga mat. No special equipment. Just you and a few minutes to finally feel better.
Let me show you exactly how to fix this.
Understanding Tech Neck and Shoulder Tension
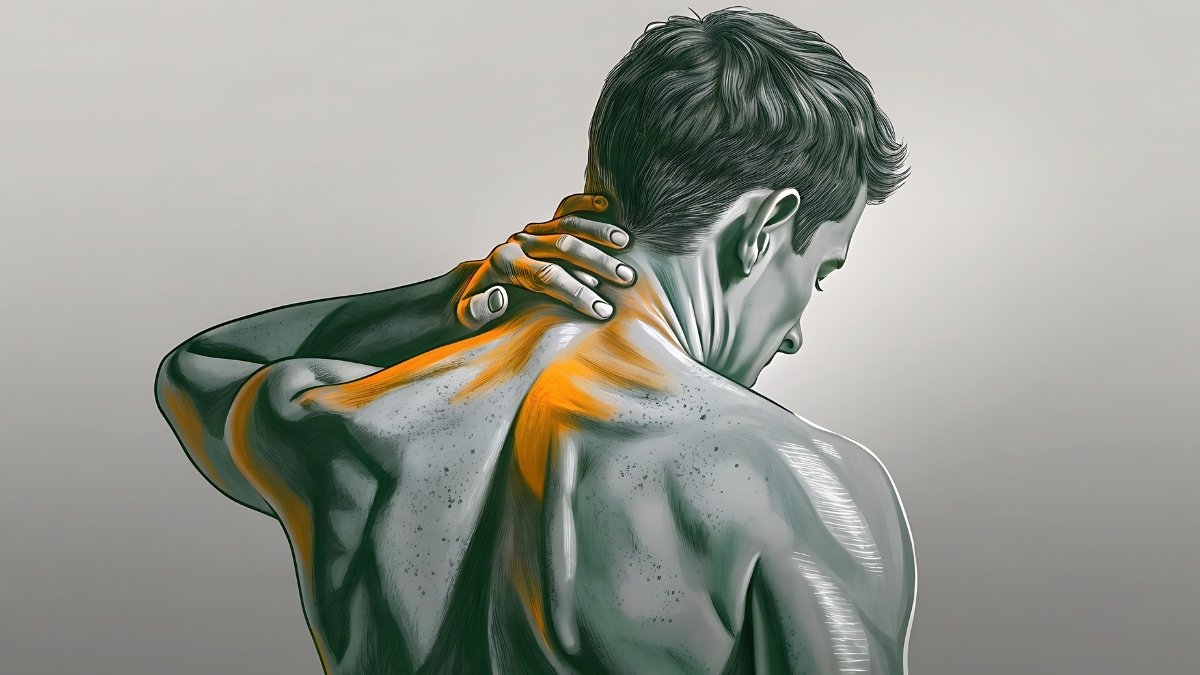
Your neck hurts. Your shoulders feel like rocks. And that pain gets worse every single day you sit at your desk.
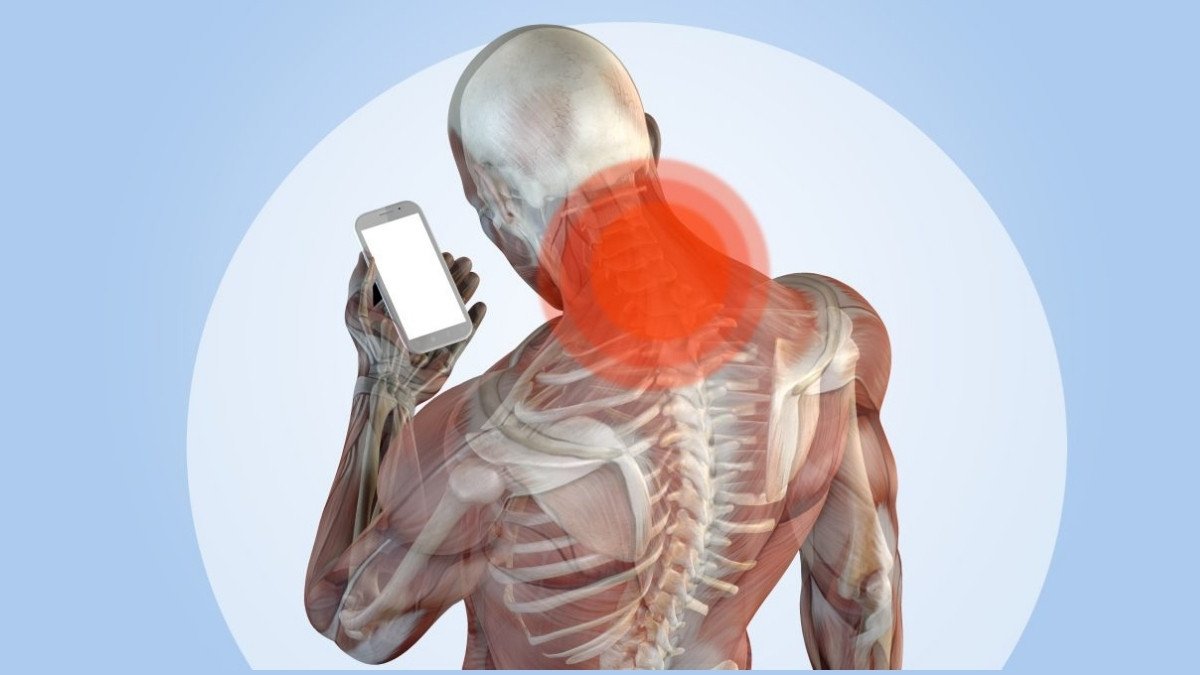
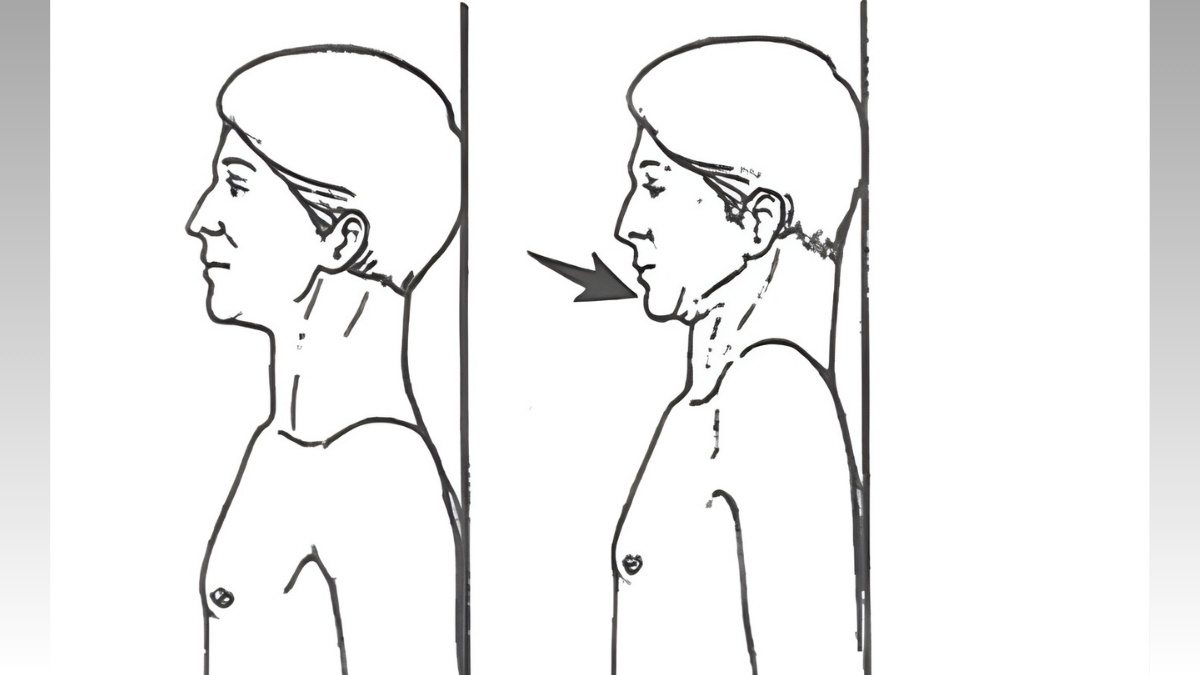
There’s a name for what you’re dealing with. Tech neck syndrome happens when you spend hours looking down at screens. Your head tilts forward. Your spine strains. And your neck muscles work overtime trying to hold up your head in that bent position.
Here’s the scary part. Each degree your head tilts forward adds massive strain to your neck. At a 45-degree angle—like when you’re scrolling on your phone—your neck feels like it’s holding up 50 pounds instead of the normal 10 to 12 pounds your head actually weighs.
And you’re not alone in this struggle. About 70% of office workers deal with neck and shoulder pain. Americans check their phones 58 times every day and spend over 4 hours staring at screens. That’s a lot of forward head posture damaging your neck.
But here’s what makes desk neck pain even worse. Stress causes your shoulders to creep up toward your ears. You might not even notice you’re doing it. This creates that hunched posture that traps tension in your upper body.
Sitting for hours also exhausts your muscles. They get tired from holding the same position. Research shows that workplace stress keeps your neck and shoulder muscles in a constant low-level squeeze. They never fully relax.
The really alarming stat? Nearly 90% of computer workers show abnormal shoulder blade movement. Your body is literally changing how it moves because of your daily habits.
But you can fix this. And it starts with the right stretches.
Why Yoga Works for Neck and Shoulder Relief
You’ve probably tried pain pills, heating pads, and expensive massages. But the tension always comes back. That’s where yoga for neck pain relief changes everything.
Here’s what the science actually says. A 2019 review looked at multiple neck pain studies and found something clear. Yoga works as a real treatment option for managing chronic neck pain.
The numbers prove it works. One study tracked people with neck pain for 10 weeks. Their pain at rest dropped from 44.3 down to 13.0 on a 100-point scale. That’s a huge drop in just two and a half months.
A 2023 study focused specifically on office workers like you. After just 4 weeks of regular stretching and yoga, participants felt real relief in their neck and shoulder pain. Four weeks. Not months or years.
But why does yoga beat other options? It’s not just about stretching tight muscles. Yoga combines three powerful things at once. You stretch the muscles. You breathe deeply to calm your stress response. And you learn to notice where you hold tension in your body.

These evidence-based stretches work on both the surface muscles you can feel and the deeper layers you can’t reach with your hands. Your upper trapezius releases. Your levator scapulae relaxes. Even the small muscles around your spine get relief.
And here’s the best part. You don’t need a gym membership or fancy equipment. You can do these stretches at your desk, in your bedroom, or even in a hotel room. All you need is your body and a few minutes.
10 Neck and Shoulder Yoga Stretches That Work
These stretches take less than 2 minutes each. You can do them right at your desk. And they actually work to melt that tension away.
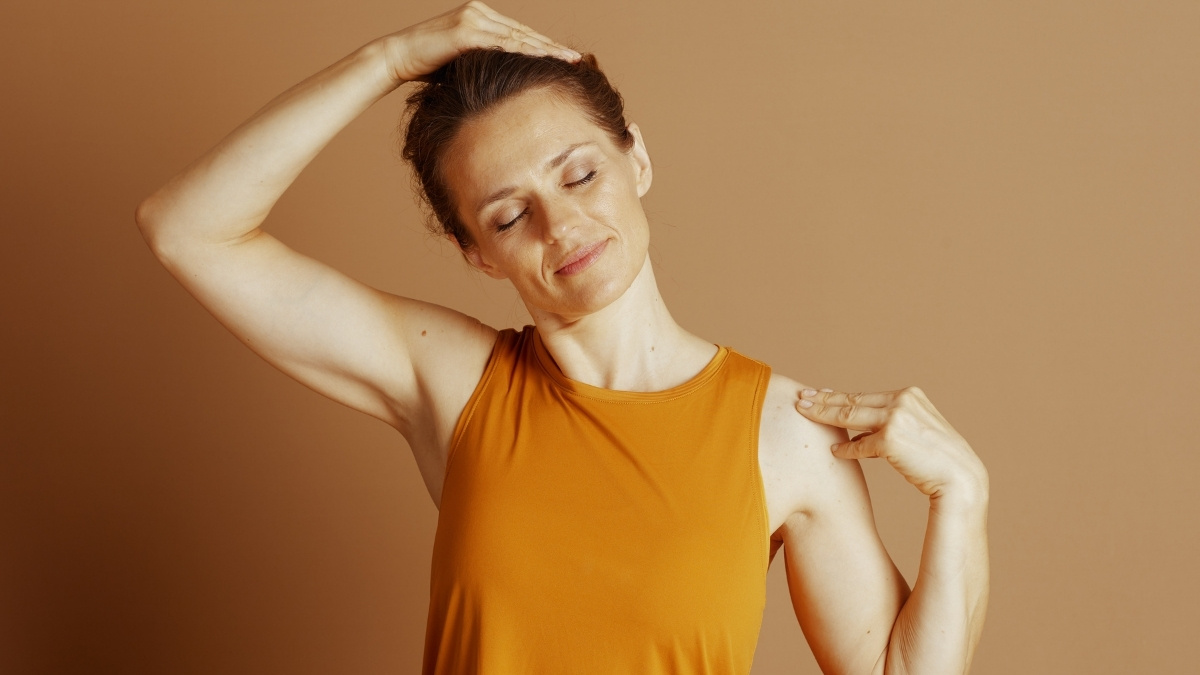
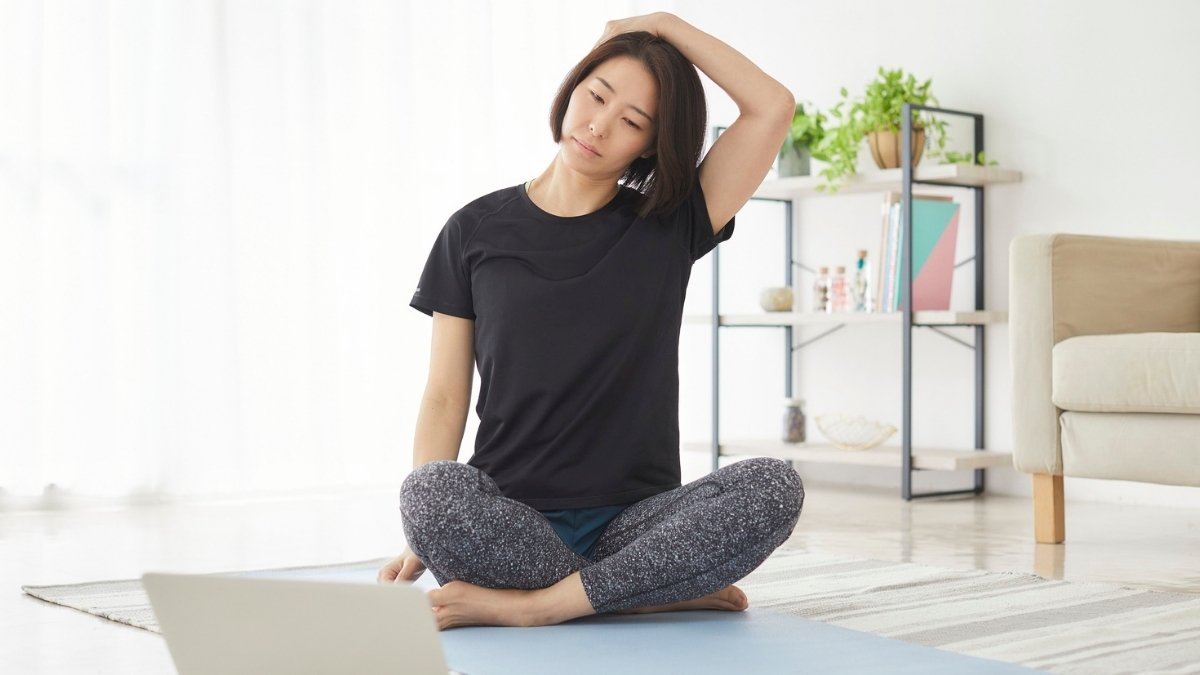
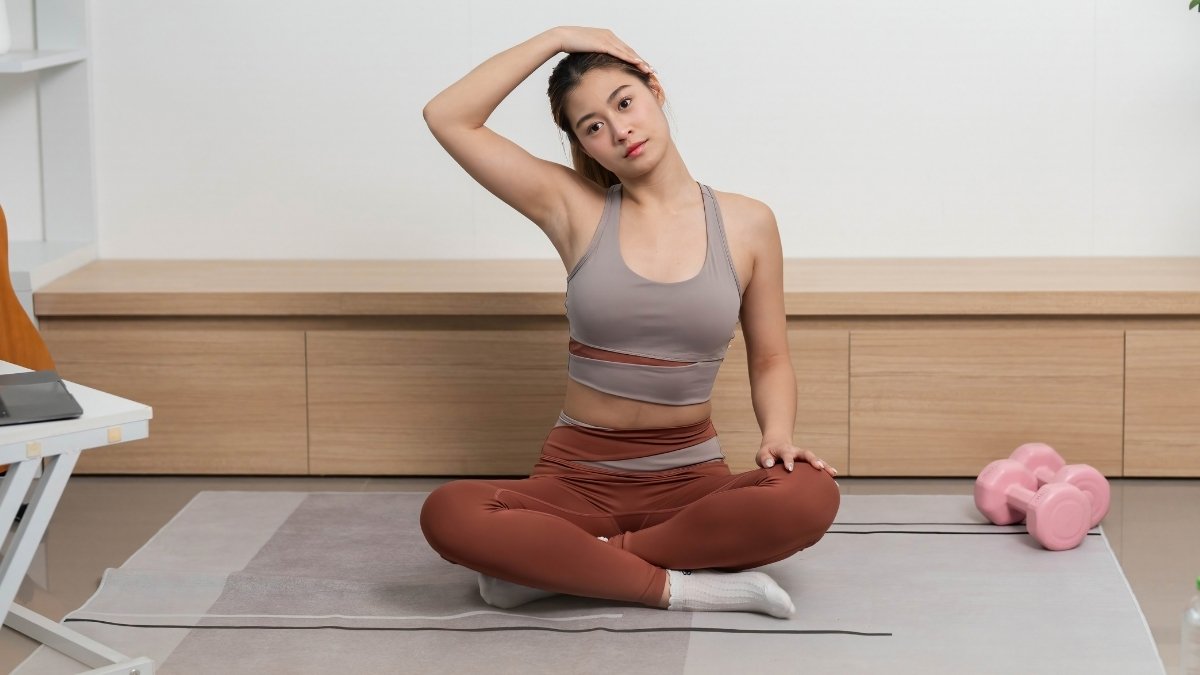
1. Seated Neck Tilt Stretch
This side neck stretch targets your scalene and upper trapezius muscles. These are the muscles running along the sides of your neck that get tight from looking at screens all day.
How to do it:
- Sit up straight in your chair with both feet flat on the floor.
- Drop your right ear down toward your right shoulder. Don’t force it. Just let gravity do the work.
- Place your right hand gently on the left side of your head for a deeper stretch. Your left arm hangs loose at your side.
- Hold for 30 seconds. Then slowly bring your head back to center.
- Repeat on the left side.
Hold duration: 30 seconds each side
Pro tip: If you want a stronger stretch, reach your hanging arm down toward the floor. This increases the pull on those tight neck muscles.
Common mistake: Don’t rotate your head forward or backward. Keep your nose pointed straight ahead. You’re tilting your ear to your shoulder, not your chin to your chest.
2. Cat-Cow Pose (Marjaryasana-Bitilasana)
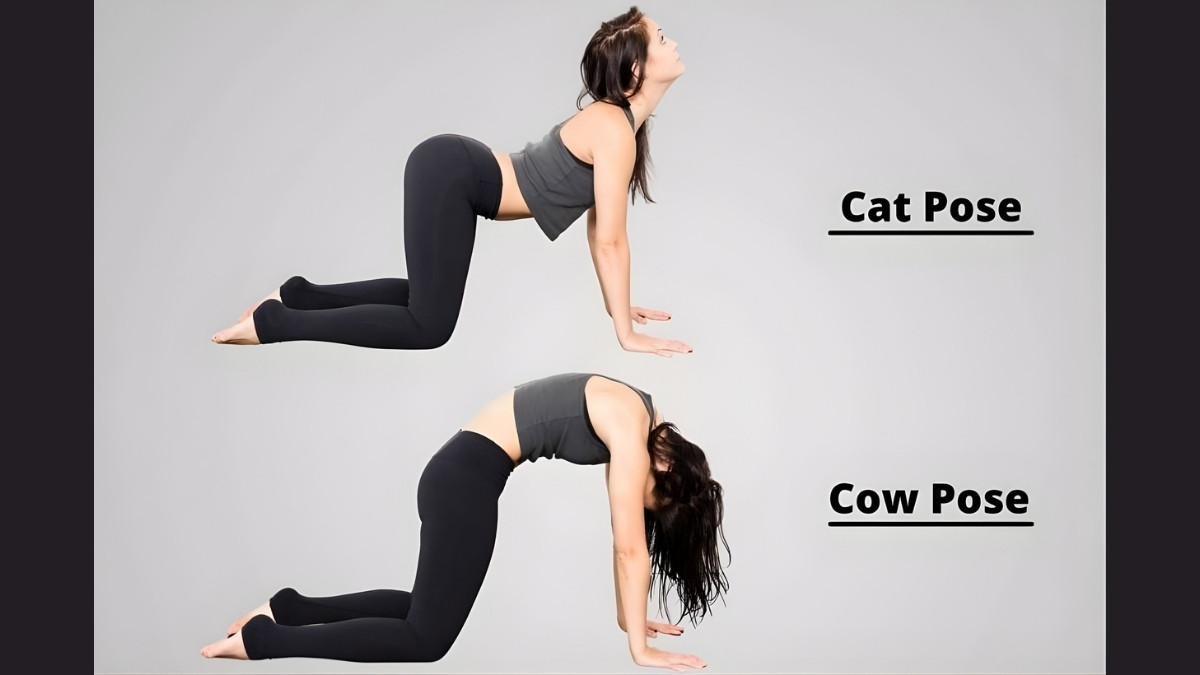
Cat-Cow gives you spinal mobility and neck flexibility through gentle movement. Instead of holding one position, you flow between two poses to release tension through your entire spine.
How to do it:
- Get on your hands and knees. Place your wrists under your shoulders and your knees under your hips.
- Breathe in as you drop your belly down and lift your chest and chin up. This is Cow Pose. Your back arches like a hammock.
- Breathe out as you round your spine up toward the ceiling and tuck your chin to your chest. This is Cat Pose. Pull your belly button toward your spine.
- Keep flowing between these two positions. Move slowly with your breath.
Hold duration: 5-8 breath cycles (about 45-60 seconds total)
Pro tip: Focus on moving your neck with your spine. When you arch into Cow, your head tilts back naturally. When you round into Cat, your chin tucks.
Common mistake: Going too fast. This isn’t a race. Match each movement to one full breath. Slow and steady releases more tension than quick movements.
3. Thread the Needle
This shoulder opener releases tension in your upper back and shoulders while giving your neck a gentle twist. It feels amazing after hours of hunching over a keyboard.
How to do it:
- Start on your hands and knees in the same position as Cat-Cow.
- Lift your right arm up toward the ceiling. Follow it with your eyes.
- Thread that right arm under your left arm, sliding it across the floor. Your right shoulder and ear come down to rest on the ground.
- Keep your left hand planted or walk it forward for a deeper stretch. Your hips stay stacked over your knees.
- Hold, then slowly unwind and switch sides.
Hold duration: 30-60 seconds each side
Pro tip: If your shoulder doesn’t reach the floor comfortably, place a folded towel or pillow under it. Don’t force your body into pain.
Common mistake: Collapsing your hips to one side. Keep your hips level and centered over your knees. This protects your lower back and deepens the upper body stretch.
4. Child’s Pose with Reverse Prayer Hands
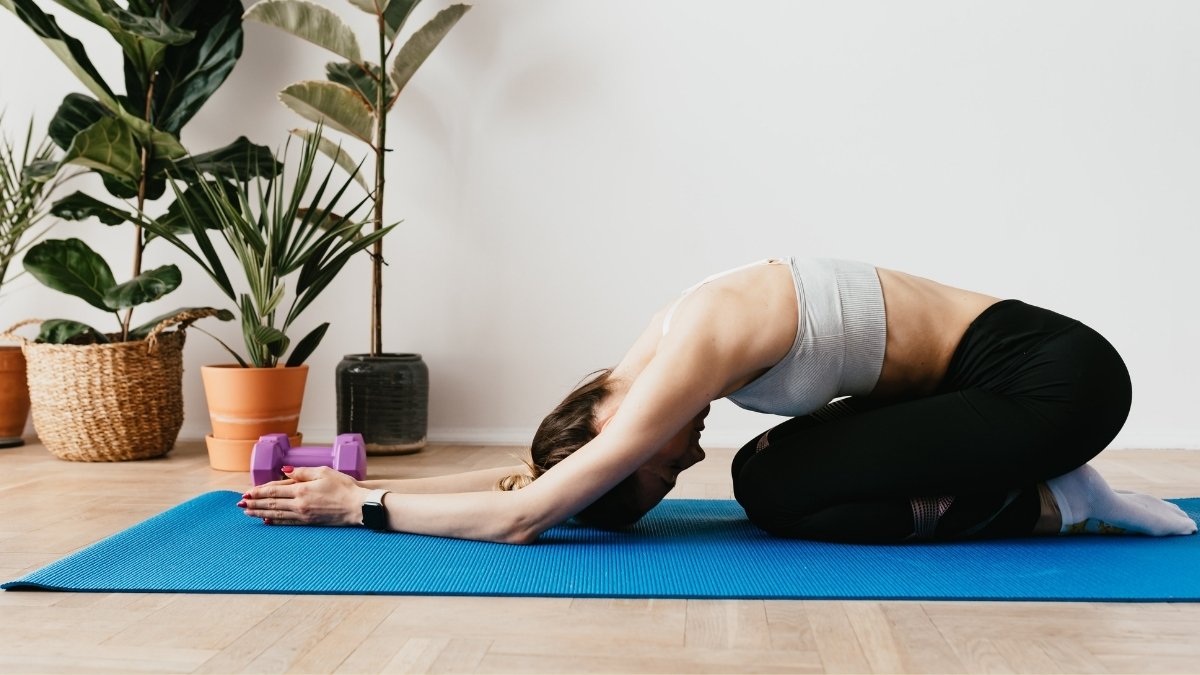
This restorative yoga stretch focuses on releasing upper body tension. The reverse prayer hand position adds a shoulder stretch that regular Child’s Pose doesn’t give you.
How to do it:
- Kneel on the floor and sit back on your heels.
- Bring your hands behind your back and press your palms together in prayer position. Your fingers point up toward your head.
- If you can’t press your palms together, just clasp your elbows behind your back instead.
- Fold forward and rest your forehead on the floor or on a pillow.
- Breathe deeply and let your shoulders release.
Hold duration: 60+ seconds (stay as long as it feels good)
Pro tip: If your forehead doesn’t reach the floor, stack your fists or use a yoga block to rest your head on. You should feel supported, not strained.
Common mistake: Forcing your palms together behind your back. If your shoulders are really tight, the reverse prayer might not happen yet. That’s fine. Use the elbow clasp variation instead.
5. Eagle Arms (Garudasana Arms)
This shoulder blade stretch increases flexibility in your shoulders and upper back. It targets that spot between your shoulder blades where tension loves to hide.
How to do it:
- Sit or stand with your spine straight.
- Stretch your arms straight out in front of you at shoulder height.
- Cross your right arm over your left arm at the elbows.
- Bend your elbows and try to bring your palms together. If they don’t touch, press the backs of your hands together.
- Lift your elbows slightly while keeping your shoulders down.
Hold duration: 20-30 seconds each side
Pro tip: Once you’re in position, try gently moving your hands away from your face. This small movement increases the stretch between your shoulder blades.
Common mistake: Hunching your shoulders up by your ears. Keep your shoulders relaxed and down. You want length in your neck, not compression.
6. Rag Doll (Standing Forward Fold)
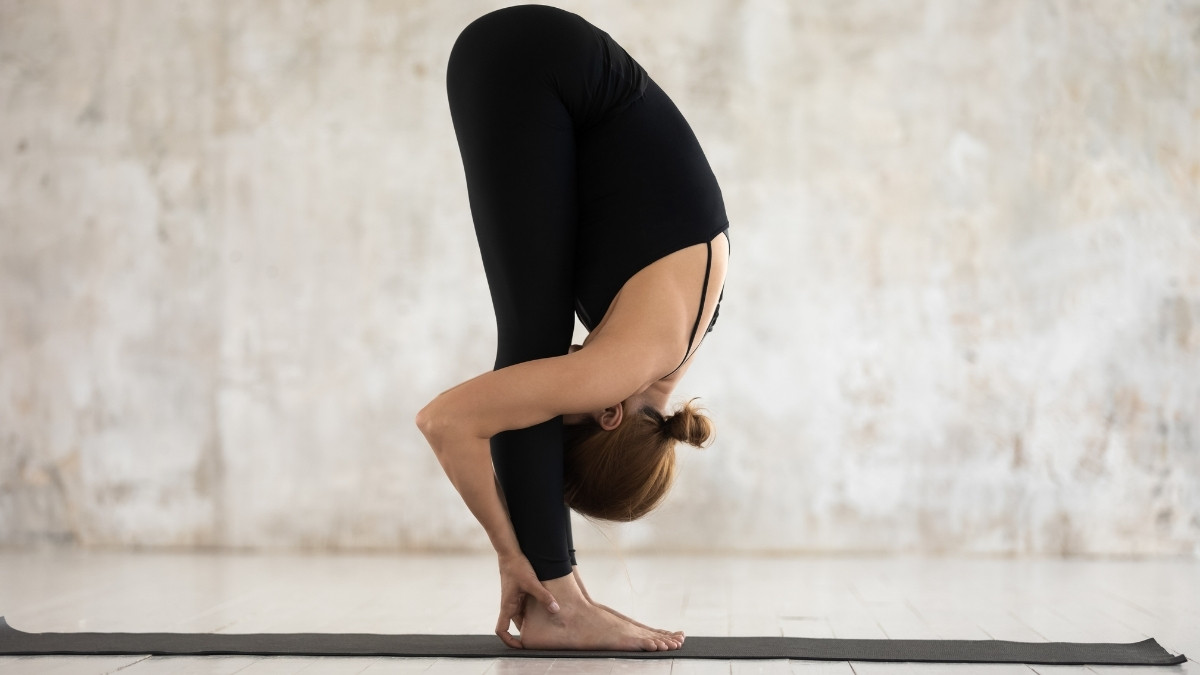
This pose allows neck decompression by letting your head hang completely loose. Gravity does the work of releasing tension while your spine gets a gentle stretch.
How to do it:
- Stand with your feet hip-width apart.
- Bend forward from your hips and let your upper body hang down. Your knees can be slightly bent.
- Let your head and neck hang completely loose. No effort. Just release.
- Grab opposite elbows with your hands and let everything dangle.
- Gently shake your head “yes” and “no” to release any remaining tension.
Hold duration: 60+ seconds
Pro tip: Bend your knees as much as you need to. This isn’t about touching your toes. It’s about releasing your neck and spine. Straight legs can actually prevent the release you’re looking for.
Common mistake: Holding tension in your neck. Your head should feel heavy, like a bowling ball hanging from your spine. If you’re holding it up at all, you’re working too hard.
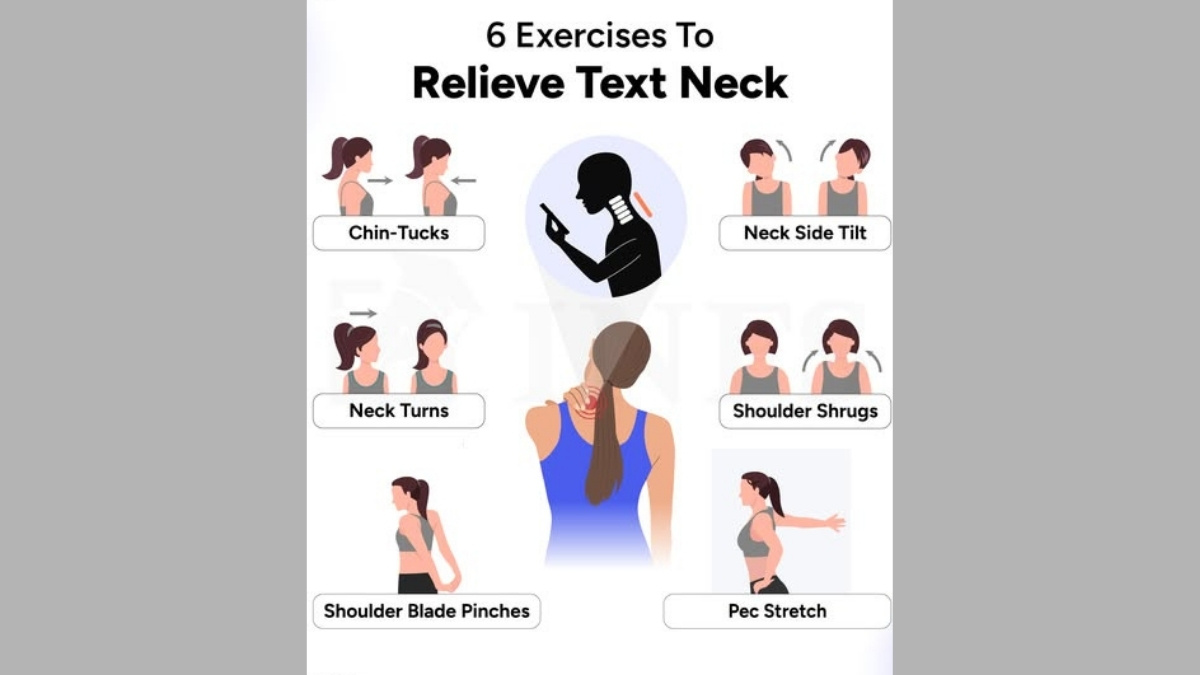
7. Chin Tucks
Chin tucks fix forward head posture by strengthening your deep neck flexors. These small muscles get weak from constantly looking down at screens. Strengthening them brings your head back where it belongs.
How to do it:
- Sit or stand tall with your shoulders back.
- Look straight ahead. Keep your eyes level.
- Pull your chin straight back, like you’re making a double chin. Your head stays level—it doesn’t tilt down.
- Hold for 5 seconds, then relax.
- Repeat 10-15 times.
Hold duration: 10-15 repetitions (5 seconds each)
Pro tip: Place two fingers on your chin and use them to push your chin straight back. This helps you feel the correct movement until your muscles learn it.
Common mistake: Tilting your head down or up. Your eyes should stay at the same level the entire time. You’re moving your head backward, not nodding.
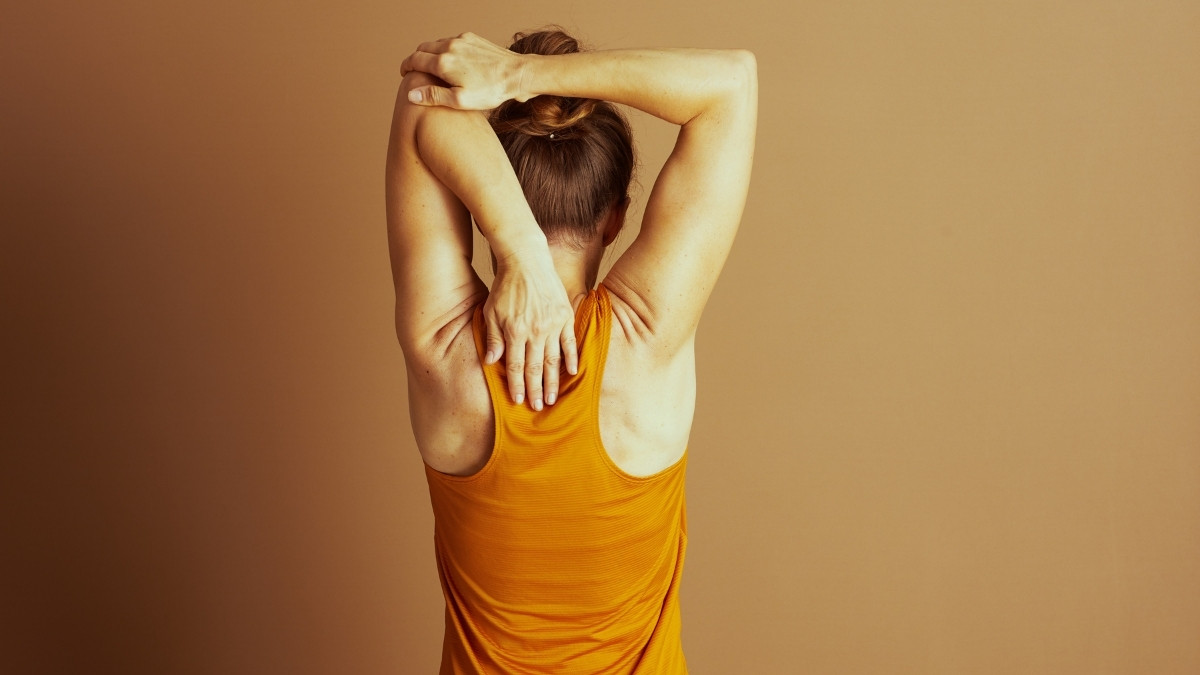
8. Shoulder Rolls
Simple shoulder rolls bring shoulder tension relief by releasing your trapezius muscles and improving blood flow. Sometimes the simplest stretches work the best.
How to do it:
- Sit or stand with your arms relaxed at your sides.
- Lift your shoulders up toward your ears.
- Roll them back, squeezing your shoulder blades together.
- Drop your shoulders down.
- Complete 10 rolls backward, then reverse direction for 10 rolls forward.
Hold duration: 10 rolls backward, 10 rolls forward (about 30 seconds total)
Pro tip: Make the circles as big as possible. Really exaggerate the movement to wake up all the muscles in your shoulders and upper back.
Common mistake: Rushing through them. Slow down. Each roll should take 2-3 seconds. You’re trying to release tension, not set a speed record.
9. Seated Spinal Twist
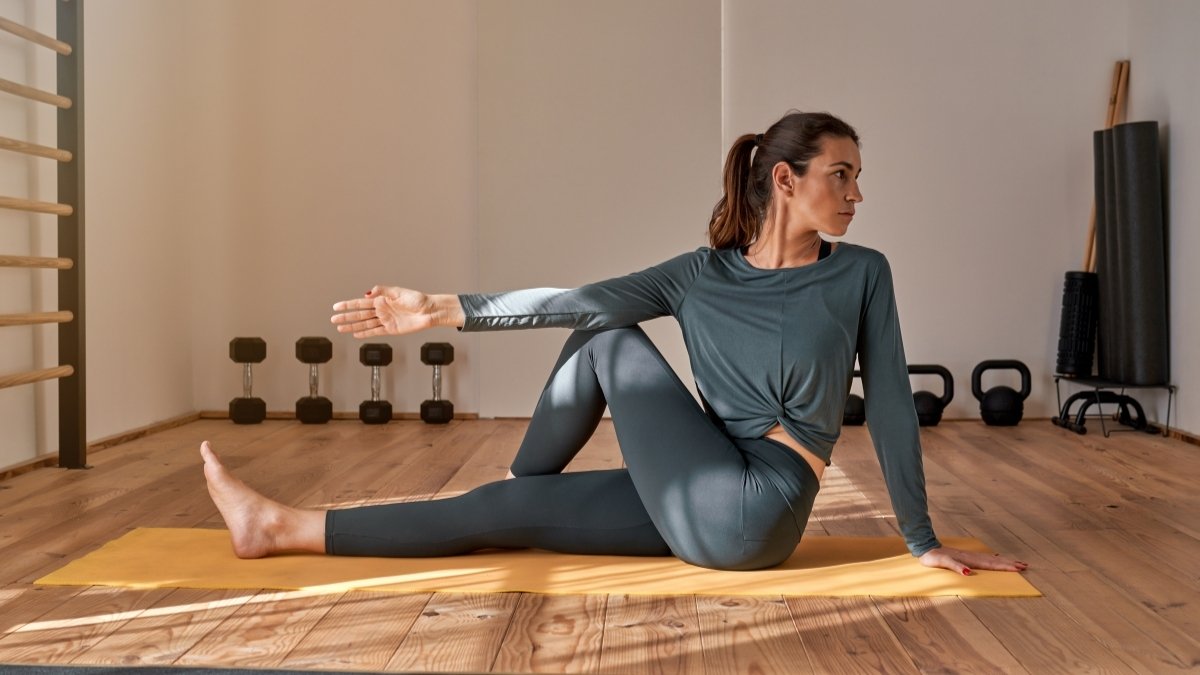
This upper back release targets the muscles between your spine and shoulder blades. Twisting wrings out tension like squeezing water from a towel.
How to do it:
- Sit tall in your chair with both feet flat on the floor.
- Place your left hand on your right knee.
- Place your right hand on the back of your chair or the armrest behind you.
- Twist your torso to the right. Your head follows your body. Look over your right shoulder.
- Breathe deeply for 30 seconds, then switch sides.
Hold duration: 30 seconds each side
Pro tip: With each inhale, sit up taller. With each exhale, twist a tiny bit deeper. Let your breath deepen the stretch naturally.
Common mistake: Forcing the twist. This should feel like a gentle wring, not a violent crank. If you feel sharp pain, back off immediately.
10. Supported Fish Pose
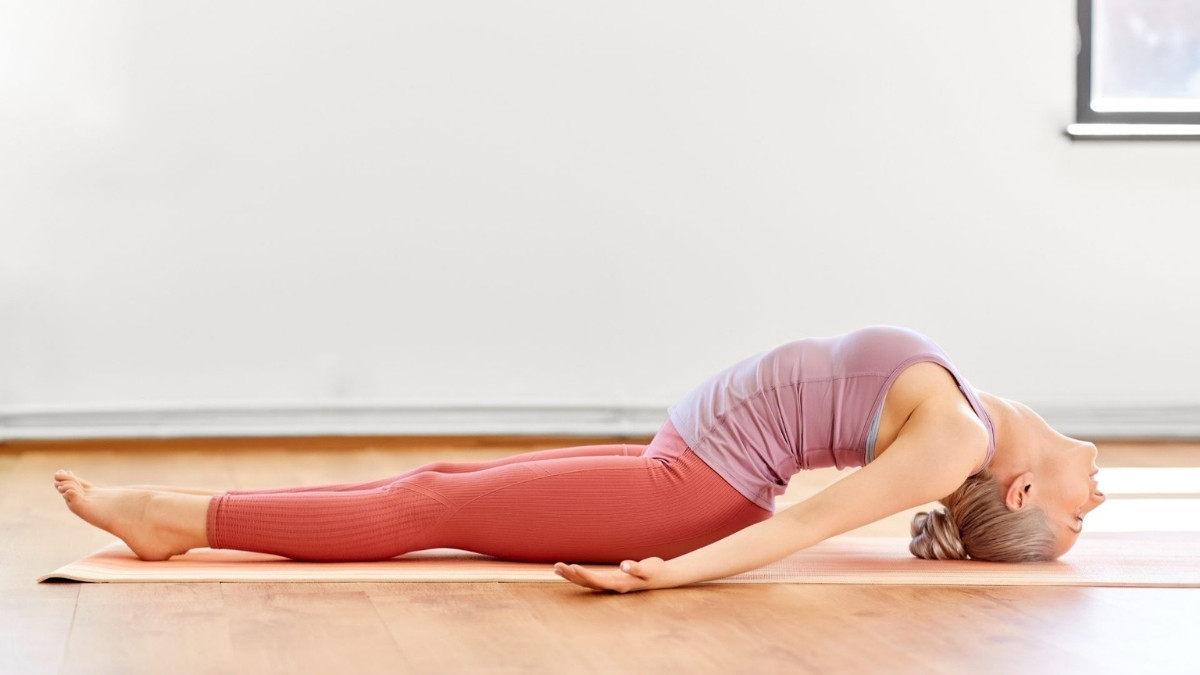
This chest opener and shoulder stretch reverses the hunched position you sit in all day. It opens your front body while supporting your back and neck.
How to do it:
- Roll up a towel or yoga mat and place it lengthwise on the floor.
- Lie back so the roll supports your spine from your shoulder blades to your head.
- Let your arms rest out to the sides with your palms facing up.
- Your chest opens and your shoulders roll back naturally.
- Close your eyes and breathe deeply.
Hold duration: 2-3 minutes
Pro tip: If your head tilts too far back and feels uncomfortable, place a folded towel under your head for support. Your neck should feel good, not strained.
Common mistake: Using a roll that’s too thick. Start with something small. You can always make it bigger next time. Too much arch too soon can hurt your back.
Creating Your Daily 10-Minute Routine

You know the stretches now. But knowing them and actually doing them are two different things. The real question is: when do you fit these into your crazy schedule?
Research shows that spending just 15-20 minutes on a daily yoga routine can seriously reduce your neck and shoulder tension. But here’s the truth. Most people won’t stick with a 20-minute routine. So let’s start with 10 minutes. That’s doable.
The best times to stretch depend on what you need. Morning stretches prevent tension before it starts. A lunch break routine resets your body halfway through the workday. Evening stretches release everything you’ve built up all day.
Your 10-Minute Morning Routine
Do these five prevention exercises before you even check your email:
- Cat-Cow Pose – 1 minute (wakes up your spine)
- Chin Tucks – 1 minute (strengthens your neck)
- Shoulder Rolls – 1 minute (loosens your shoulders)
- Thread the Needle – 3 minutes (deep shoulder release, both sides)
- Rag Doll – 4 minutes (total body reset)
Total time: 10 minutes. Done before your coffee gets cold.
Your 5-Minute Desk Break Routine

These desk stretches work right at your computer. No yoga mat needed:
- Seated Neck Tilt – 2 minutes (both sides, releases side tension)
- Eagle Arms – 1 minute (targets between shoulder blades)
- Seated Spinal Twist – 2 minutes (wrings out upper back tightness)
Set a timer to do this every 2-3 hours. Experts recommend taking movement breaks every 30-60 minutes during work. Even 30 seconds of shoulder rolls counts.
How to Actually Stick With It
Link your stretches to something you already do every day. Stretch while your coffee brews. Do neck tilts during your first video call of the day. Put a sticky note on your computer that says “2pm stretch break.”
Start with just three stretches for one week. Don’t try to be perfect. Miss a day? Start again tomorrow. Building this habit matters more than doing it perfectly.
Set phone reminders every two hours. When they go off, stand up and do at least one stretch. Your future neck will thank you.
How to Stop Tech Neck Before It Starts
Stretching fixes the damage. But tech neck prevention stops the damage from happening in the first place. Your workspace setup matters just as much as these stretches.
Fix Your Screen Position Now
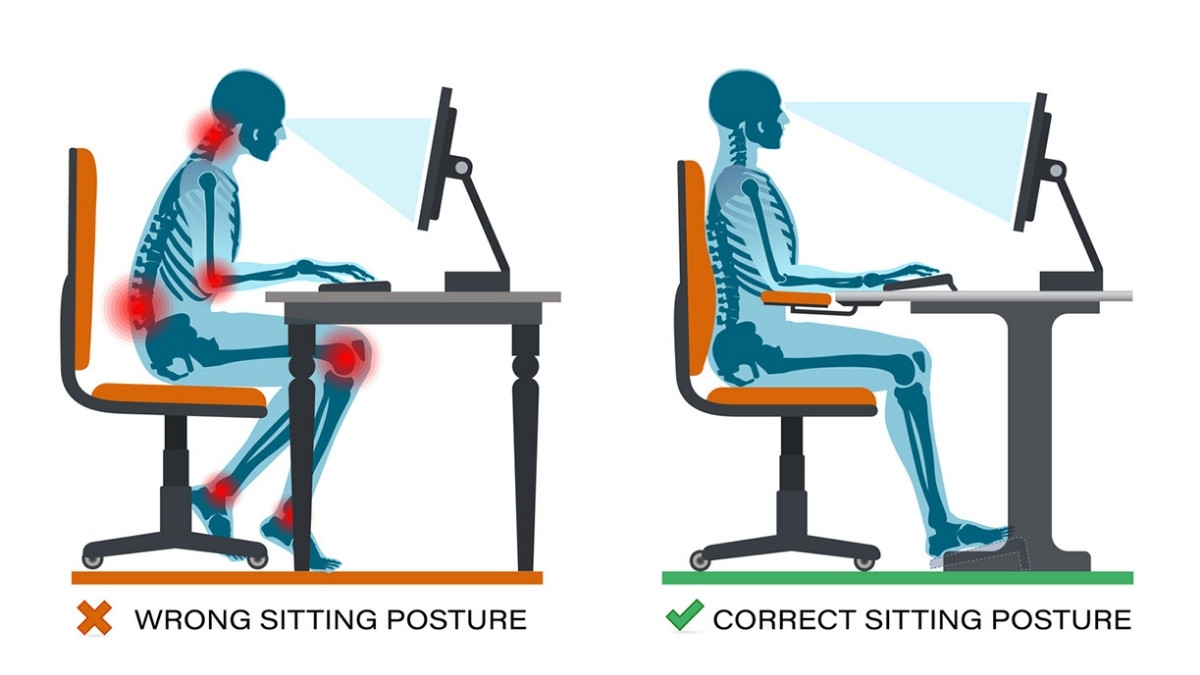
Your screen should sit at eye level. When you look straight ahead, your eyes should hit the top third of your screen. This keeps your neck in a neutral position instead of constantly bent forward.
Get a laptop stand. Seriously. Raising your laptop 5-6 inches makes a massive difference. You can buy one for $20, or just stack some books under your laptop and use an external keyboard.
Your chair should recline 25-30 degrees. This isn’t about being lazy. A slight recline reduces the load on your spine and neck muscles. If your chair doesn’t recline, put a small pillow behind your lower back to tilt your pelvis slightly back.
Change How You Use Your Phone

Hold your phone at eye level instead of looking down at your lap. Yes, you’ll look a little weird on the subway. But you won’t need physical therapy in six months.
Every degree your head tilts forward adds strain. Looking down at your phone for hours every day creates real damage over time. Severe tech neck can lead to permanent spinal changes and disc degeneration.
The Enhanced 20-20-20 Rule
You’ve probably heard of the 20-20-20 rule for eye strain. Look at something 20 feet away for 20 seconds every 20 minutes. But let’s make it better for your neck.
Every 20 minutes, take a 20-second break and do one movement. Roll your shoulders. Tilt your head side to side. Stand up and reach your arms overhead. The movement matters more than just looking away.
Set three alarms on your phone: 10am, 2pm, and 4pm. When they go off, do a full posture correction. Sit up tall. Roll your shoulders back. Tuck your chin. Reset your position.
Strengthen What Stretching Can’t Fix
Stretching releases tight muscles. But you also need to strengthen weak ones. Do 10 chin tucks every morning. Squeeze your shoulder blades together 15 times while you’re on calls.
These small strengthening moves build the muscles that hold your head in the right position. Strong neck flexors mean your head stays where it belongs instead of drifting forward.
The Hydration Connection

Drink water. Your spinal discs need water to stay cushioned and healthy. When you’re dehydrated, those discs compress more easily. That creates more pain and stiffness in your neck.
Keep a water bottle at your desk. Every time you finish a meeting, drink some water. Simple habit. Big impact on your ergonomic workspace and overall comfort.
Your Next Step to a Pain-Free Neck

Tech neck hits up to 95% of computer workers. You’re not alone in this pain. But now you have evidence-based stretches that actually work.
Start small. Do three stretches today: Neck Tilt, Cat-Cow, and Rag Doll. That’s it. Just three. Set a timer on your phone to go off every hour. When it buzzes, stand up and move.
Your daily 10-minute practice matters more than doing everything perfectly once. Fix your desk setup. Hold your phone higher. Take breaks.
These neck and shoulder yoga stretches aren’t just temporary relief—they’re your path to lasting freedom from daily tension. Your body will feel different by tomorrow morning.