Breaking: Scientists Stunned—This 2-Day-Per-Week Routine Builds More Muscle After 65 Than 5-Day Splits

For decades, you’ve been told that building muscle requires spending hours in the gym five days a week. But what if everything you’ve been told about strength training after 65 is backward?
You’re tired of complicated workout schedules that leave you too sore to function. You’ve tried following those intense programs designed for 30-year-olds, but the recovery time leaves you exhausted. Meanwhile, the fitness industry keeps pushing the same message: more is better.
Here’s what you’ll learn. Why twice-weekly training matches or exceeds results from 5-day programs for adults 65+. The science behind recovery time and muscle building after 65.
A complete, actionable 2-day workout program with specific exercises. How to avoid the most common mistakes that prevent progress. Real recovery strategies that actually work.
Here’s what the latest research reveals about resistance training frequency for older adults—and why it changes everything.

Builds More Muscle After 65
2 DAYS > 5 DAYSThe Science That Changes Everything: Why Less Is Actually More After 65

Your body changed. Training five days a week won’t work anymore.
After 65, muscles need 48 to 72 hours to recover fully. Tendons need up to 7 days. Research shows peak strength comes on day three, not day one.
Studies found 12 weekly sets per muscle group builds muscle in older adults. That’s just 6 sets per workout, twice weekly. Lifting twice weekly cuts death risk by 46%. People gained 10-11% muscle thickness in 12 weeks.
What builds muscle? Recovery, not more workouts. Your muscles grow when you rest.
The Hidden Cost of 5-Day Training Splits After 65
You train Monday. Tuesday you’re sore. Wednesday you push through anyway. By Friday, you’re exhausted. Sound familiar?
Here’s what happens when you train before your body recovers. Your muscles need 72 hours to rebuild. Your tendons need up to 7 days. Train at 48 hours and you’re building on damaged tissue. Each workout adds more damage before the last one heals.
This creates a cycle. You feel weaker each session. Weights that felt light now feel heavy. You blame age. But it’s incomplete recovery.

The numbers tell the story. Only 63% of adults over 60 exercise regularly. Five-day programs? Even fewer people stick with them. You miss Monday. Then you skip Wednesday to “catch up.” Your progress stops because consistency breaks down.
There’s more. Training too often raises cortisol. That’s your stress hormone. High cortisol breaks down muscle instead of building it. You feel tired all day, not just at the gym.
Meet Tom. He’s 68. Trained five days weekly for six months. Always sore. Skipped sessions. Saw zero muscle gain. Switched to twice weekly. Recovered fully between workouts. Added 15 pounds to his chest press in three months. Same effort. Better timing.
The Recovery Protocol: What to Do Between Workouts
You finished your workout. Now what? The next 72 hours determine if you build muscle or waste your effort.
Move, Don’t Sit
Walk 20 to 30 minutes daily. Your muscles need blood flow to repair. Sitting slows recovery. Light movement speeds it up. Try gentle yoga or swimming. These help without adding stress.
Eat Protein Within 2 Hours

Your body needs protein right after training. Aim for 0.2 grams per pound of bodyweight. Weigh 150 pounds? Eat 30 grams of protein post-workout. Three eggs plus Greek yogurt hits that target perfectly.
Research shows older adults need 40% more protein than younger people to build muscle. Your daily goal: 1.0 to 1.2 grams per kilogram of bodyweight. Spread it across meals. Breakfast: 25g. Lunch: 30g. Dinner: 35g. Snacks: 20g.
Best sources: eggs, Greek yogurt, chicken, fish, cottage cheese. These contain leucine, which triggers muscle growth.
Sleep 7 to 9 Hours

Your body releases growth hormone during deep sleep. Skip sleep and you skip gains.
Older adults also dehydrate faster. Drink water before, during, and after workouts.
Listen to Your Body
Sore for more than 3 days? Take an extra rest day. Foam roll tight spots. Do gentle stretches. Recovery isn’t weakness. It’s where muscle builds.
Common Mistakes That Kill Progress (And How to Avoid Them)
Five mistakes stop your progress. Here’s how to avoid them.

Mistake 1: Training Too Often
Sarah added a third workout day “just to be safe.” Her progress stopped. Why? She cut her 72-hour recovery window short. Muscles can’t grow when constantly damaged. Stick to twice weekly. No exceptions.
Mistake 2: Skipping Protein
John trained fasted and ate little protein daily. He lost muscle instead of gaining it. After 65, you need protein within 2 hours post-workout. Skip it and your workout was wasted.
Mistake 3: Starting Too Heavy
Mike grabbed 25-pound dumbbells on day one. He injured his shoulder in week two. Start light. Master form first. Add weight slowly. Ego lifting at 65 means injury, not gains.
Mistake 4: Inconsistent Training
Linda trained twice weekly for three weeks. Then skipped two weeks. Her strength reset to zero. Two sessions weekly is the minimum. Miss weeks and you start over every time.
Mistake 5: Comparing to Age 30
You’re not 30 anymore. That’s okay. You can still build muscle. Focus on getting stronger than last month, not stronger than your younger self. Celebrate lifting more this week than last week.
Your Complete 2-Day-Per-Week Strength Program

Here’s your exact workout plan. Print this. Follow it. Start Monday.
Program Setup
Pick two days with at least 72 hours between them. Monday and Thursday work. So do Tuesday and Friday. Each session takes 40 to 50 minutes. You’ll hit every major muscle group twice weekly.
What You Need
Light dumbbells (3 to 8 pounds). Resistance bands. A sturdy chair. That’s it. Start with the lightest weight. Form matters more than heavy lifting.
WORKOUT DAY 1 (Monday or Tuesday)
Warm-Up (5-7 Minutes)
March in place for 2 minutes. Do 10 arm circles forward and backward. Roll your shoulders 10 times. Gently twist side to side 10 times. You’re ready.
Exercise 1: Chair Squats
Stand in front of a chair. Feet shoulder-width apart. Lower yourself like you’re sitting down. Touch the chair lightly. Stand back up. That’s one rep. Do 2 sets of 8-12 reps. Rest 60 seconds between sets.
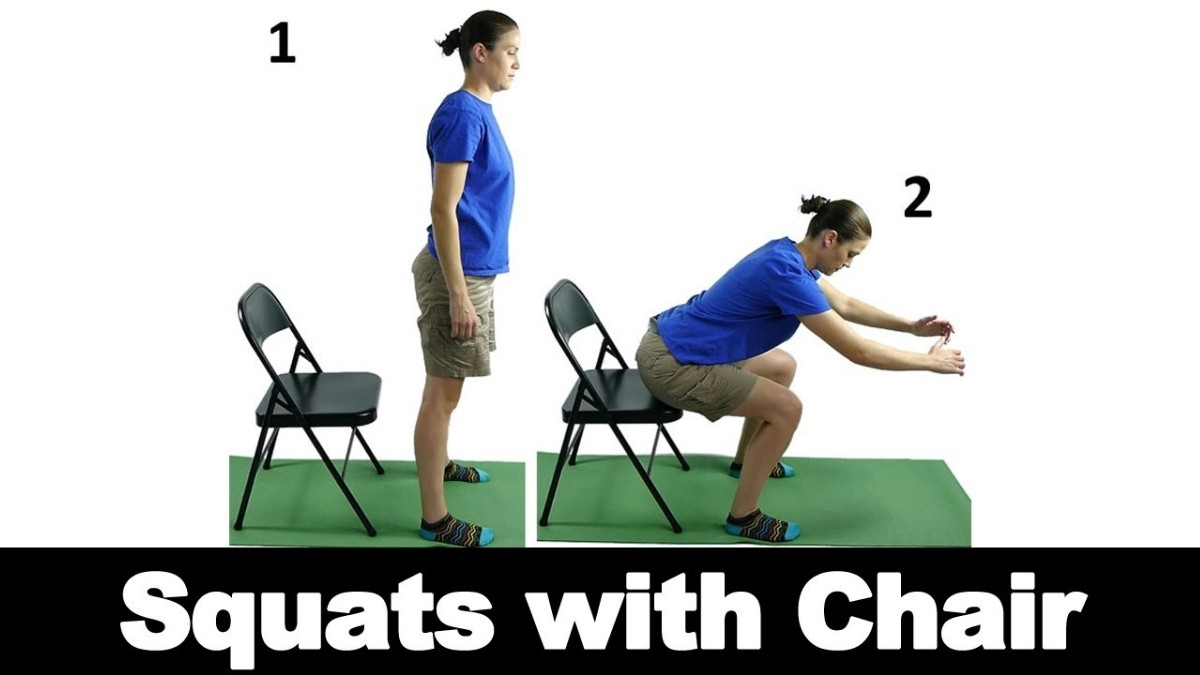
Breathe in as you lower. Breathe out as you stand. Keep your weight on your heels. If this feels too easy, don’t use the chair as a guide.
Exercise 2: Seated Row with Band
Sit in a chair. Loop a resistance band around your feet. Hold both ends. Pull the band to your chest. Squeeze your shoulder blades together. Slowly return. Do 2 sets of 8-12 reps.

Keep your back straight. Don’t lean forward or backward. Exhale when you pull. Inhale when you release.
Exercise 3: Chest Press
Lie on your back on a mat or bed. Hold light dumbbells. Start with weights at chest level. Push them straight up. Lower slowly. Do 2 sets of 8-12 reps.
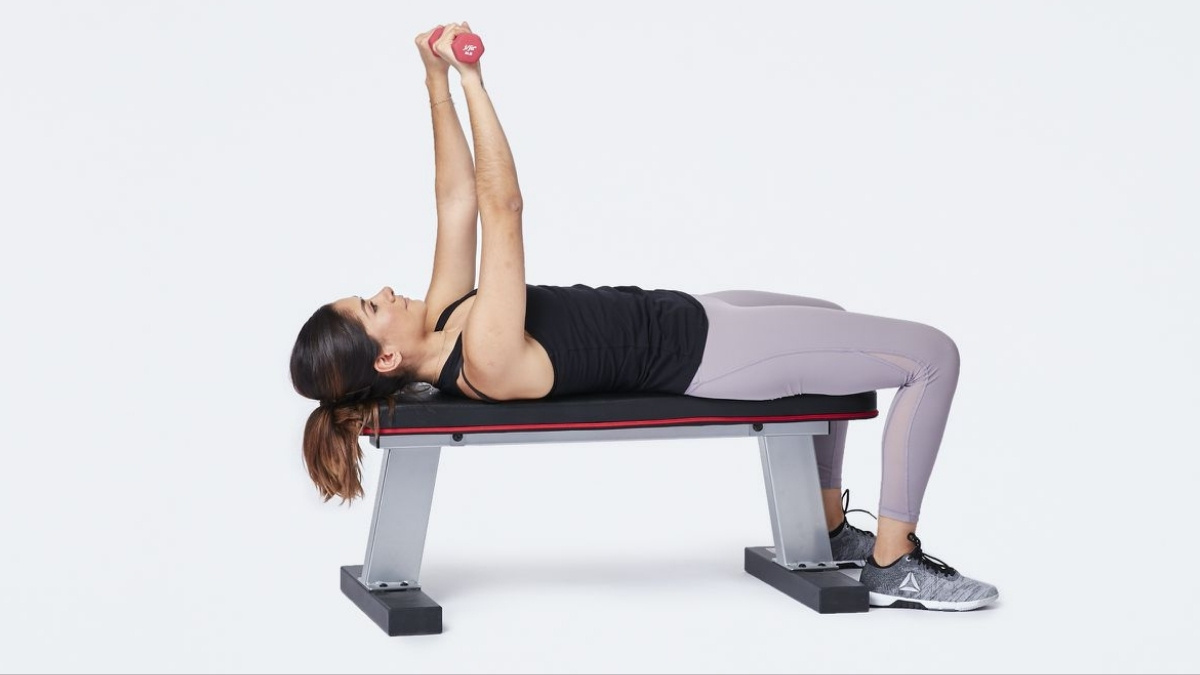
Don’t arch your back. Keep your feet flat on the floor. Exhale when pushing up. Inhale when lowering.
Exercise 4: Seated Overhead Press
Sit in a chair. Hold light dumbbells at shoulder height. Push them straight up overhead. Lower slowly. Do 2 sets of 8-12 reps.
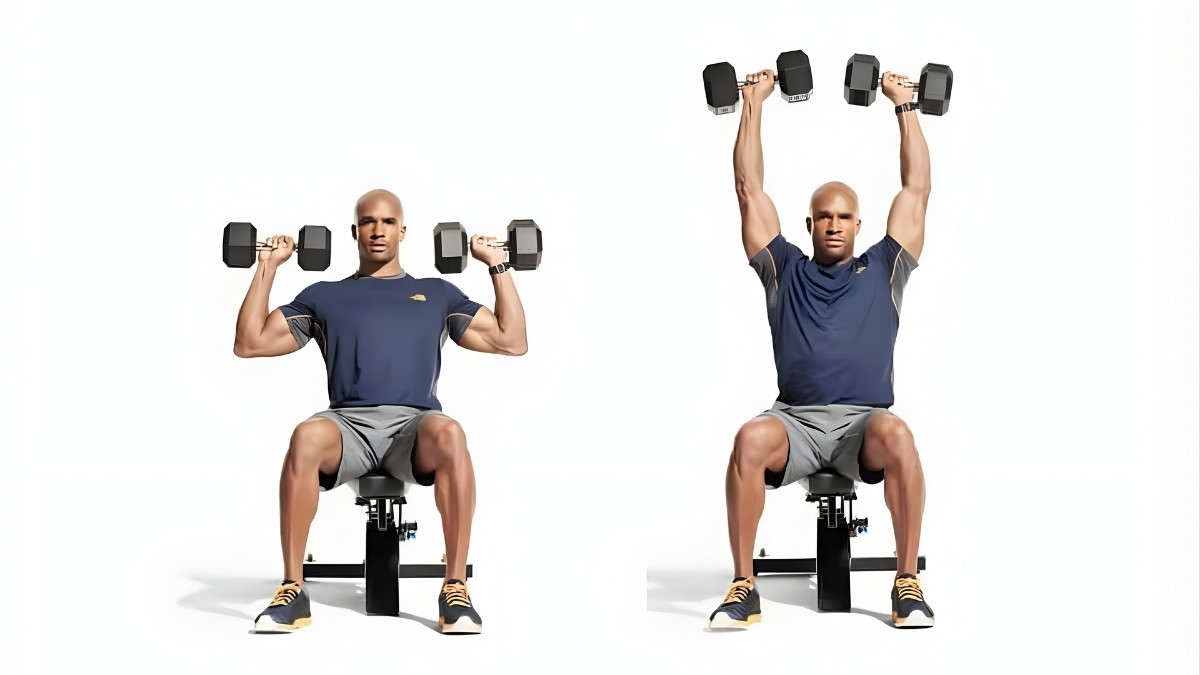
Don’t lean back. Keep your core tight. Exhale when pressing up. Inhale when lowering.
Exercise 5: Seated Leg Raises
Sit in a chair. Hands on armrests or seat for support. Lift both knees toward your chest. Lower slowly. Do 2 sets of 8-12 reps.
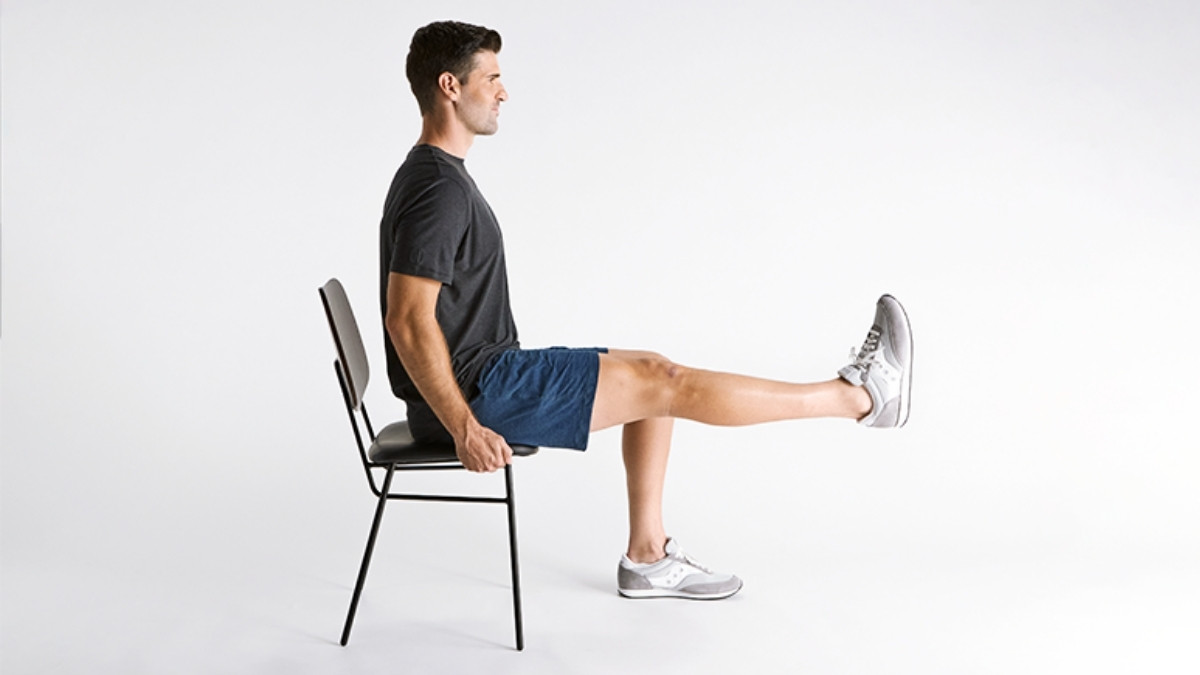
Keep your back against the chair. Move slowly and controlled. Exhale when lifting. Inhale when lowering.
Exercise 6: Bicep Curls
Stand or sit. Hold light dumbbells at your sides. Curl them up to shoulder height. Lower slowly. Do 2 sets of 8-12 reps.

Keep your elbows at your sides. Don’t swing the weights. Exhale when lifting. Inhale when lowering.
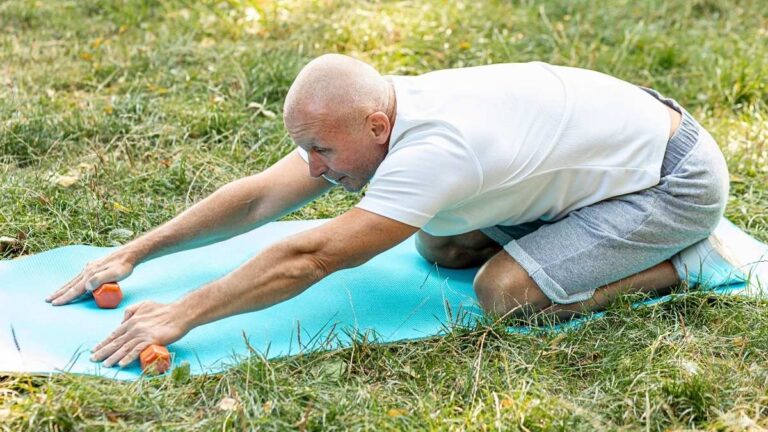
Cool-Down (5 Minutes)
Stretch each muscle group for 30 seconds. Hamstrings. Chest. Shoulders. Back. Arms. Breathe deeply during each stretch.
WORKOUT DAY 2 (Thursday or Friday)
Same warm-up. Same cool-down. Different exercises.
Exercise 1: Step-Ups
What It Works: Legs, glutes, balance, and core stability
Equipment Needed: A low step or sturdy box (4 to 6 inches high), chair for balance (optional)
Setup: Place your step or box on a non-slip surface. Stand facing it with feet hip-width apart. Keep a sturdy chair next to you if you need balance support.
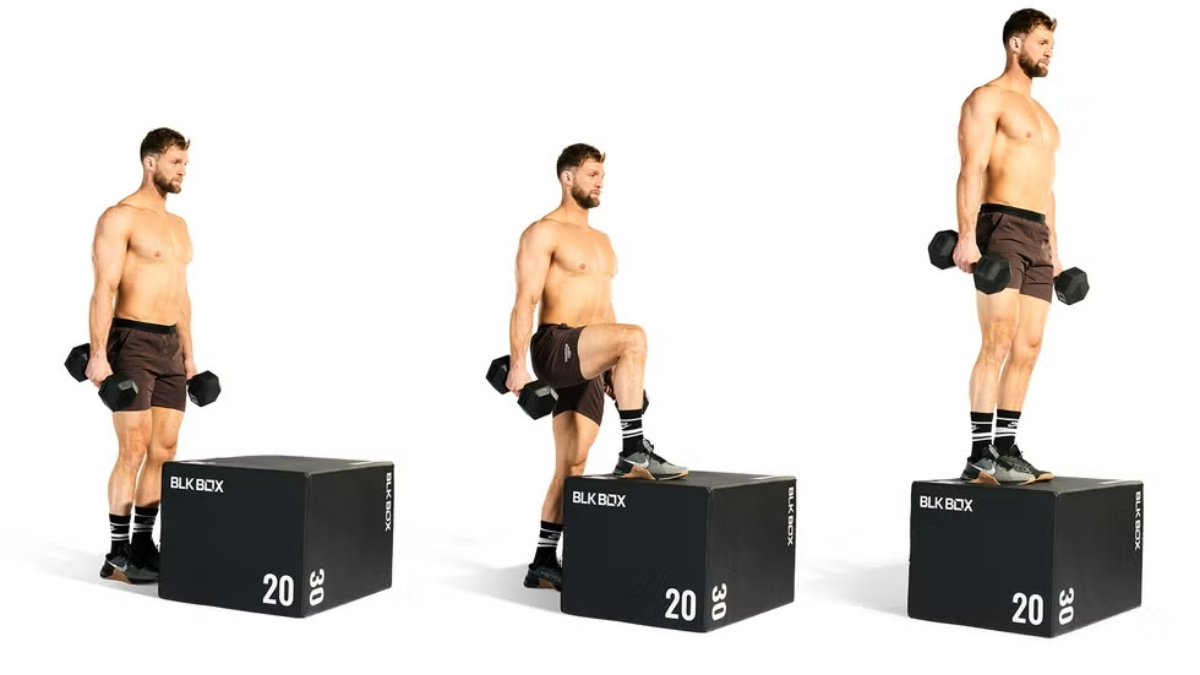
How to Do It: Step up onto the box with your right foot. Plant your entire foot on the surface. Push through your right heel and bring your left foot up to meet it. Both feet are now on the box. Step back down with your right foot first. Then bring your left foot down. That’s one rep for your right leg.
Complete 8 to 12 reps leading with your right leg. Rest 60 seconds. Then do 8 to 12 reps leading with your left leg. That’s one set. Rest 90 seconds. Do a second set.
Breathing: Breathe out as you step up. Breathe in as you step down.
Form Tips:
- Keep your chest up and shoulders back
- Don’t lean forward
- Push through your heel, not your toes
- Place your entire foot on the step, not just the ball of your foot
- Move slowly and controlled
Exercise 2: Lat Pulldown or Band Pulls
What It Works: Upper back, lats, and rear shoulders
Equipment Needed: Resistance band, door anchor (or sturdy door handle)
Setup: Loop your resistance band over the top of a sturdy door. Close the door and make sure it’s secure. You can also use a door attachment if you have one. Stand or sit facing the door. Hold one end of the band in each hand.
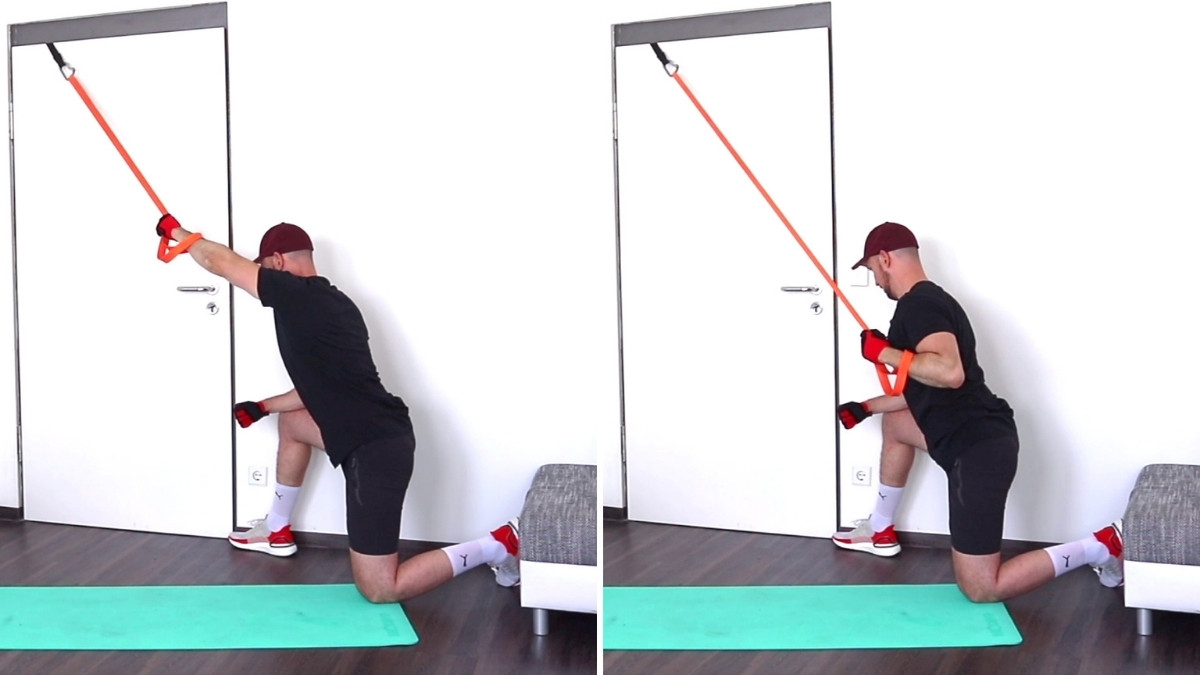
How to Do It: Start with your arms extended overhead, holding the band. Sit or stand with your back straight. Pull both ends of the band down to chest level. Squeeze your shoulder blades together at the bottom. Your elbows should move down and slightly behind you. Hold for one second. Slowly let the band return to the starting position with control. That’s one rep.
Do 8 to 12 reps. Rest 60 seconds. Do a second set.
Breathing: Breathe out as you pull down. Breathe in as you release.
Form Tips:
- Keep your back straight throughout
- Don’t lean backward or forward
- Lead with your elbows, not your hands
- Squeeze your shoulder blades together at the bottom
- Control the return—don’t let the band snap back
Exercise 3: Wall Push-Ups
What It Works: Chest, shoulders, and triceps
Equipment Needed: A wall (or countertop for progression)
Setup: Stand facing a wall, about 2 feet away. Place your palms flat on the wall at shoulder height and shoulder-width apart. Your body should form a straight line from your head to your heels.
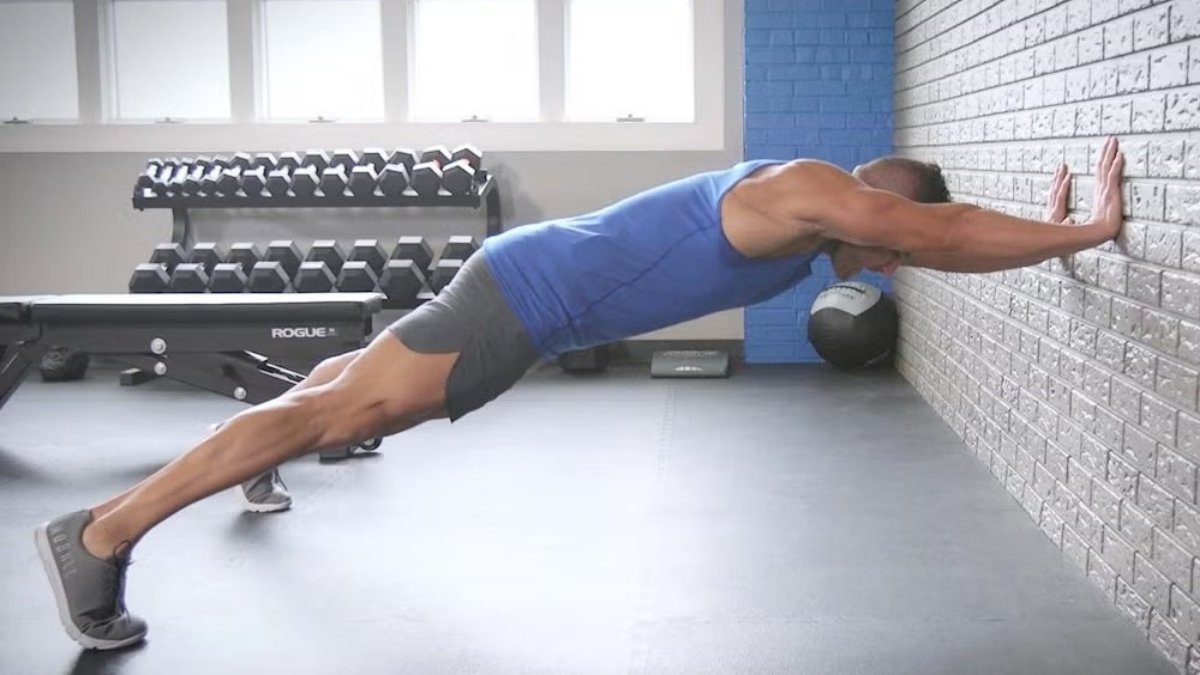
How to Do It: Start with your arms straight, hands on the wall. Bend your elbows and lean your body toward the wall. Keep your body in a straight line—don’t let your hips sag or stick out. Lower yourself until your nose almost touches the wall. Push yourself back to the starting position. That’s one rep.
Do 8 to 12 reps. Rest 60 seconds. Do a second set.
Breathing: Breathe in as you lower yourself toward the wall. Breathe out as you push away.
Form Tips:
- Keep your core tight throughout
- Don’t let your hips sag or stick out
- Your body should move as one unit
- Lower yourself slowly and with control
- Fully extend your arms at the top
Exercise 4: Lateral Raises
What It Works: Shoulders (specifically the middle deltoids)
Equipment Needed: Light dumbbells (3 to 5 pounds to start)
Setup: Stand with feet shoulder-width apart. Hold a light dumbbell in each hand. Let your arms hang at your sides with palms facing your body.
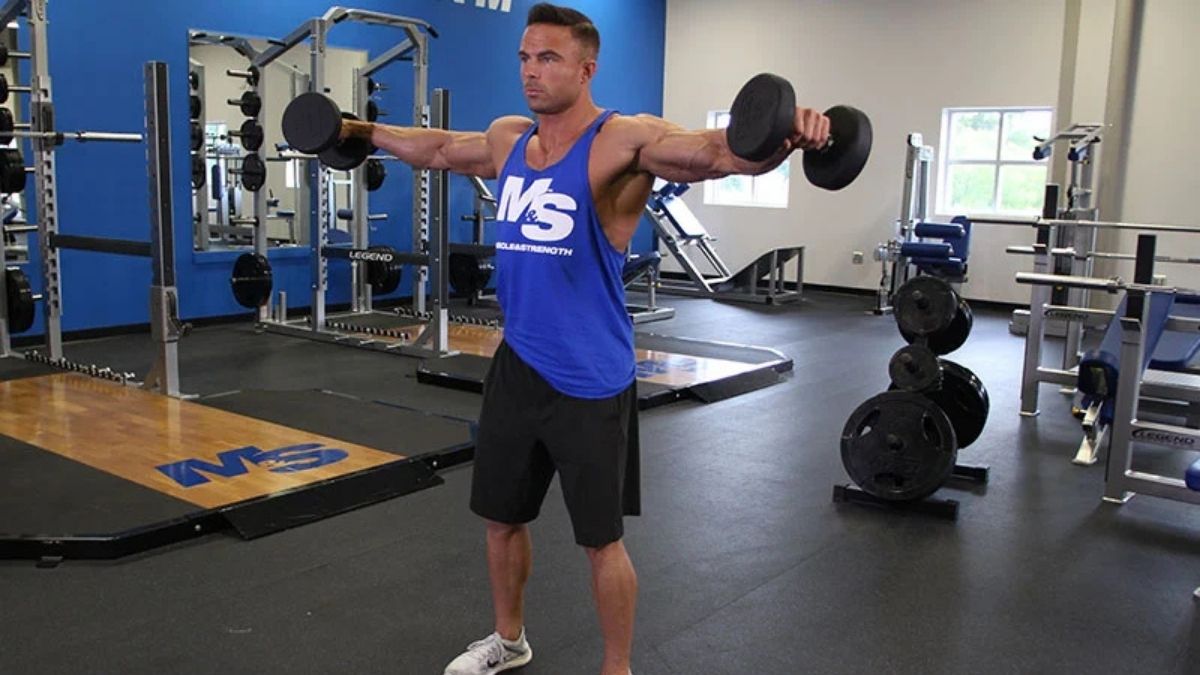
How to Do It: Keep a slight bend in your elbows. Lift both dumbbells out to your sides. Raise them until your arms are parallel to the floor (shoulder height). Your body should look like a “T” at the top. Pause for one second. Slowly lower the weights back to your sides. That’s one rep.
Do 8 to 12 reps. Rest 60 seconds. Do a second set.
Breathing: Breathe out as you lift the weights. Breathe in as you lower them.
Form Tips:
- Keep a slight bend in your elbows throughout
- Don’t shrug your shoulders up toward your ears
- Lift the weights out to the sides, not forward
- Move slowly and with control
- Don’t swing or use momentum
- Lead with your elbows, not your hands
Exercise 5: Modified Plank
What It Works: Core (abs and lower back), shoulders
Equipment Needed: Exercise mat or soft surface (optional)
Setup: Get on your hands and knees on the floor or mat. Place your hands directly under your shoulders. Your knees should be under your hips. Keep your back flat and straight.
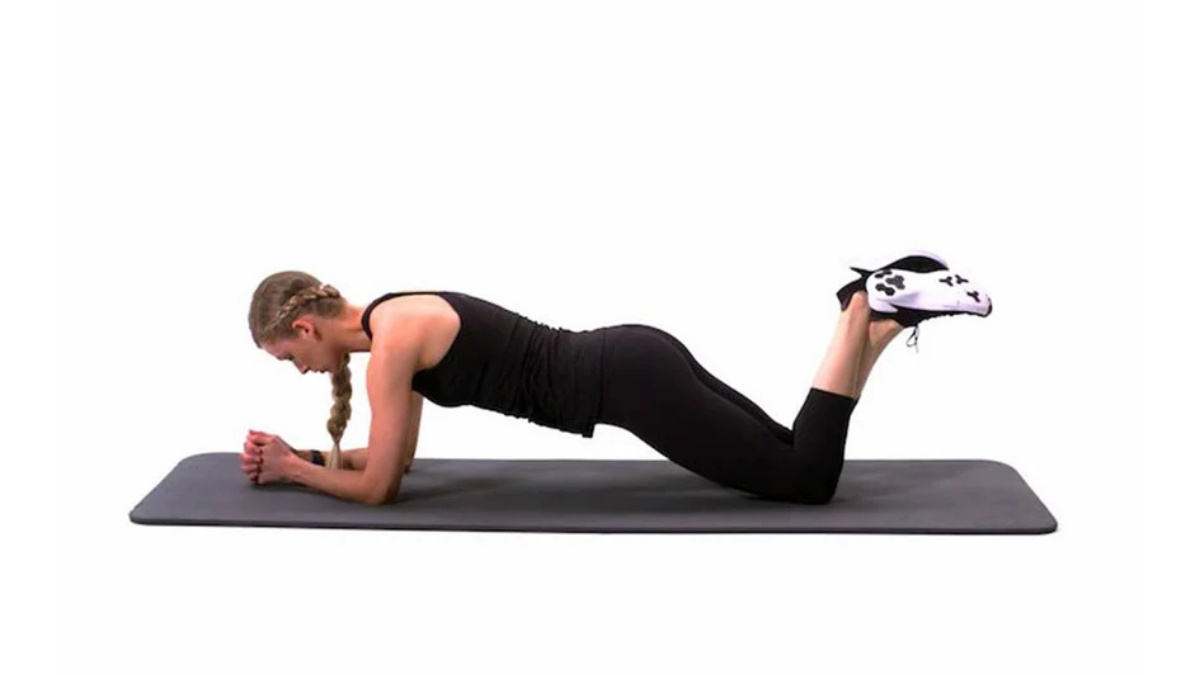
How to Do It: From the hands-and-knees position, keep your back perfectly straight. Don’t let your hips sag down or stick up. Tighten your stomach muscles. Hold this position for 20 to 30 seconds while breathing normally. Rest 60 seconds. Do a second set.
Breathing: Breathe normally throughout the hold. Don’t hold your breath.
Form Tips:
- Keep your back completely flat
- Don’t let your lower back sag
- Don’t stick your hips up in the air
- Keep your neck in line with your spine—look at the floor
- Tighten your abs as if someone is about to punch your stomach
Exercise 6: Hammer Curls
What It Works: Biceps and forearms
Equipment Needed: Light dumbbells (3 to 8 pounds)
Setup: Stand with feet shoulder-width apart. Hold a dumbbell in each hand. Let your arms hang at your sides. Your palms should face your body (neutral grip), not forward.
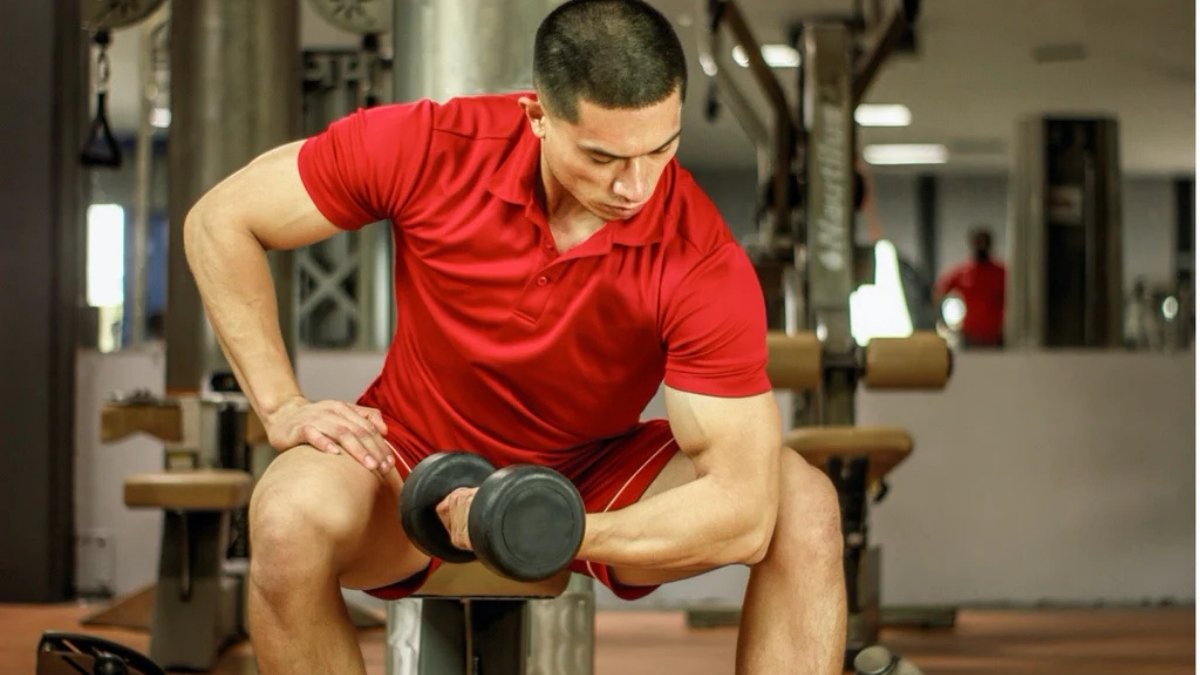
How to Do It: Keep your elbows close to your sides. Curl both dumbbells up toward your shoulders. Keep your palms facing each other throughout the entire movement (that’s what makes it a “hammer” curl). Squeeze your biceps at the top. Slowly lower the weights back to the starting position. That’s one rep.
Do 8 to 12 reps. Rest 60 seconds. Do a second set.
Breathing: Breathe out as you curl up. Breathe in as you lower down.
Form Tips:
- Keep your elbows locked at your sides—don’t let them move forward or backward
- Don’t swing the weights or use your back
- Move slowly and with control
- Keep your wrists straight—don’t bend them
- Squeeze at the top of the movement for one second
How to Progress Over 12 Weeks
Weeks 1-4: Focus on perfect form. Use the lightest weights. Learn each movement. Don’t worry about adding weight yet.
Weeks 5-8: Add 5-10% more resistance. If you’re using 5-pound dumbbells, try 6 or 8 pounds. Or use a stronger resistance band.
Weeks 9-12: Add a third set to each exercise. You’re now doing 3 sets of 8-12 reps instead of 2 sets.

After 12 weeks: Increase weight again or add more reps. If you can do 12 reps easily, it’s time to add resistance.
Safety Rules
Never sacrifice form for heavier weight. If you can’t complete 8 reps with good form, the weight is too heavy. Use a chair or wall for balance whenever you need it. Stop if you feel sharp pain. Muscle burn is okay. Joint pain is not.
Final Words:
Two workouts weekly matches or exceeds results from 5-day programs after 65. That’s what the research proves. Recovery time (48-72 hours minimum) is critical for muscle growth. Your body needs 12 sets per muscle group weekly, not more. Proper nutrition and sleep make or break results. Consistency beats intensity for long-term success.

Start this Monday with Workout Day 1. Keep it simple, focus on form, and trust the science. Your body doesn’t need more workouts—it needs better recovery. Track your progress over 12 weeks and you’ll see why twice-weekly training is the smart choice after 65.
This evidence-based approach to strength training for seniors over 65 respects your body’s natural recovery needs while delivering real muscle building results. The era of overtraining is over.