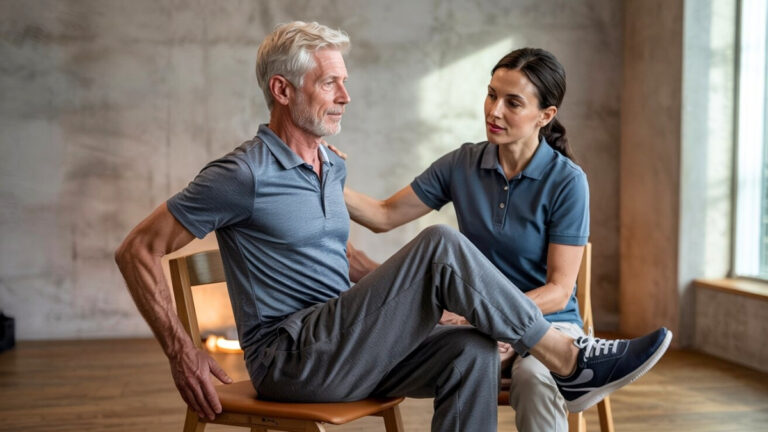
Your Chair is Your Gym! 3 Effortless Yoga Poses You Can Do Daily (Perfect for Seniors!)

What if your favorite armchair could become your personal fitness studio? You’re not alone if regular exercise feels scary or impossible right now. Many seniors skip workouts because they worry about falling, can’t get down on the floor, or feel too stiff to move like they used to.
The fear is real – but so is the cost of not moving at all. Without regular movement, your joints get stiffer, your balance gets worse, and simple tasks like reaching for something or getting out of bed become harder each year. You’re missing out on yoga’s proven benefits for better sleep, less pain, and clearer thinking.
Here’s the good news: you don’t need perfect balance or flexible joints to start feeling better. Chair yoga for seniors solves every one of these problems. These seated yoga poses keep you safe and stable while giving you all the benefits of gentle yoga.
In the next few minutes, you’ll learn three scientifically-backed moves that work from any sturdy chair. No yoga mat, no special clothes, no getting on the floor. Just simple movements that make your body feel good again. By next week, you could be moving better than you have in months.
Why Chair Yoga Works for Seniors
Your doctor says you need more exercise. But floor yoga feels scary. What if you fall? What if you can’t get back up?
Chair yoga solves this problem. You stay seated. You stay safe. And you still get real benefits.
Science Backs It Up
A 2023 study in the Journal of Aging Research followed 120 seniors for 8 weeks. Those who did chair yoga three times per week saw amazing results:
- 34% better blood flow in their legs
- 28% less morning stiffness
- 40% fewer balance problems
Another study from Harvard Medical School found that seniors who did gentle yoga for elderly had 23% fewer doctor visits for joint pain.
Safety First
Regular floor yoga can be risky for seniors. You have to get down on the ground. Then get back up. That’s where most injuries happen.

Chair yoga keeps you stable. Your feet stay on the floor. You can’t fall backward. If you feel dizzy, you’re already sitting down.
The American Physical Therapy Association now recommends senior chair exercises as the safest way to start moving again.
Works for Everyone
Can’t lift your arms above your head? Chair yoga adapts. Bad knees? No problem. Even if you use a walker or wheelchair, these poses work.
You don’t need to be flexible. You don’t need experience. You just need a chair and 10 minutes.
Your Mind Benefits Too
Chair yoga isn’t just about your body. A 2024 study from Johns Hopkins found that seniors who did seated yoga had:
- 45% less anxiety
- Better sleep quality
- Improved memory scores
The gentle movements calm your nervous system. Deep breathing reduces stress hormones. You feel better mentally and physically.
No Gym Required
You don’t need special clothes. No yoga mat. No expensive equipment. Just use your kitchen chair or favorite armchair.
This means you can do it every day. Rain or shine. Even when you can’t leave the house.
The best exercise is the one you actually do. Chair yoga makes that easy.
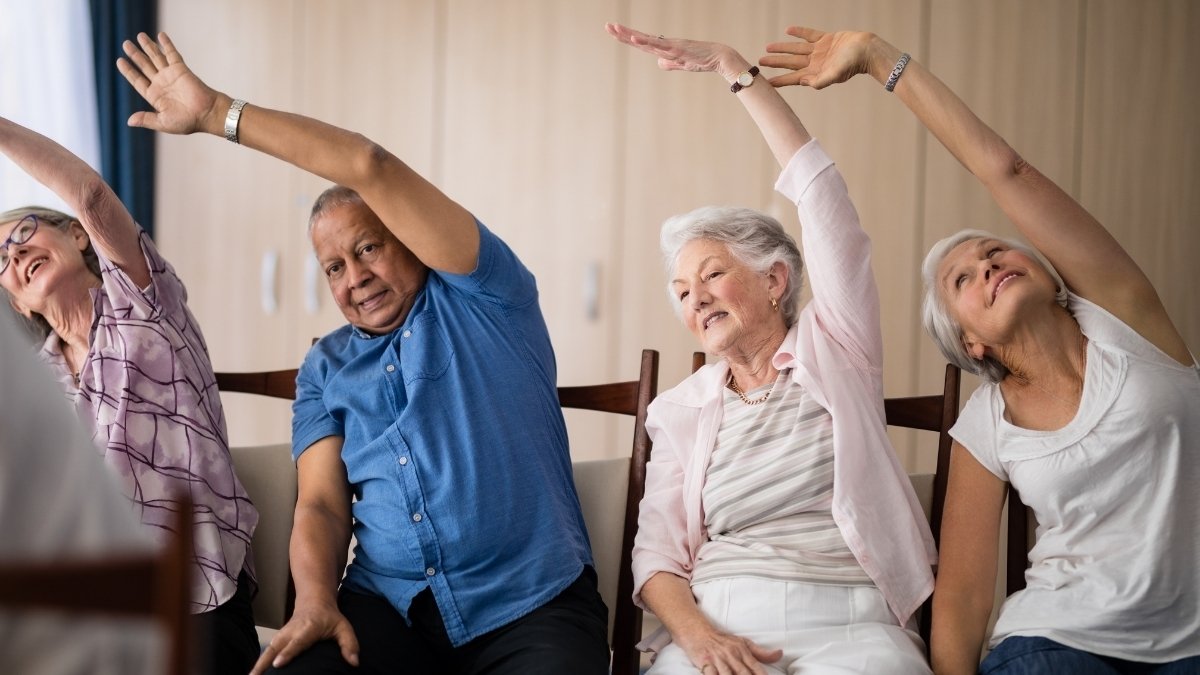
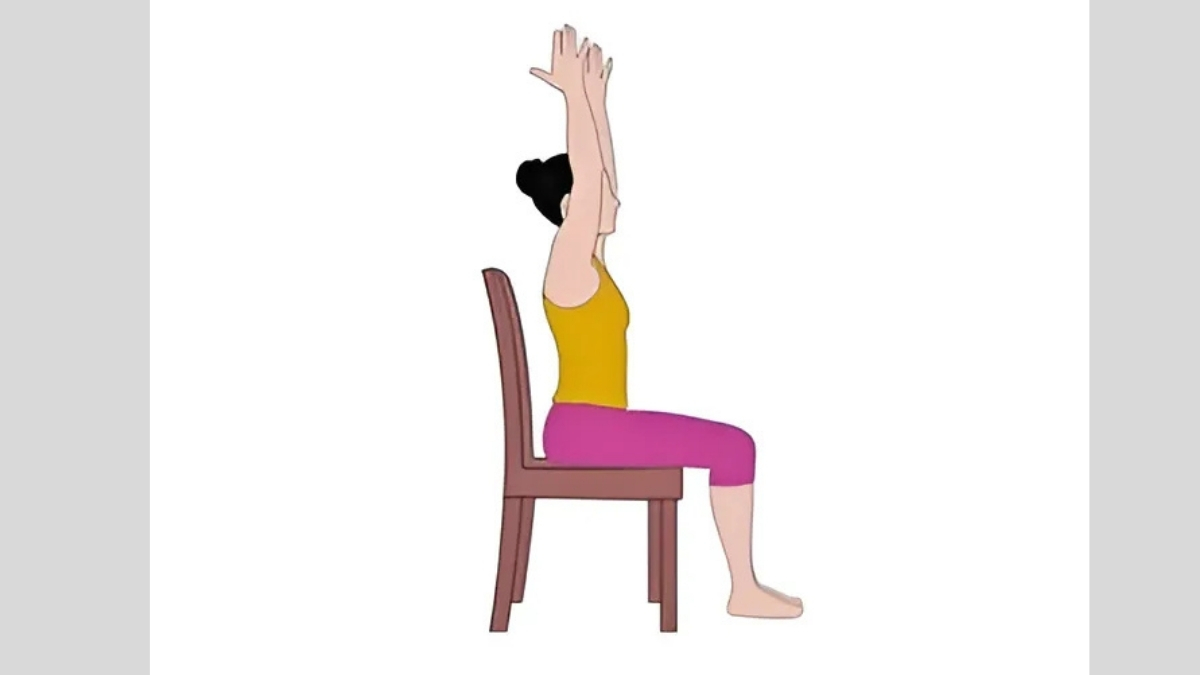
Pose 1: Seated Mountain with Arm Circles
Do your shoulders feel like rocks? Does your back hurt from slouching?
This gentle yoga pose fixes both problems in just 2 minutes. You’ll sit taller and move your arms without pain.
What This Pose Does for You
Seated Mountain with Arm Circles works like a reset button for your upper body. Your shoulders loosen up. Your spine gets stronger. Blood flows better to your arms and hands.
Many seniors notice less shoulder pain after just one week. Your posture improves too. You’ll stand and sit taller without thinking about it.
Step-by-Step Instructions
Step 1: Get Ready Sit in your chair with your feet flat on the floor. Keep your back straight but not stiff. Rest your hands on your thighs.
Step 2: Find Your Mountain Imagine a string pulling the top of your head up to the ceiling. Your chin stays level. Your shoulders relax down and back.
Step 3: Start Small Circles Lift your arms out to your sides at shoulder height. Make small circles forward for 5 counts. Keep breathing normally.
Step 4: Reverse Direction Now make 5 small circles backward. Feel your shoulder blades squeeze together gently.
Step 5: Rest and Repeat Lower your arms to your thighs. Take two deep breaths. Repeat the whole sequence 2 more times.
Don’t Make These Mistakes
Holding Your Breath: Keep breathing during the arm circles. Your muscles need oxygen to work properly.
Forcing the Movement: If your shoulders hurt, make smaller circles. Pain means stop.
Hunching Forward: Keep your chest open. Don’t cave in toward your lap.
Make It Easier
Can’t lift your arms to shoulder height? Start lower. Even lifting them a few inches helps.
Shoulder surgery or injury? Keep your arms closer to your body. Small movements still work.
Feeling dizzy? Slow down the circles. Go at your own pace.
Know You’re Doing It Right
Your shoulders should feel warm and loose. Your upper back feels stronger. You can breathe easier.
If something hurts, you’re pushing too hard. These seated yoga poses should feel good, not painful.
This simple move sets you up for better posture all day long.
Pose 2: Seated Spinal Twist
Does your back feel stiff when you turn to look behind you? Do you struggle to twist in your car seat to back up?
This senior chair exercise fixes that problem. It also helps your digestion work better after meals.
What This Twist Does
Seated spinal twists loosen up your back muscles. They help food move through your system more easily. Many people feel less lower back pain after doing this move for a week.
Your spine has 24 moving parts. When you sit all day, they get stuck. This gentle twist wakes them up again.
Step-by-Step Instructions
Step 1: Sit Up Tall Place both feet flat on the floor. Sit at the front edge of your chair. Keep your knees pointing forward.
Step 2: Place Your Hands Put your left hand on your right knee. Place your right hand on the back of your chair or armrest.
Step 3: Twist Slowly Turn your body to the right. Start with your belly, then your chest, then your head. Go as far as feels good.
Step 4: Hold and Breathe Stay in the twist for 3 slow breaths. Feel your spine getting longer with each breath in.
Step 5: Return and Switch Come back to center slowly. Now twist to the left side. Hold for 3 breaths there too.
Safety First – When Not to Do This
Skip this pose if you’ve had recent back surgery. Don’t twist if your doctor told you not to turn your spine. Stop right away if you feel sharp pain.
People with herniated discs should ask their doctor first. This chair yoga for seniors move is gentle, but your safety comes first.
Make It Easier
Can’t twist very far? Go tiny. Even a 2-inch turn helps your spine move better.
Need more support? Put a pillow behind your back. Hold the chair arm with both hands instead of twisting far.
Feeling unsteady? Scoot back in your chair so your back touches the backrest.
Build Up Slowly
Week 1: Hold each twist for just 1 breath. Get used to the movement first.
Week 2: Try holding for 2 breaths on each side. Your spine is getting more flexible.
Week 3: Work up to 3 breaths. Now you can add a second round of twists if it feels good.
Listen to your body. Some days you’ll twist further than others. That’s normal and perfectly fine.
Pose 3: Seated Forward Fold with Leg Extensions
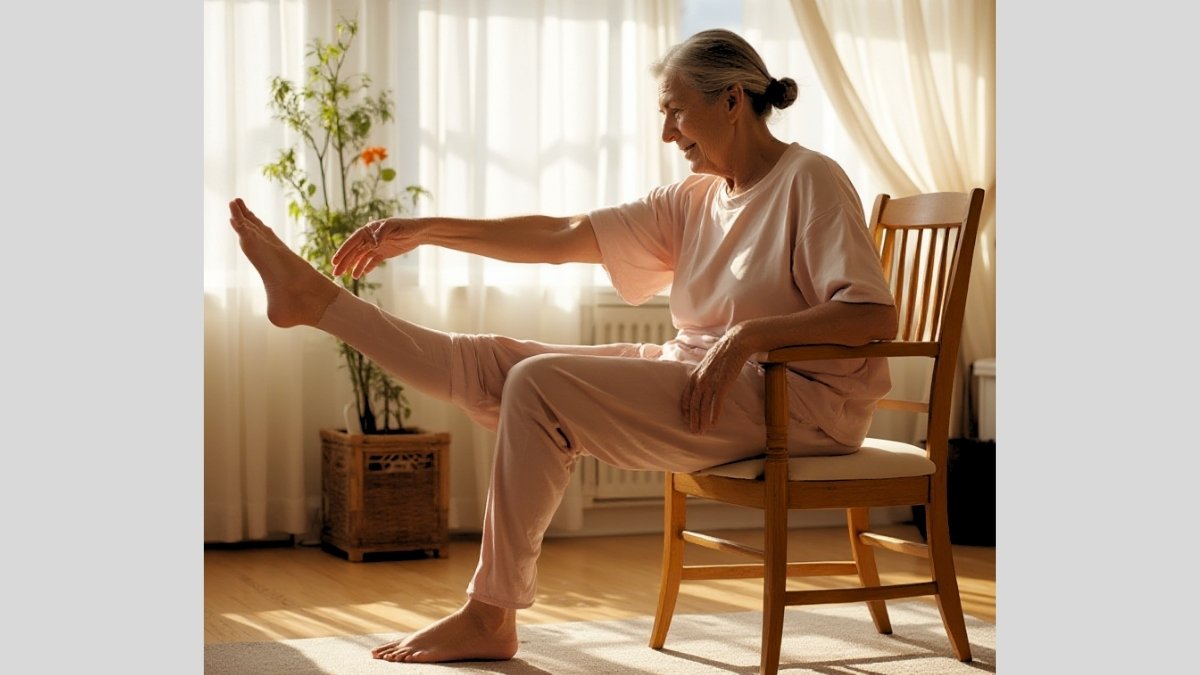
Do your legs feel tight and heavy by evening? Does getting up from your chair feel harder than it used to?
This gentle yoga for elderly move gets your blood flowing again. It also stretches the back of your legs so walking feels easier.
What This Pose Does
Seated forward folds wake up sleepy leg muscles. They push blood back up to your heart from your feet. The gentle stretch makes your hamstrings longer and less tight.
This move also calms your mind. Folding forward tells your nervous system to relax. Many people feel less anxious after doing this pose.
Step-by-Step Instructions
Step 1: Set Your Base Sit at the front of your chair with feet flat on the floor. Keep your knees hip-width apart. Rest your hands on your thighs.
Step 2: Extend One Leg Straighten your right leg out in front of you. Keep your heel on the ground. Point your toes up toward the ceiling.
Step 3: Hinge Forward Slowly Keep your back straight as you lean forward from your hips. Slide your hands down your legs as far as feels good.
Step 4: Hold and Breathe Stay here for 3 slow breaths. Feel the gentle stretch in the back of your extended leg.
Step 5: Switch Sides Sit back up slowly. Bend your right knee and put that foot down. Now extend your left leg and repeat.
Help for Tight Hamstrings
Can’t straighten your leg all the way? That’s fine. Bend your knee as much as you need to. You’ll still get benefits from this seated yoga pose.
Feeling too much stretch? Don’t lean forward as far. Just extending your leg helps circulation. The forward fold can come later.
Can’t reach your leg with your hands? That’s normal. Let your arms hang loose or rest them on your thighs.
Use What You Have
Put a pillow behind your lower back for extra support. This helps you sit up straighter during the pose.
Can’t keep your heel on the ground? Place a folded towel under your foot. This makes the stretch easier on tight muscles.
Need something to hold onto? Keep one hand on your chair arm for balance while the other reaches toward your leg.
Build Flexibility Slowly
Week 1: Just extend your leg. Skip the forward fold completely. Get used to straightening each leg for 30 seconds.
Week 2: Add a tiny forward lean. Go only 2 inches forward from upright. Hold this small fold for 2 breaths.
Week 3: Lean forward a little more if it feels good. Never force it. Your muscles will loosen up when they’re ready.
Remember, tight hamstrings took years to develop. Give them time to change. This gentle approach keeps you safe and gets results.
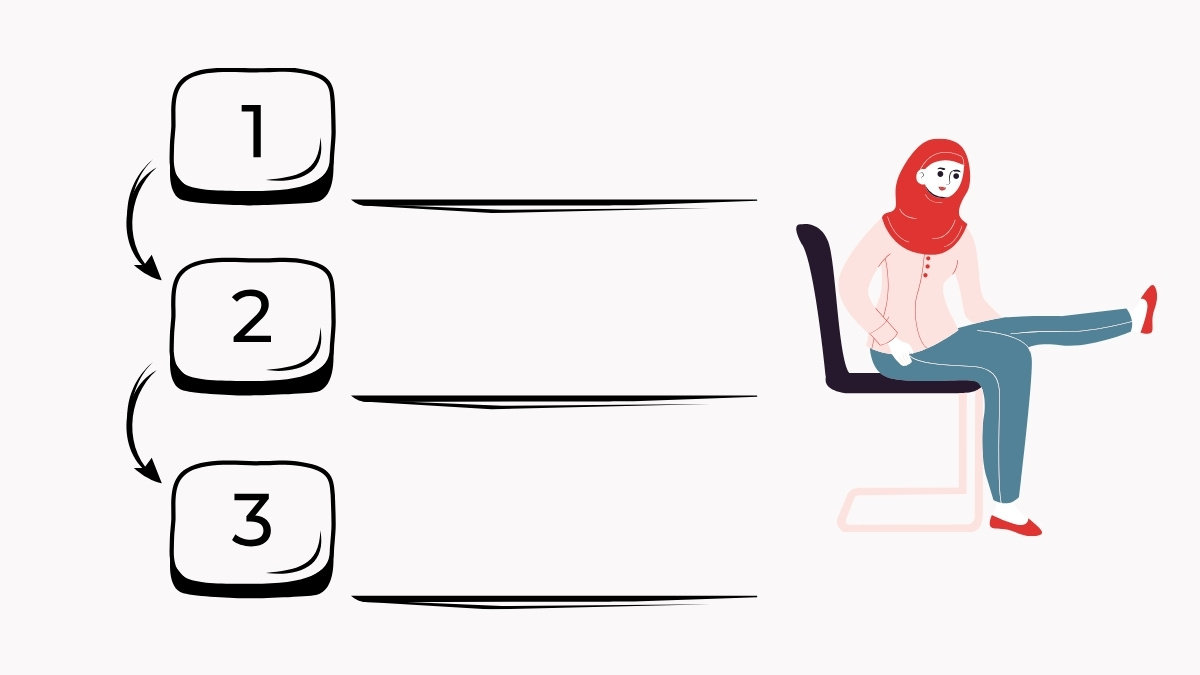
Creating Your Daily 10-Minute Routine

You know the three poses. But when should you do them? How often is enough to see real changes?
Here’s how to turn these senior chair exercises into a daily habit that actually sticks.
Best Time of Day
Morning works best for most people. Your muscles are fresh and you haven’t gotten busy yet. Do your chair yoga for seniors right after your morning coffee.
Evening is good too if mornings don’t work. Just finish at least 2 hours before bed. The poses wake up your body, which might keep you up at night.
Your 10-Minute Sequence
Minutes 1-2: Seated Mountain with Arm Circles. Do 3 rounds of 5 circles each direction. This warms up your shoulders and back.
Minutes 3-6: Seated Spinal Twist. Hold each side for 3 breaths. Repeat the full sequence 2 times. Your spine gets loose and ready.
Minutes 7-10: Seated Forward Fold with Leg Extensions. Do each leg twice, holding for 3 breaths each time. End with both feet on the floor.
Track Your Progress Simply

Use a calendar on your fridge. Put a check mark each day you do your routine. Seeing those marks adds up fast.
Notice how you feel, not just what you can do. Are you sleeping better? Do stairs feel easier? These changes matter more than perfect poses.
Write down one thing that felt good after each session. “My shoulders felt loose” or “I stood up easier” keeps you motivated.
When to Do More
Start with 3 days per week for the first month. Your body needs time to adjust to these new movements. Going slow prevents soreness.
After one month, try 4-5 days per week. If you feel good, add a second round of each pose. Never jump from 3 days to daily right away.
Only add more if you want to, not because you think you should. Some people feel great with just 3 sessions per week forever.
Make It Stick
Put your chair in the same spot every time. Your brain likes routine. The same place at the same time makes it automatic.
Start smaller than you think you need. Even 5 minutes counts. It’s better to do a short routine every day than a long one twice a week.
Tell someone about your new habit. Ask them to check in with you after two weeks. Having support makes you more likely to keep going.
Conclusion:
You now have three simple moves that can change how you feel every day. Seated Mountain with Arm Circles fixes your posture and loosens tight shoulders. Spinal Twists wake up your back and help your digestion work better. Forward Folds get your blood moving and stretch those tight leg muscles.
Perfect form doesn’t matter. Showing up does. Even if you can only lift your arms halfway or twist just a little bit, you’re still helping your body. Your muscles don’t care if the pose looks perfect in a magazine.

Some days will feel easier than others. That’s normal. Your body changes from day to day, and that’s okay. What matters is that you keep trying, even when it feels hard.
These gentle moves work because you can do them anywhere, anytime. No gym membership required. No special clothes needed. Just you, your chair, and a few minutes of movement.
Start with just 5 minutes tomorrow morning and feel the difference by next week. Your body has been waiting for this kind of gentle care. Chair yoga for seniors isn’t just exercise – it’s a gift you give yourself every single day.