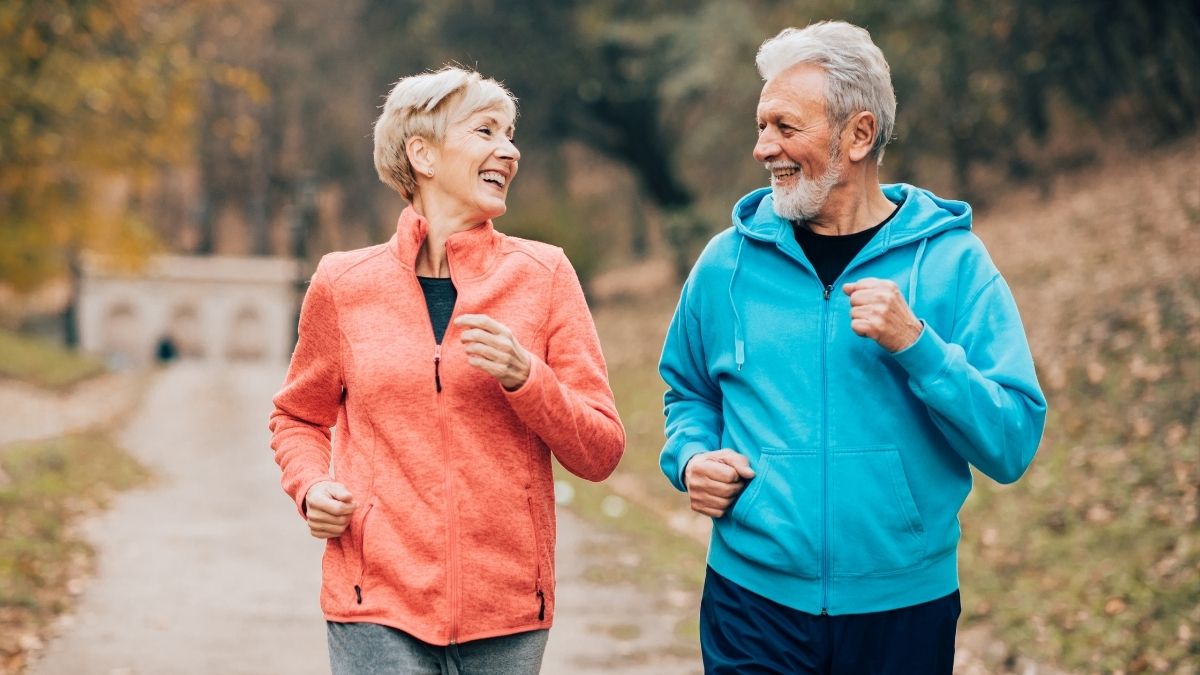
10 Daily Movements Every Senior Should Do for Strength and Stability
Here is a fact from the CDC: more than one in four Americans aged 65 and older falls each year. For this group, falls are the leading cause of injury-related death.
This isn’t just a statistic. It is a fear that can limit your life. This fear of falling can cause you to become less active, which leads to the exact muscle weakness and poor balance that make a fall more likely.
This age-related muscle loss has a name: sarcopenia. Research from 2025 confirms that exercise is the single most effective way to fight it, especially since no effective drugs exist.
This article gives you a simple, 15-minute daily routine. It has 10 functional movements designed to build strength and improve balance. The goal is to provide the stability and confidence you need to stay independent and active.
Before starting any new exercise routine, it is essential to consult your healthcare provider. This will ensure these daily movements for seniors are safe for your individual needs.
⚠️ The Senior Falls Crisis
Understanding the statistics that make daily movement essential for independence
• Consult your healthcare provider before starting any new exercise routine
• Extra important if you have chronic conditions like arthritis, osteoporosis, or balance issues
• A physical therapist can help “choose and teach the best exercises for you”
Remember: Your safety comes first. Professional guidance ensures these movements are appropriate for your individual health status.
• Use a sturdy chair that won’t slide or roll
• Exercise near a kitchen counter or sturdy support
• Ensure the area is well-lit
• Remove throw rugs or clutter that could cause trips
• Always wear proper footwear
Goal: Create a safe environment where you can focus on movement without worry.
• Feel a “challenge,” not pain
• Some muscle soreness is normal, but shouldn’t limit daily activities
• STOP immediately if you feel: Dizziness, chest pain, or sharp pain
• Don’t hold your breath—keep breathing steadily
Wisdom: Your body is your best guide. Respect its signals and progress at your own pace.
Why Daily Movement? The Critical Link to Independence
Let’s look at why daily movement is so important. The facts are stark. More than one in four Americans 65 and older falls each year. In 2021, falls caused over 38,000 deaths.
A key reason for this is sarcopenia. This is the natural, age-related loss of muscle mass and strength. This “lower body weakness” is a primary risk factor for falling , and it is linked to functional disability and hospitalization.
Here is the 2025 insight. Research confirms there are no approved drugs for sarcopenia. The most effective treatment is “combined interventions” of exercise and nutrition. These actions improve muscle mass, strength, and gait speed.
This is why we focus on functional fitness. These are movements that train your muscles for everyday life. A “Sit-to-Stand” (Movement #3) builds strength for getting out of a chair. A “Single-Leg Stance” (Movement #7) improves balance for when you trip.
The goal is to maintain “quality movement patterns”. This is how you ensure your “continued independence and freedom”
Before You Begin: A 3-Step Safety Checklist
Your safety comes first. Before you begin any new movements, follow this simple 3-step checklist. This will help you get strong and stay safe.
1. Clear It With Your Doctor First, consult your healthcare provider before starting any new exercise routine. This is extra important if you have chronic conditions like arthritis, osteoporosis, or balance issues. A physical therapist can help “choose and teach the best exercises for you”.

2. Create Your Safe “Fitness Zone” Second, create a safe space. You just need a “sturdy chair… that won’t slide or roll”. Plan to do your exercises near a “kitchen counter” or “sturdy support” you can hold on to.
Make sure the area is well-lit. Remove any “throw rugs or clutter” that you could trip over. Always wear “proper footwear” to reduce the risk of falls.
3. Listen to Your Body’s “Rules” Third, “listen to your body”. The goal is to feel a “challenge,” not pain. “Some muscle soreness is normal,” but if it limits your daily activities, you may have done too much.
Stop immediately if you feel dizzy, chest pain, or sharp pain. And remember to breathe. “Don’t hold your breath”.
Part 1: The Warm-Up (Movements 1-2)
1. Seated Shoulder Rolls
Why it helps: This move releases tension in your neck and shoulders. It also helps warm up the upper body.
Step-by-Step:
- Sit up straight in your chair with your feet flat on the floor.
- Keep your arms relaxed by your sides.
- Slowly roll your shoulders up toward your ears.
- Roll them back, squeezing your shoulder blades.
- Roll them down, then forward, in a smooth circle.
- Repeat this 5 times, then reverse the direction for 5 more rolls.
Safety: “All motion will be in your shoulders”. Move slowly and do not force the movement.
2. Seated Ankle Circles
Why it helps: This improves ankle mobility and circulation. Good circulation is critical for walking stability and helps prevent falls.
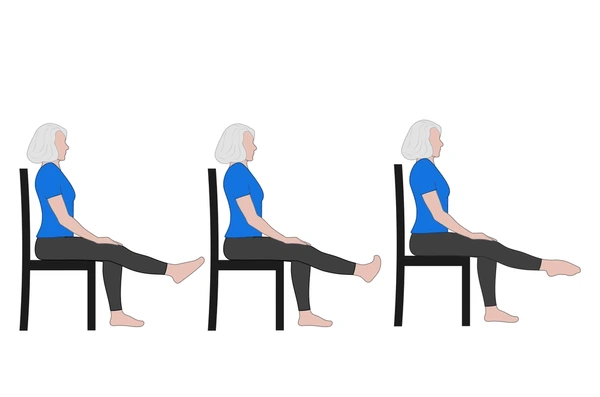
Step-by-Step:
- Sit tall in your chair. Hold the edge for support.
- Extend one leg straight out.
- Slowly circle your ankle 10 times in one direction.
- Reverse and circle 10 times in the other direction.
- Lower that leg and repeat with the other ankle.
Safety: “Move just your foot and ankle, not your leg”.
Part 2: The Core Routine (Movements 3-8)
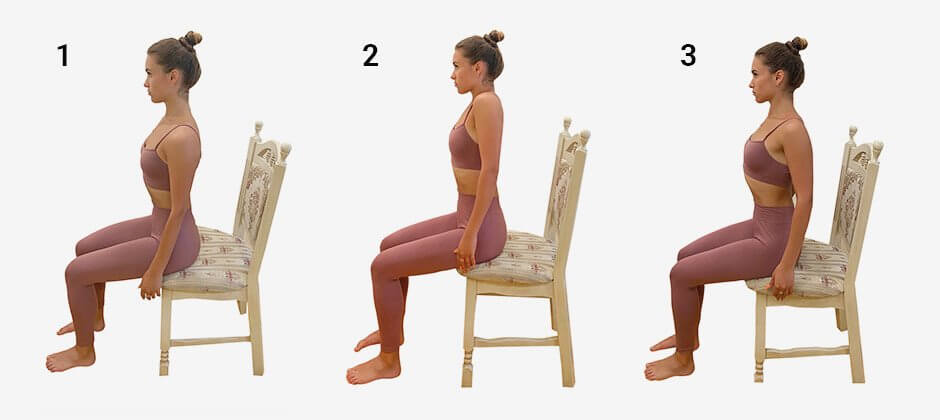
3. Sit-to-Stand
Why it helps: This is the most functional exercise you can do. It builds leg, glute, and core strength. This strength is essential for getting up from a chair, the toilet, or a car.

Step-by-Step:
- Sit on the front half of a sturdy chair.
- Place your feet flat on the floor, hip-width apart.
- Lean your chest slightly forward (“nose over toes”).
- Squeeze your glutes and push through your heels to slowly rise to a full standing position.
- Slowly and with control, reverse the motion to sit back down.
- Aim for 5 to 10 repetitions.
Safety & Modification: “The goal is to not use your hands at all”. If you are a beginner, “Place your hands on the arms or seat of the chair and push through your hands to help stand”.
4. Standing Calf Raises
Why it helps: This move strengthens your calf muscles and ankles. These muscles are vital for balance, stability, and walking.

Step-by-Step:
- Stand tall behind your sturdy chair, holding the backrest for balance.
- Place your feet hip-width apart.
- Slowly lift your heels off the floor, rising up onto the balls of your feet.
- Pause briefly at the top.
- Slowly lower your heels back down with control. “Avoid bouncing”.
- Repeat 10 times.
Safety: “Hold lightly onto the backrest of the chair for balance”.
5. Standing Side Leg Raise
Why it helps: This strengthens the hip muscles on the outside of your thighs. These muscles are critical for stabilizing your pelvis when you walk and preventing falls.
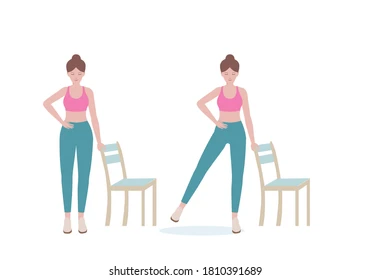
Step-by-Step:
- Stand tall beside your chair, holding it for support.
- Keep your “standing leg slightly bent”.
- Slowly lift your other leg straight out to the side. Keep your toes pointed forward.
- Lift only as high as possible without tilting your torso. “Don’t lean”.
- Hold for 2-3 seconds, then slowly lower the leg.
- Repeat 10 times, then switch legs.
Safety: “No leaning, just straight up and down”.
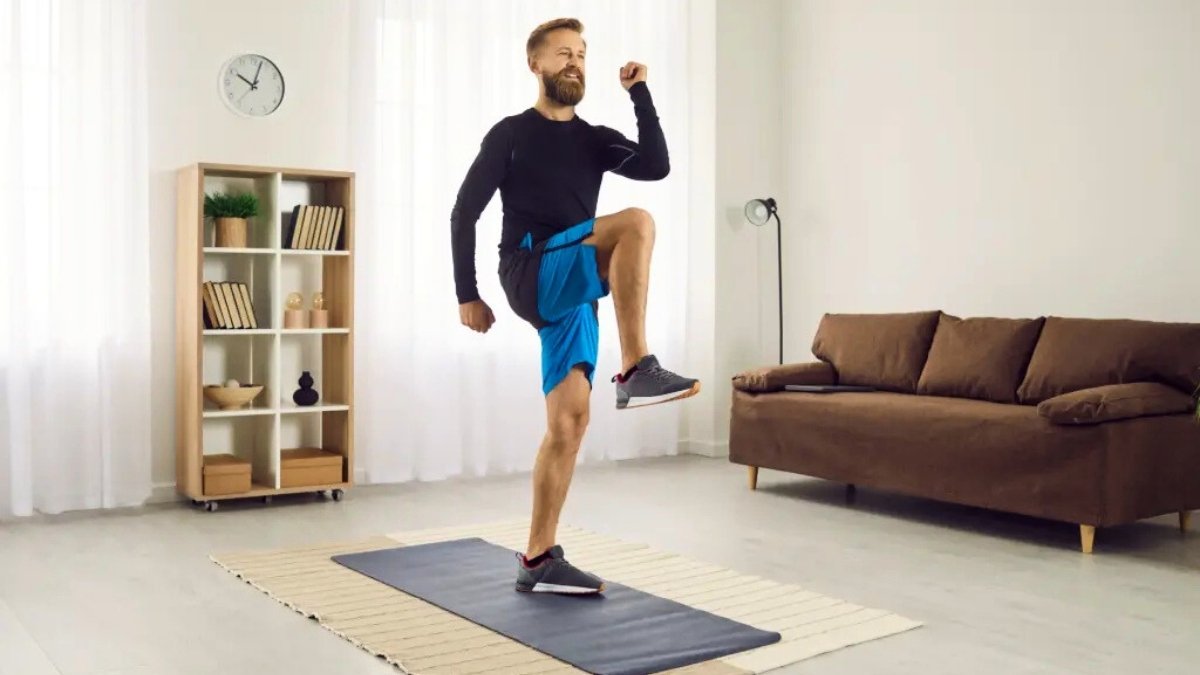
6. Standing March
Why it helps: This is a core-strengthening exercise. It helps shore up the muscles that support your spine and improves your dynamic balance.
Step-by-Step:
- Stand tall behind your chair, holding on for balance.
- Lift one knee until your thigh is parallel to the floor, or as high as you comfortably can.
- Keep your torso straight and “avoid any leaning”.
- Pause, then slowly return your foot to the floor.
- Repeat with the other leg, alternating.
- Perform 20 total marches (10 per leg).
Safety: “As you get stronger, perform the move without holding on to anything”.
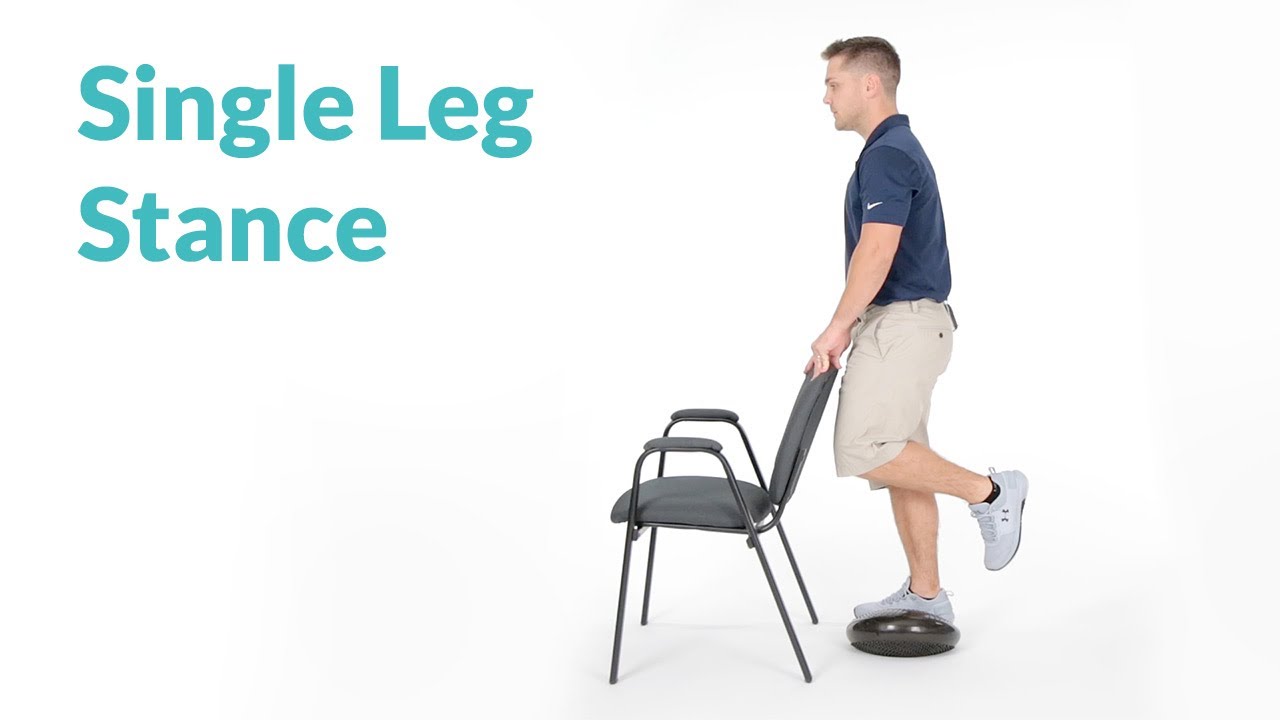
7. Single-Leg Stance
Why it helps: This is a direct balance-training exercise. Research shows the ability to stand on one leg is a strong predictor of fall risk.
Step-by-Step:
- Stand behind your sturdy chair or counter, holding on.
- Slowly lift your right foot off the floor, bending the knee.
- Spread your weight equally on your left foot.
- Hold this position for 10 seconds. Try to work your way up to 30 seconds.
- Lower your right foot and repeat on the left side.
- Repeat 5 times on each leg.
Safety & Modification: “Use a stable object like a table or a counter for support if you need it”. As you improve, “try to do each one with your eyes closed” or “balance on one leg while standing on a pillow” for an advanced challenge.
8. Heel-to-Toe Walk
Why it helps: This improves coordination and dynamic balance. It copies how you must adjust your weight while walking.
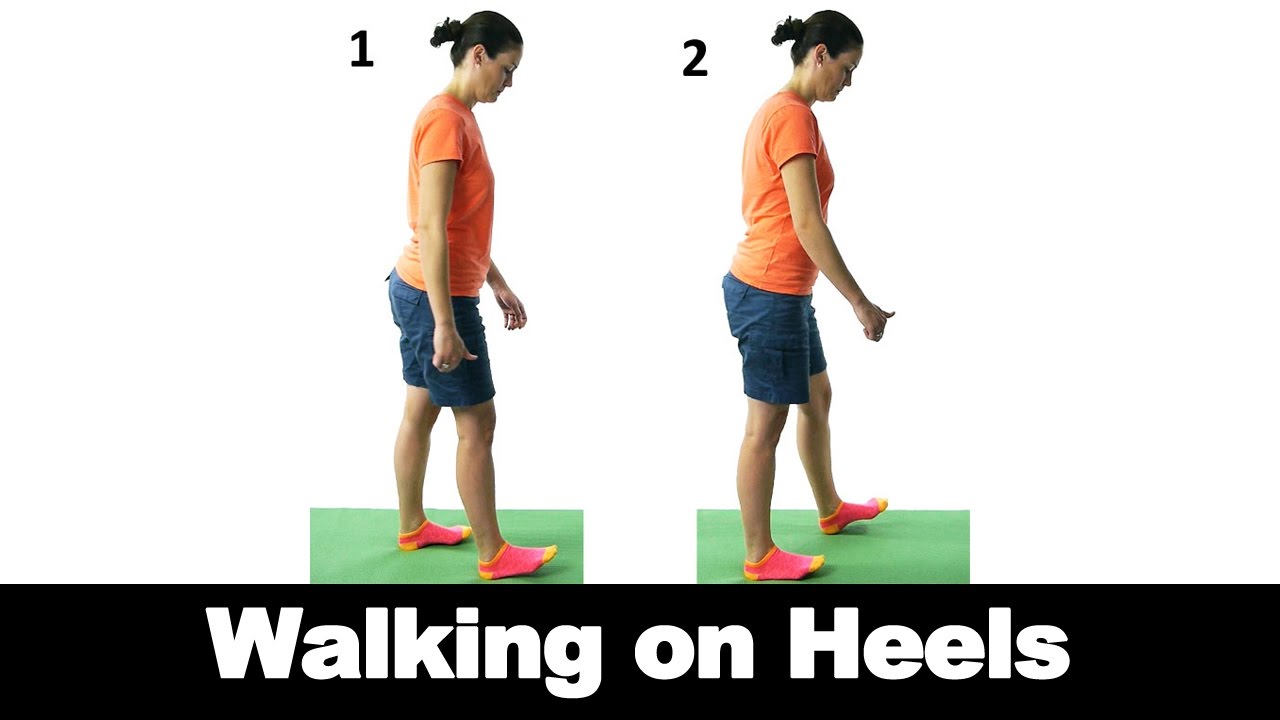
Step-by-Step:
- Stand tall near a wall or kitchen counter for support.
- Take a step forward with your right foot. Place your heel directly in front of your left toes.
- Take your next step with your left foot, placing your left heel directly in front of your right toes.
- Continue walking in a straight line for 20 steps.
Part 3: The Cool-Down (Movements 9-10)
9. Seated Hamstring Stretch
Why it helps: This stretches the large muscles on the back of your thigh. Tight hamstrings can affect your posture and how you walk.
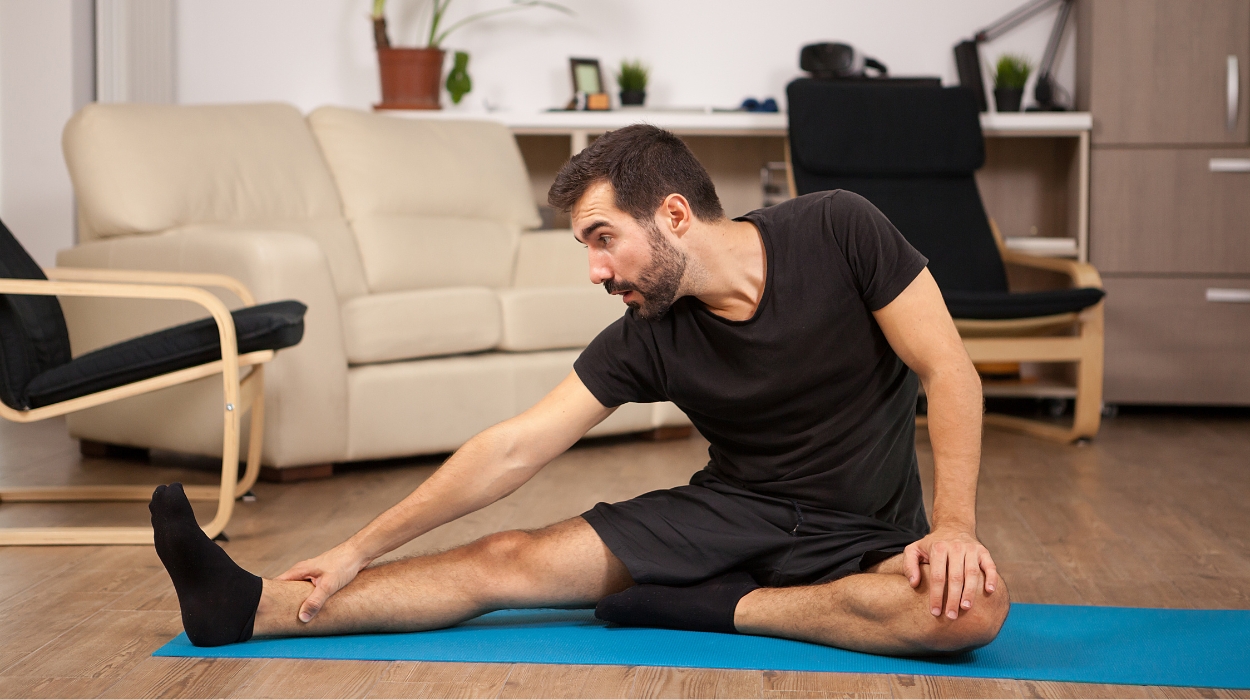
Step-by-Step:
- Sit toward the edge of your sturdy chair.
- Extend one leg straight out. Put your heel on the floor and point your toes up.
- Keep your other foot flat on the floor.
- Sit up tall. Place your hands on your other thigh for support.
- “Keep your back straight” and “keep your chest up”.
- Slowly lean forward from your hips, not your waist. Do not round your back.
- Hold this gentle stretch for 15 to 30 seconds. Do not bounce.
- Slowly sit up and switch legs.
Safety: “Stop doing an exercise if you have increased pain”.
10. Wall Push-Up
Why it helps: This is a safe way to build upper body and chest strength. This strength helps you push up from a chair or get up from the floor.
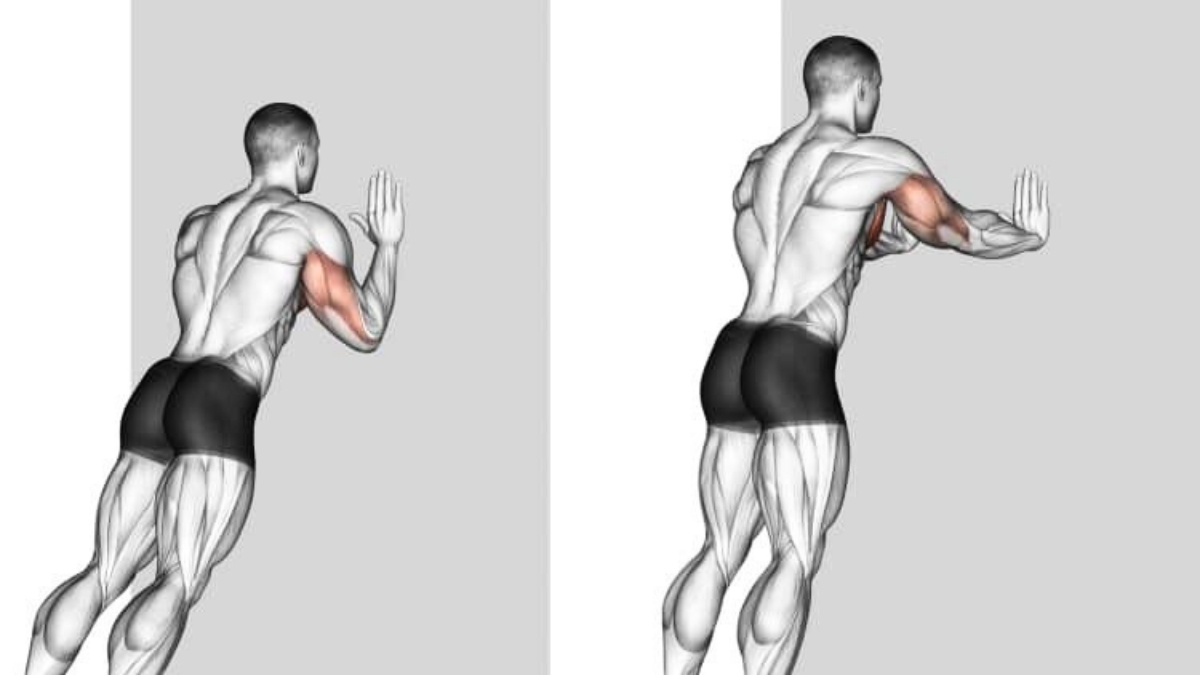
Step-by-Step:
- Stand facing a clear wall, about arm’s length away.
- Place your palms flat on the wall, shoulder-width apart and at shoulder height.
- Keep your back straight and your feet planted.
- Slowly bend your elbows, leaning your body toward the wall in a straight line.
- Pause when your nose is close to the wall.
- Gently push back to the starting position.
- Repeat 10 times.
Safety: Keep your back straight. Do not let your hips sag.
At the Last,
Staying active is your most powerful tool. It helps you maintain strength, guard stability, and protect your independence. The 10 simple movements in this guide are a daily plan to combat muscle loss and significantly reduce your risk of a fall.
You do not need to do all 10 movements tomorrow. The best way to begin is to start small.

Here is your action for today. Pick just one movement from the list, like the Seated Ankle Circles or the Sit-to-Stand. Try to do five repetitions. The most important step is the first one. Start today to build your senior strength and stability.
Build strength and stability with 10 simple daily movements for seniors. Prevent falls and stay active and independent.