
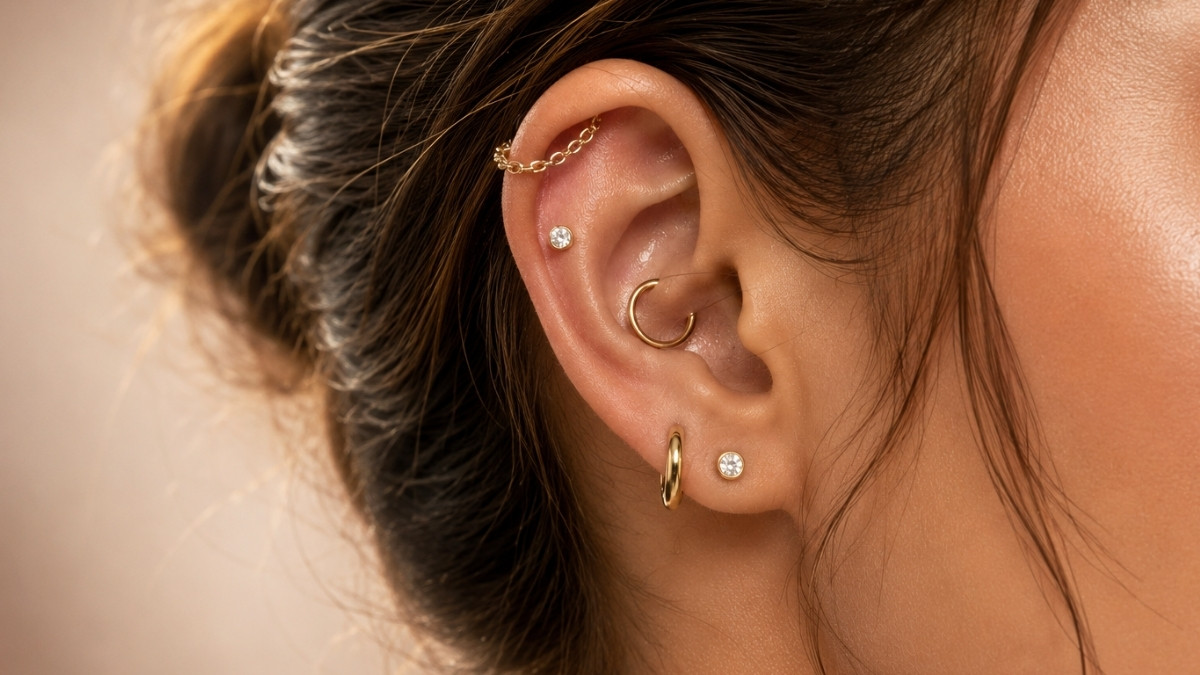
The conch sits right in the middle of the ear, wide and open, giving jewelry room to actually breathe. Unlike a single lobe stud, this spot can hold a cluster, a hoop, or even a small pendant, turning one piercing into a visible centerpiece.
It heals well for most people and pairs easily with helix, tragus, and lobe piercings already in place, making it a natural next step for anyone building out a curated ear.
This list gathers twenty conch styles, from tiny star studs to bold pave hoops, each showing how one piece of jewelry changes the whole look of an ear.
Save this Post for Later! ⬇️
1. Delicate Multi-Piercing Ear Curation with Single-Stone Conch
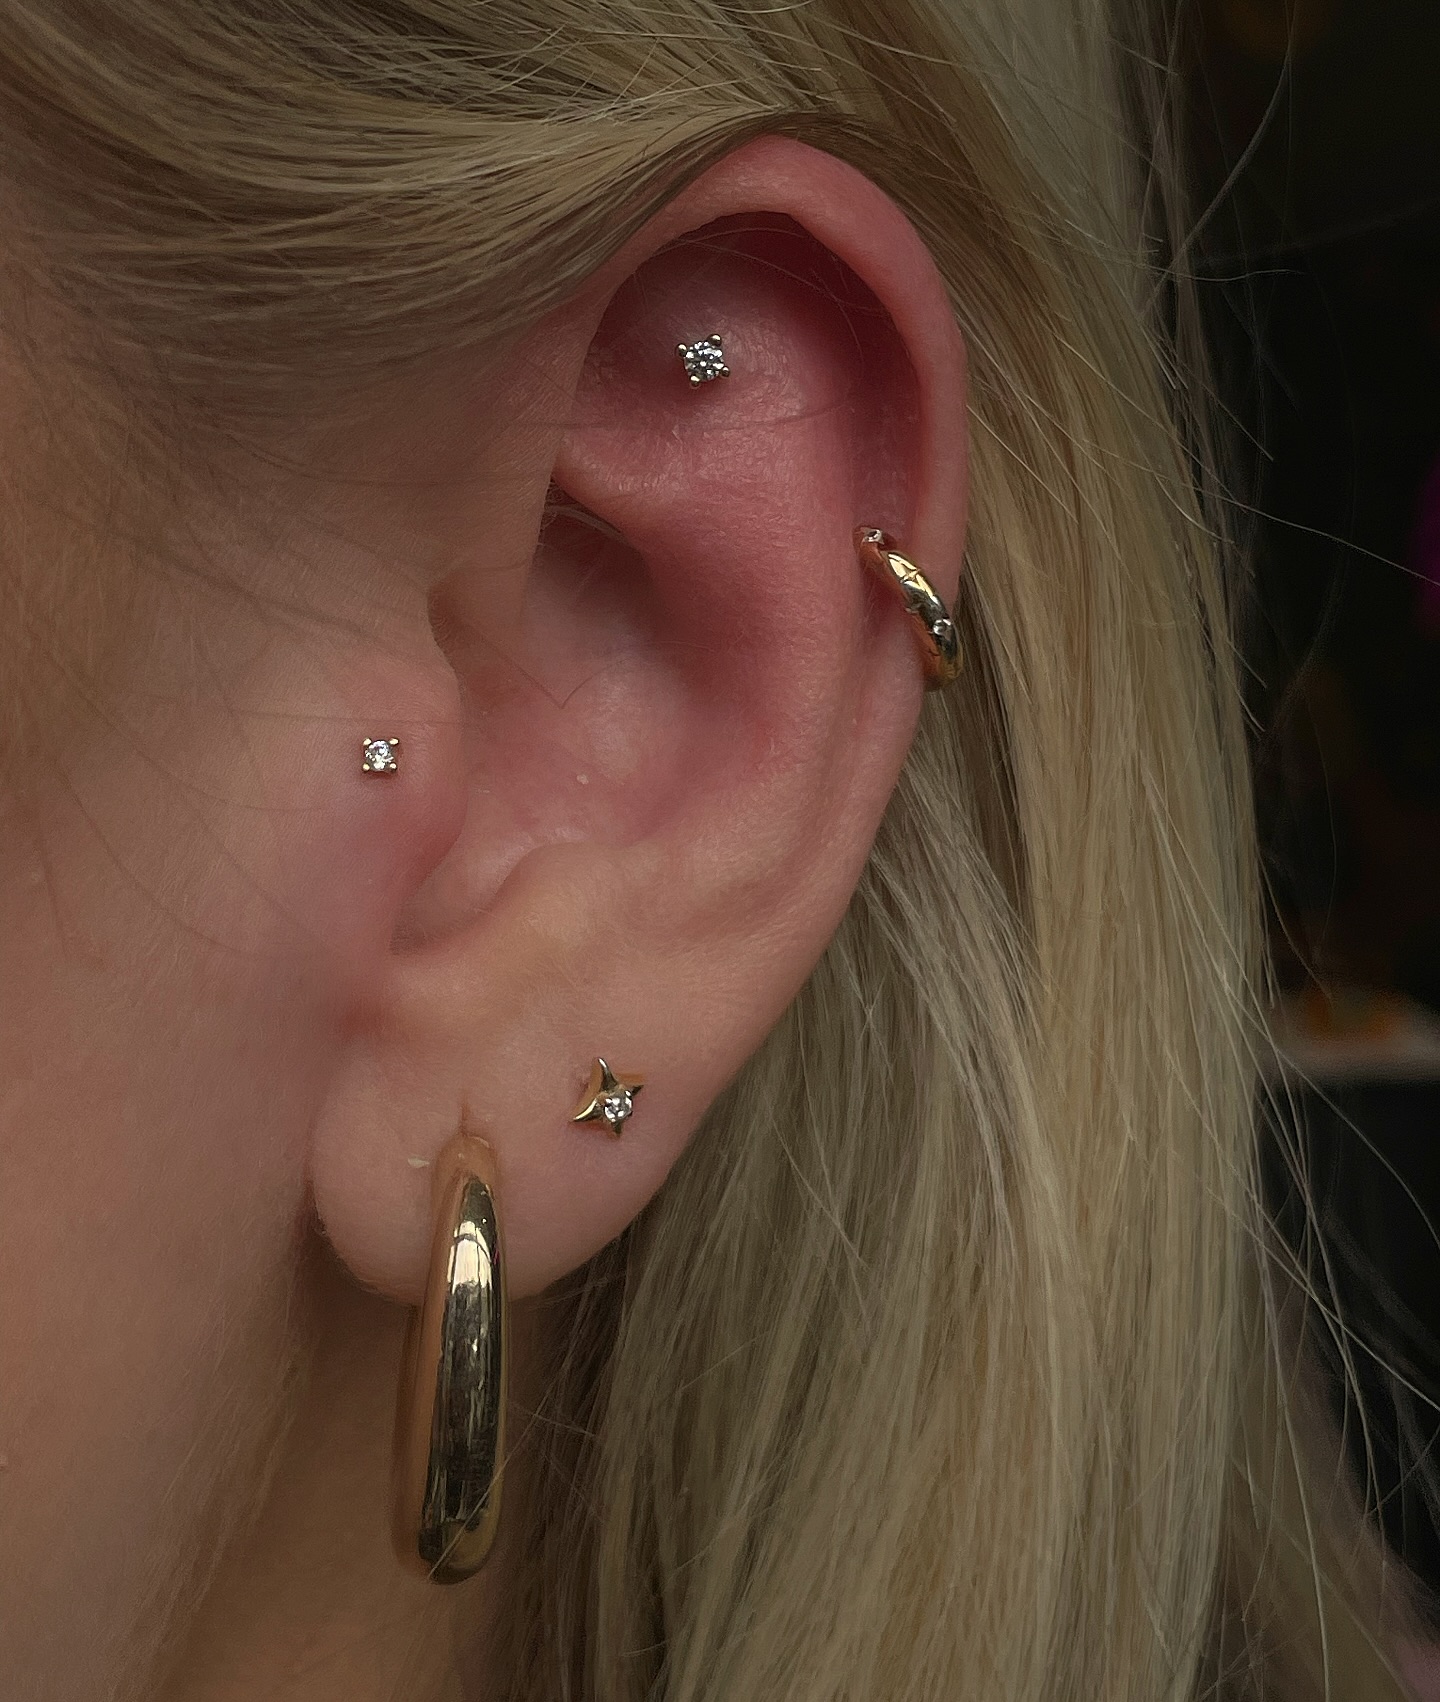
This ear showcases a curated constellation of fine gold pieces. A small single-diamond stud sits in the conch, paired with a matching stud in the tragus. Above, a slim gold huggie wraps the helix. Two pieces rest in the lobe: a tiny star stud and a bold chunky hoop.
Gold tones stay consistent across every piece, giving the arrangement a cohesive, polished look. Placement creates visual rhythm from top to bottom, guiding the eye through each curve of the ear. Mixed piercing sizes add texture without crowding the design, proving that subtlety and shine can coexist beautifully.
2. Botanical Gold Flower Stud Nestled in the Conch
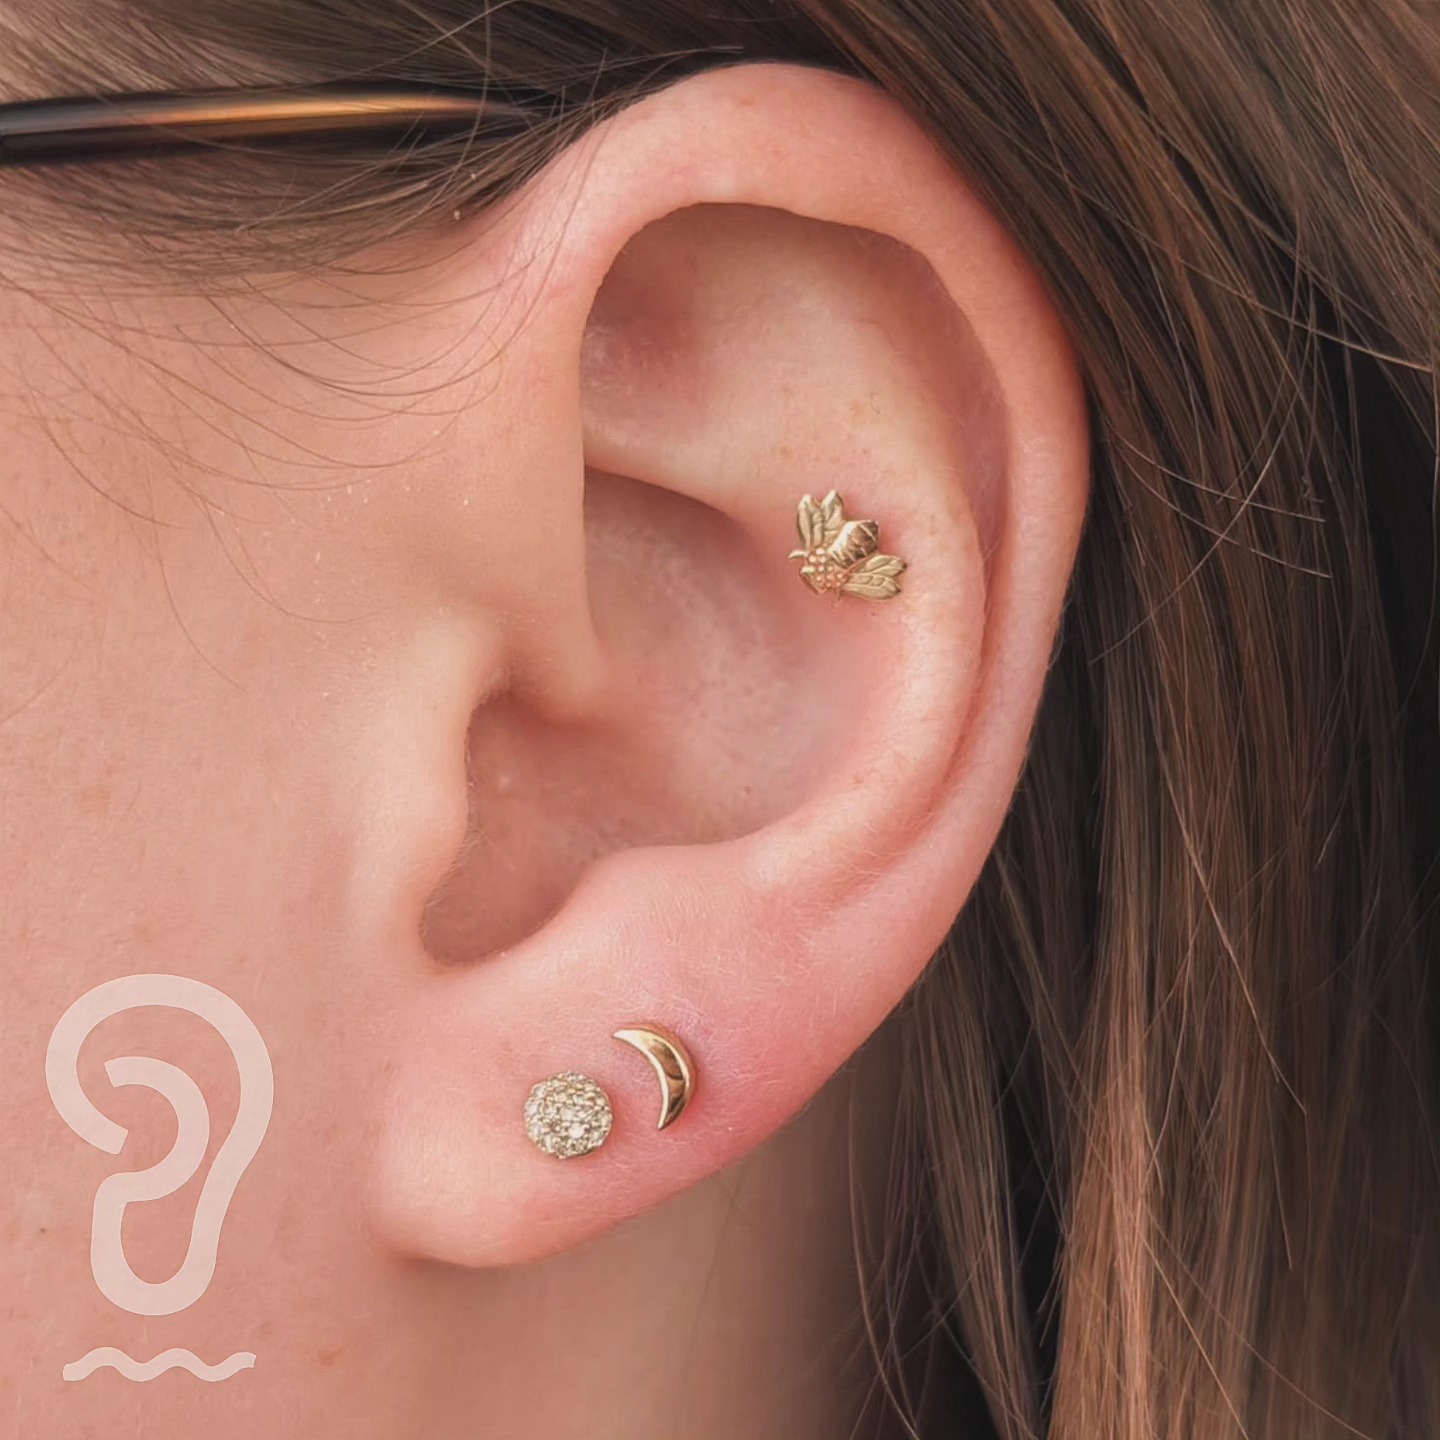
A tiny gold flower stud rests inside the conch, its petals catching soft light with quiet detail. Textured metalwork gives the piece a handcrafted feel rather than a mass-produced shine. Below it, the lobe carries a pave crystal stud alongside a small crescent moon charm, adding sparkle and whimsy.
Nature-inspired jewelry brings warmth to structured ear layouts like this one. Placement stays intentional, letting each piece breathe without competing for attention. Mixed textures, from smooth metal to gemstone pave, build depth across the ear. This combination suits anyone drawn to romantic, earthy accents paired with delicate shine.
3. Golden Star Cluster Ear Stack
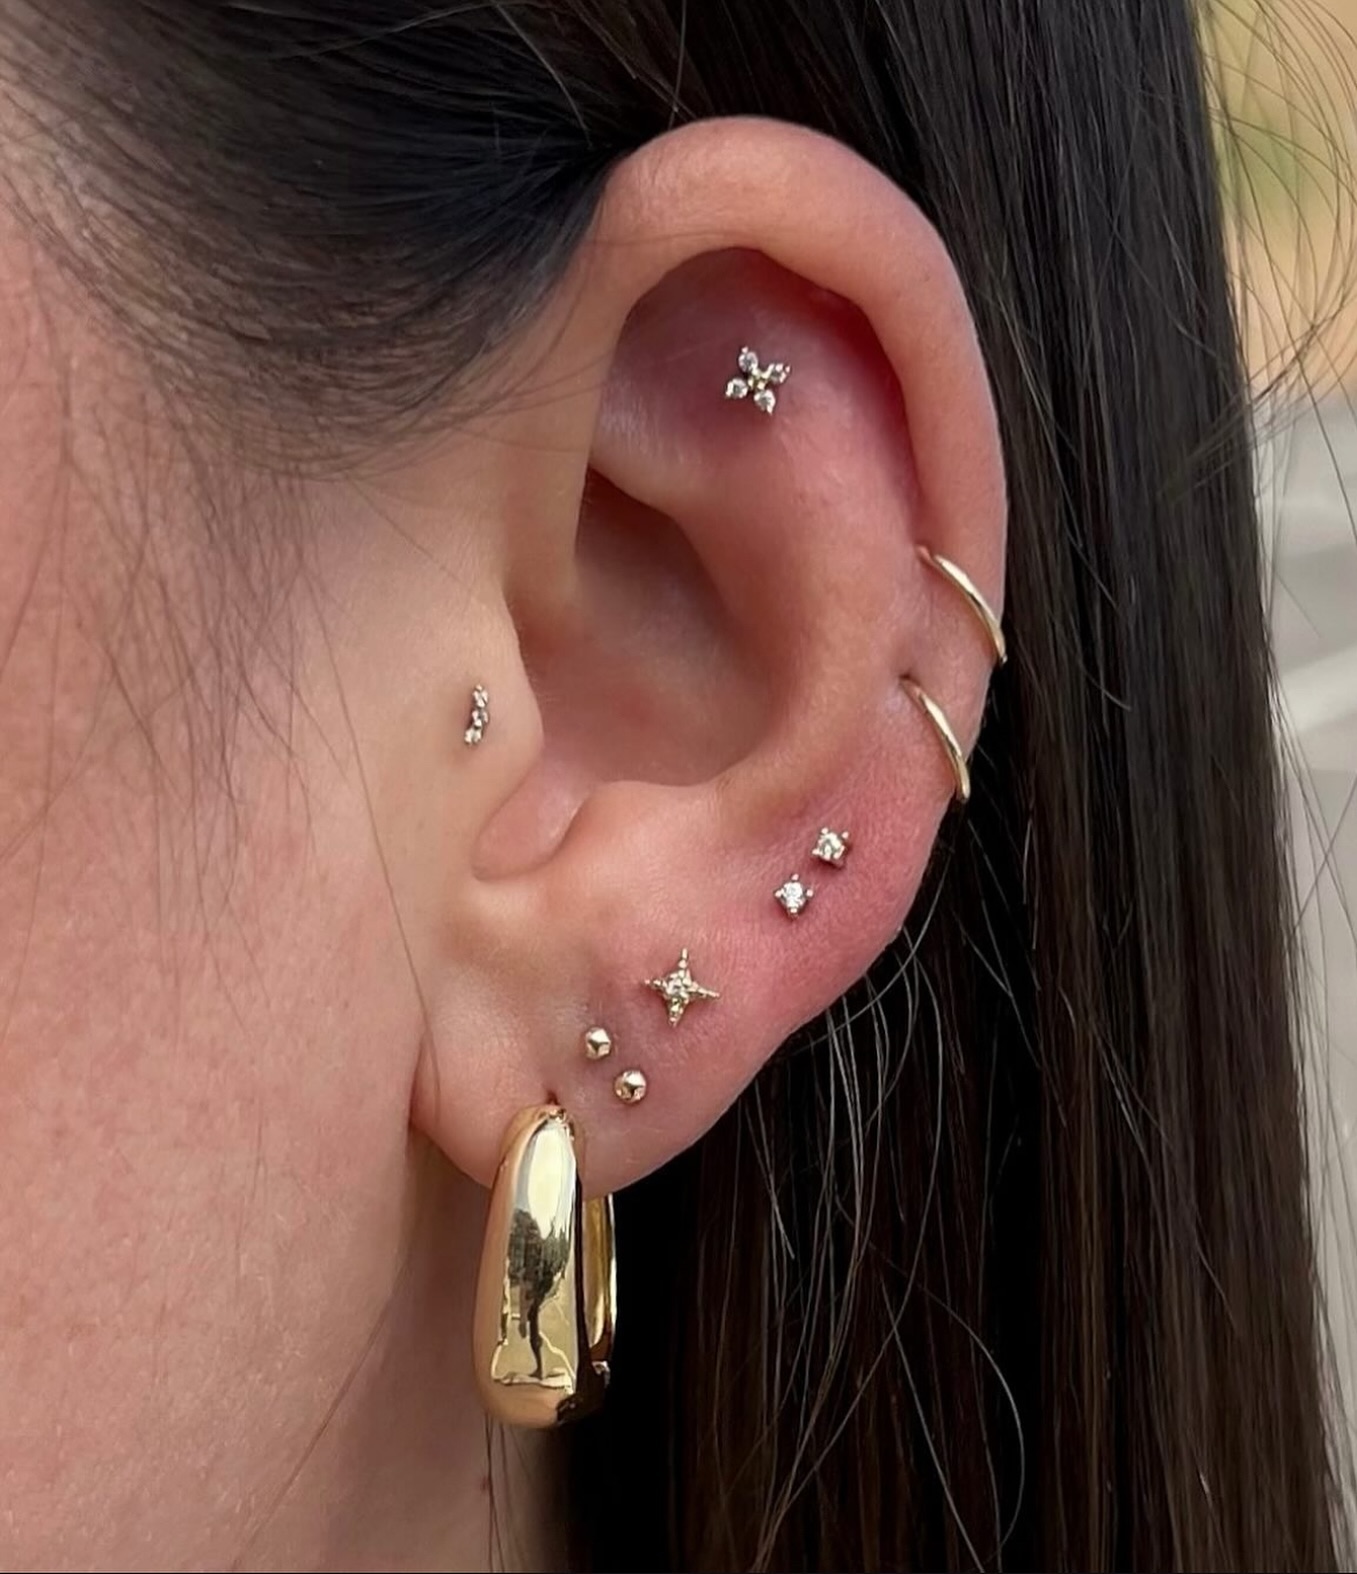
Gold studs trace this ear in a soft cluster. A tiny cross sits in the helix, and small dots follow the conch line.
Two thin hoops wrap the upper ear for gentle movement. This chunky gold hoop finishes the lobe below for everyday charm.
4. Golden Teardrop Rook with Triple Stone Cluster
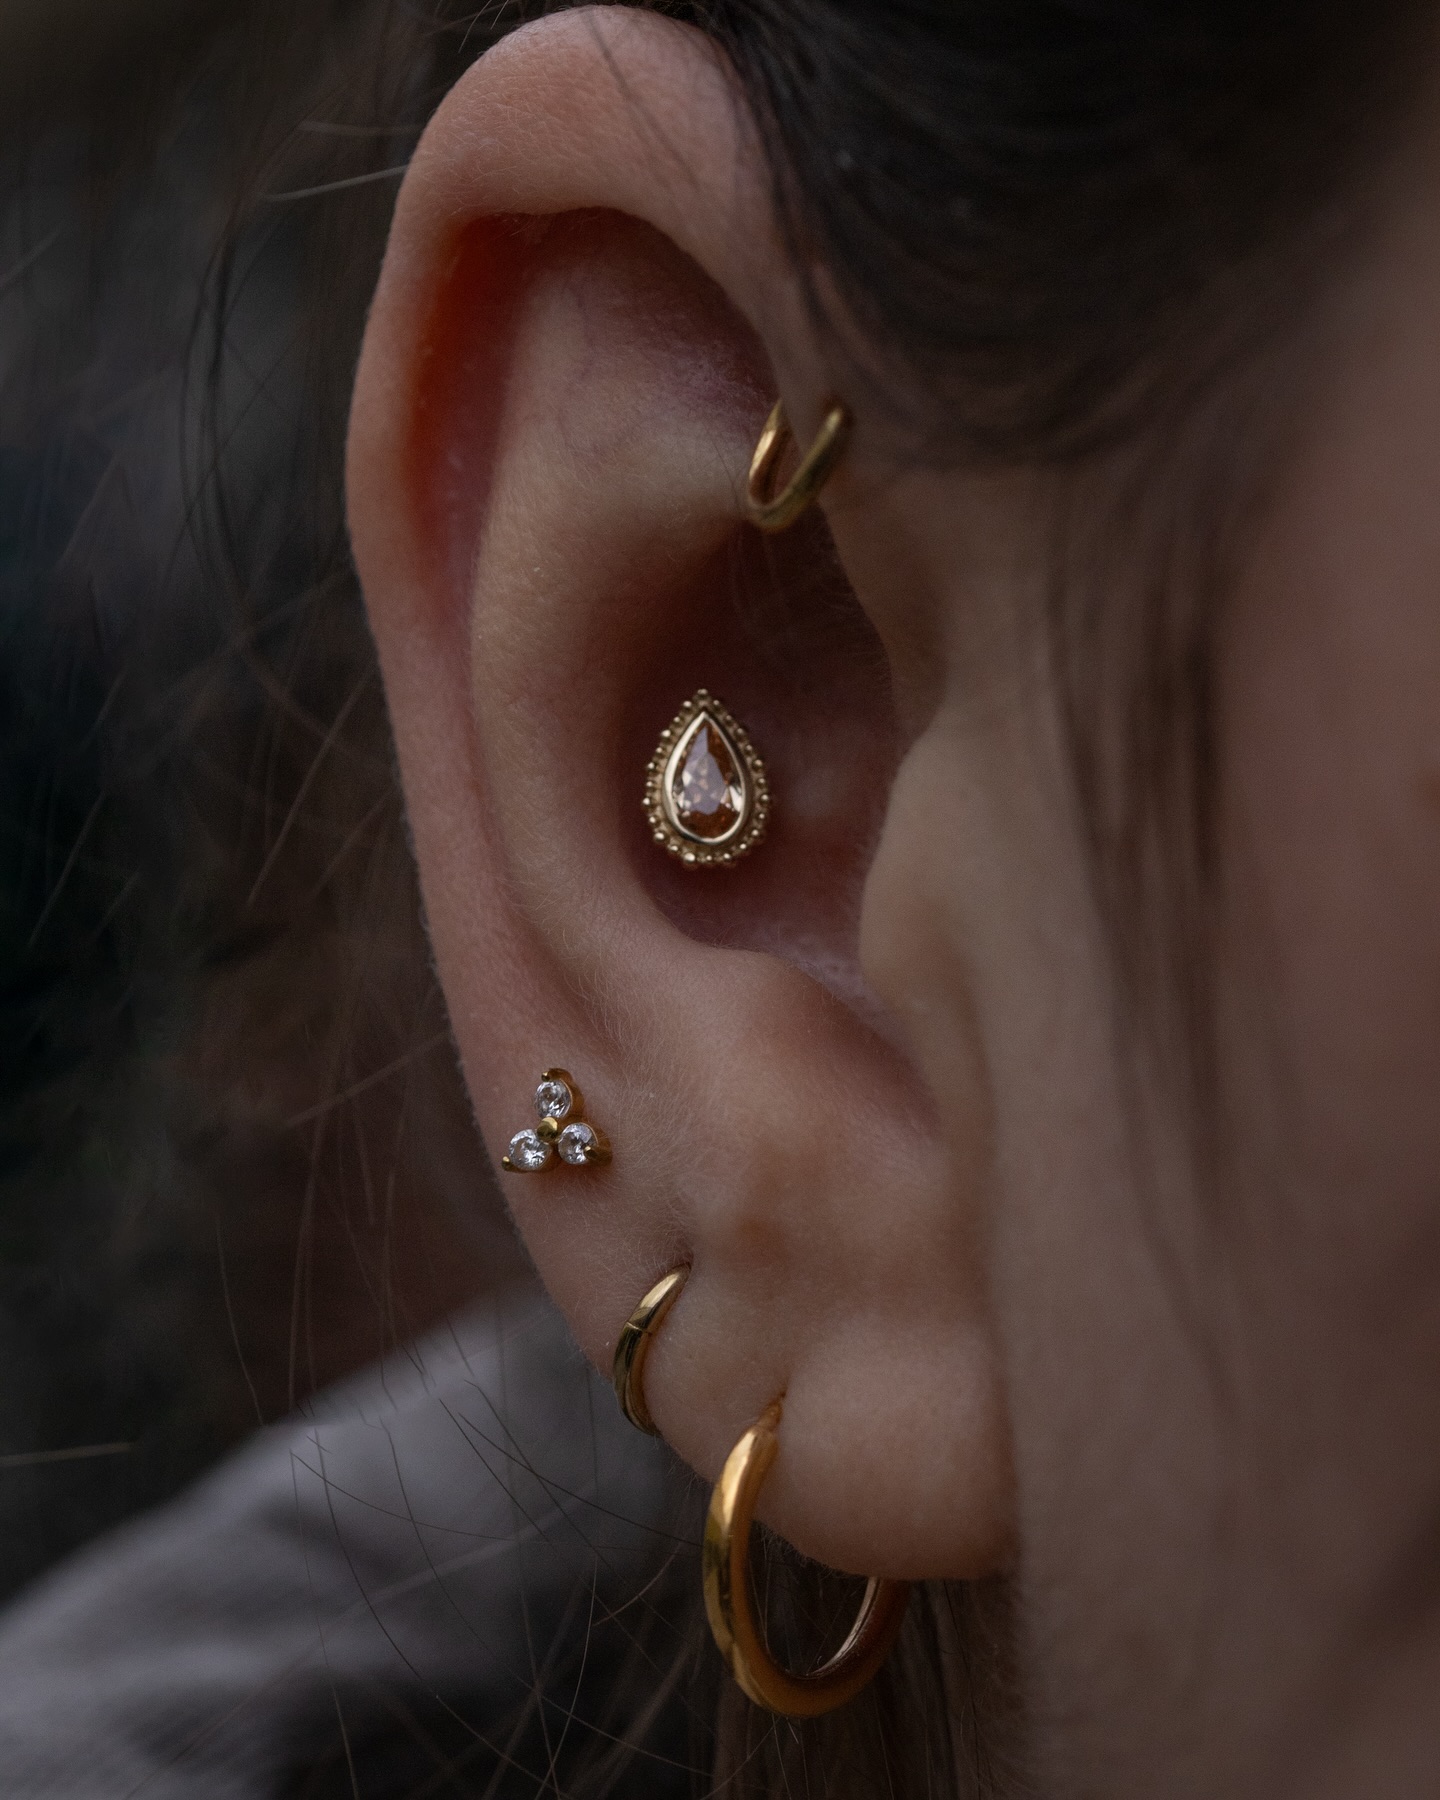
This ear shows five piercings working together in warm gold tones. A plain gold hoop sits on the rook, and a teardrop-shaped stud with a champagne stone and beaded edge fills the conch. Below that, a three-stone cluster stud adds sparkle near the tragus, while two gold hoops layer along the lobe.
Gold hardware against warm skin gives this combination a soft, romantic feel. The teardrop conch piece acts as the focal point, its antique beaded trim adding texture other studs lack. Simple hoops on the rook and lobe balance the sparkle without competing, making this a wearable set for anyone who likes gentle, feminine details.
5. Double Pave Ear Cuff with Evil Eye Charm
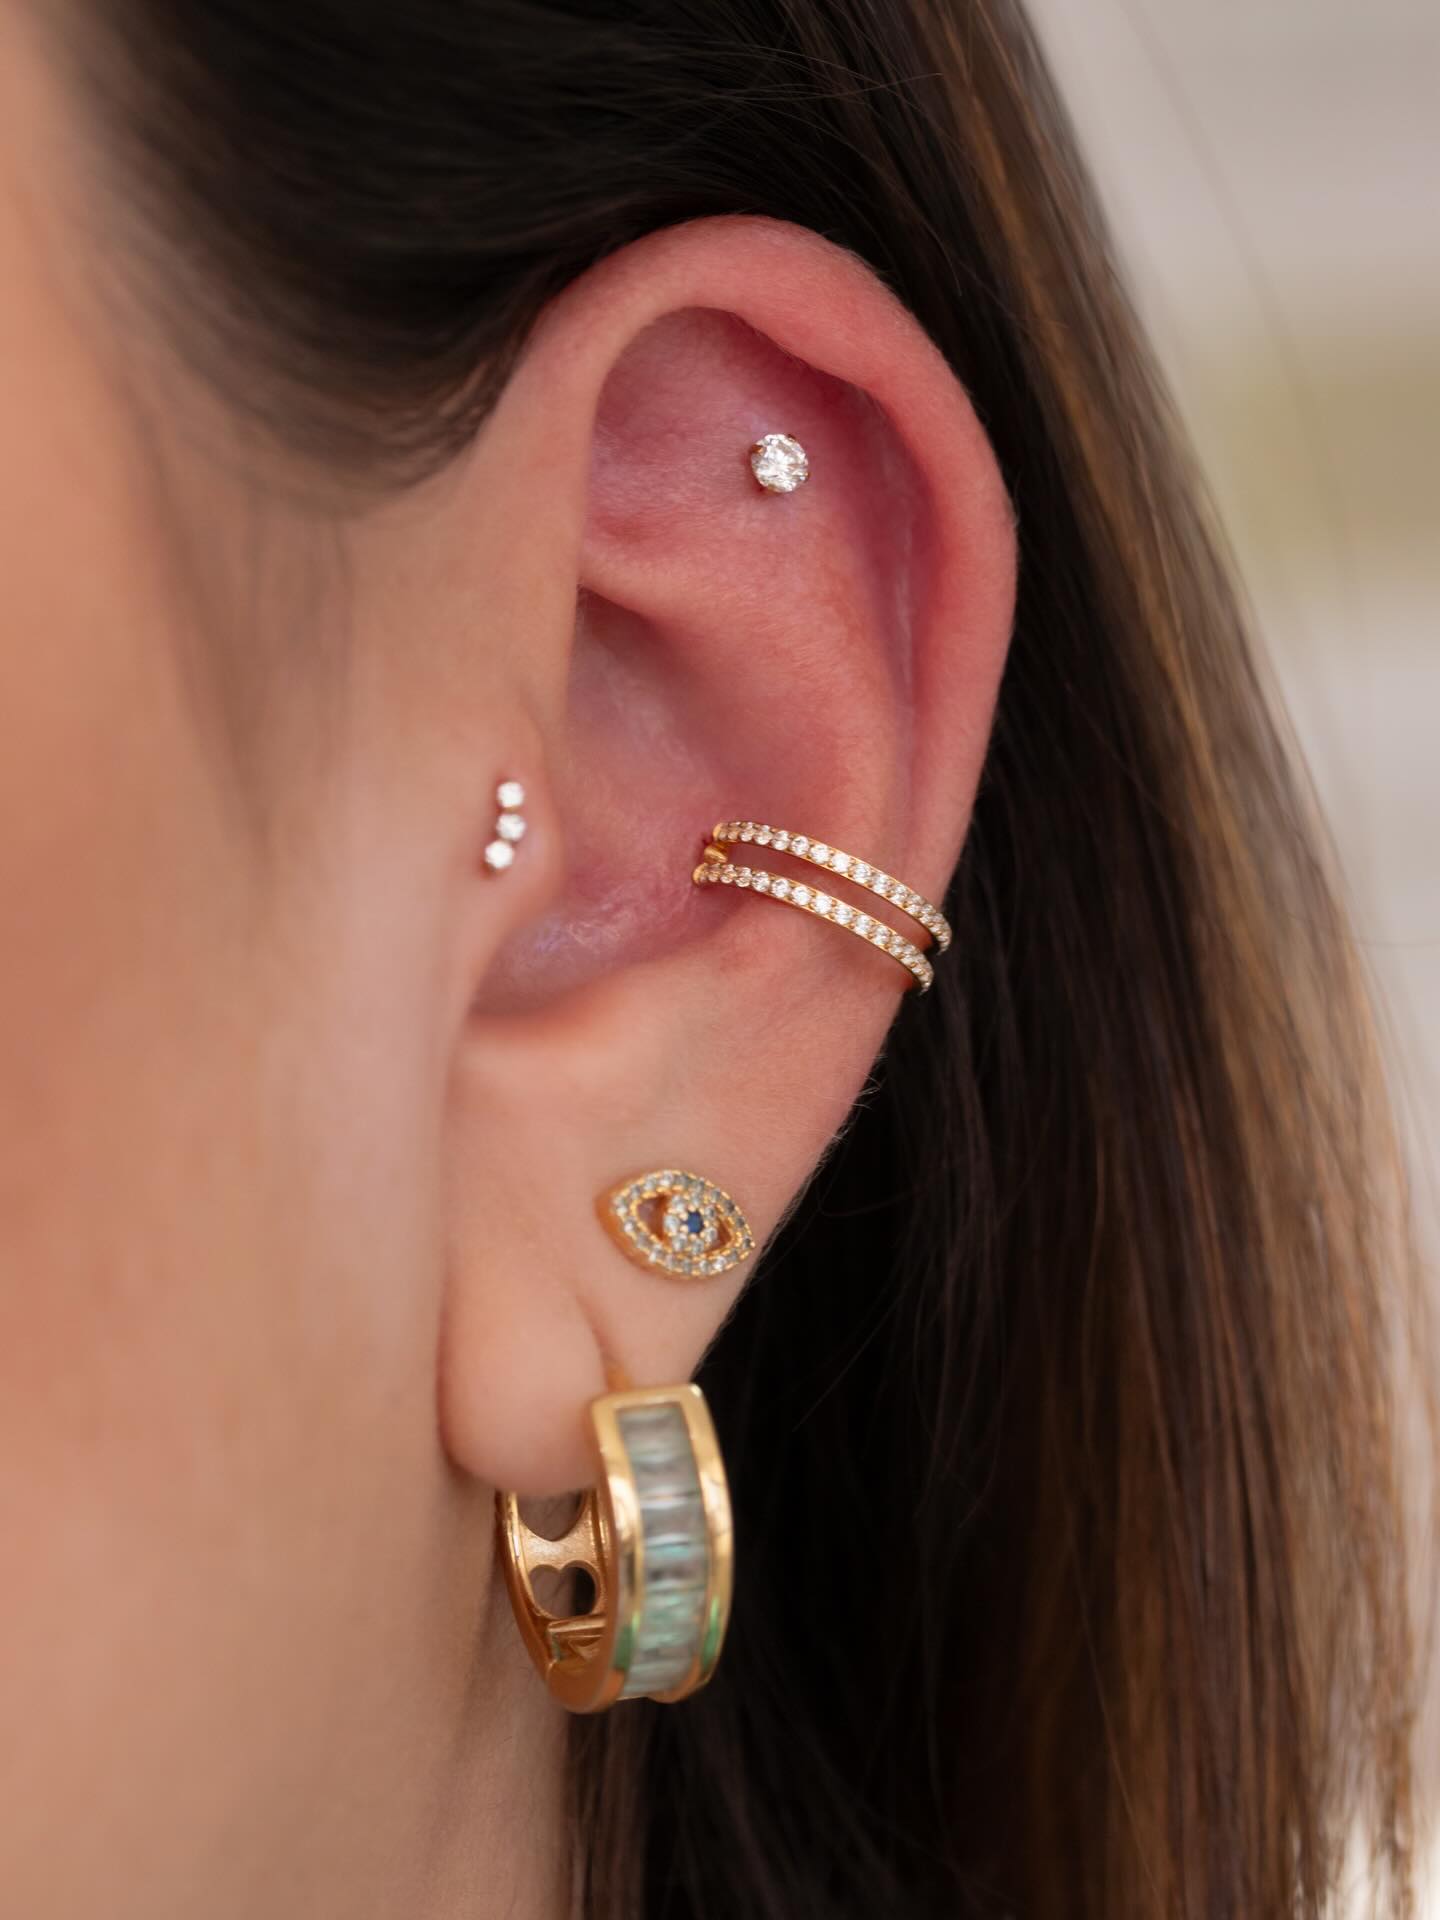
Six piercings layer together on this ear in gold and silver tones. A single cubic zirconia stud sits on the helix, and a two row pave ear cuff wraps the outer cartilage without a piercing needed. Two small studs stack along the lobe near an evil eye charm set with a sapphire center.
Two gold hoops finish the look, one plain and one lined with abalone shell inlay. This combination mixes fine jewelry sparkle with symbolic charm details, giving the ear a curated feel. The cuff adds volume without extra piercings, making it a gentle option for anyone who wants a fuller look with fewer holes.
6. Twin Diamond Conch with Gold Hoop Layers
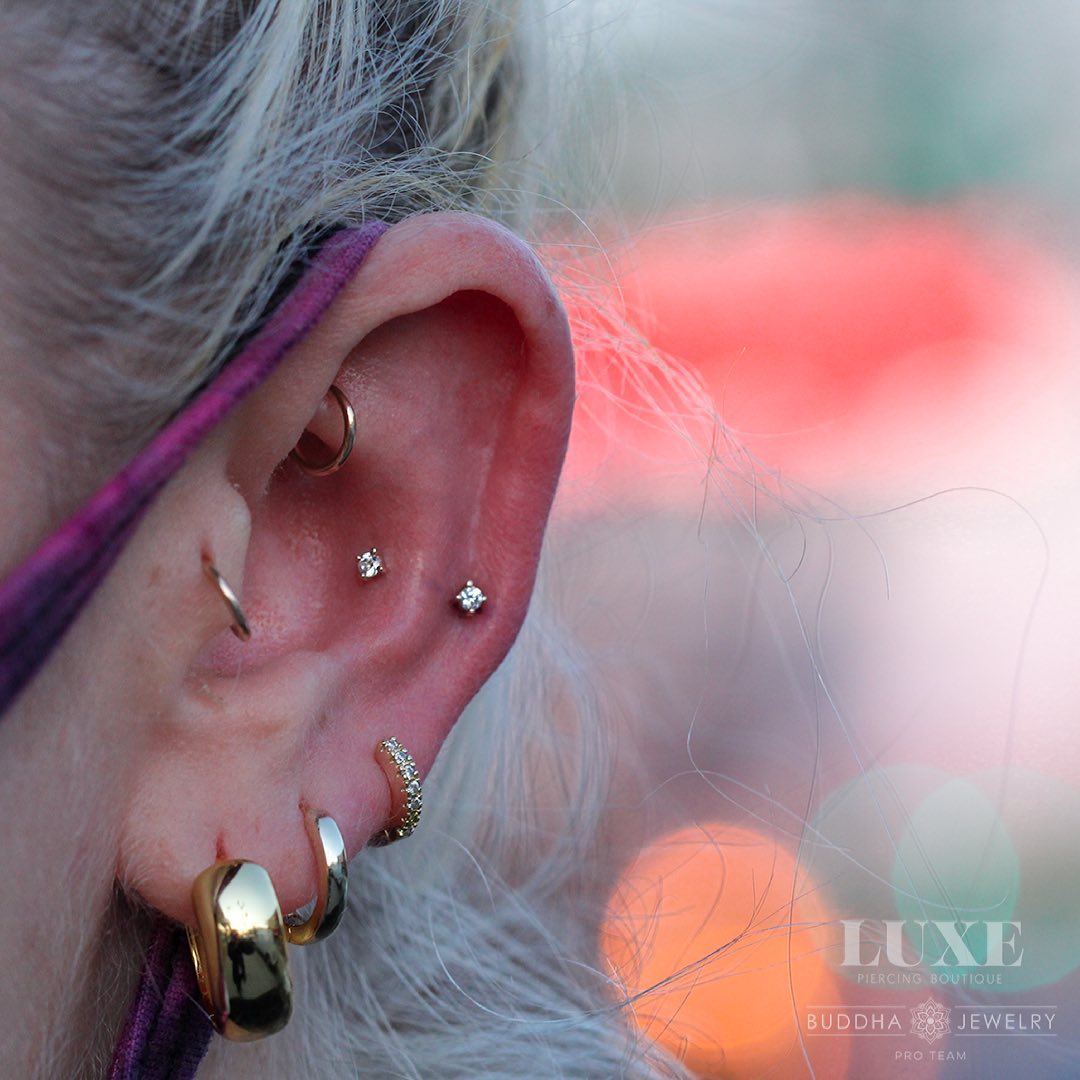
Seven piercings fill this ear in a mix of gold hoops and delicate studs. A slim gold ring circles the daith, and a thin hoop sits at the tragus. Two small diamond studs rest side by side in the conch, creating a matched pair look near the ear canal.
Lobe piercings carry three gold hoops, one plain, one twisted, and one lined with tiny pave stones. Colors stay warm and consistent throughout, giving the whole arrangement a cohesive gold finish. This setup shows how paired conch studs can balance a busy lobe, offering symmetry among the mix of hoop styles and thickness.
7. Silver Star and Cluster Conch Duo
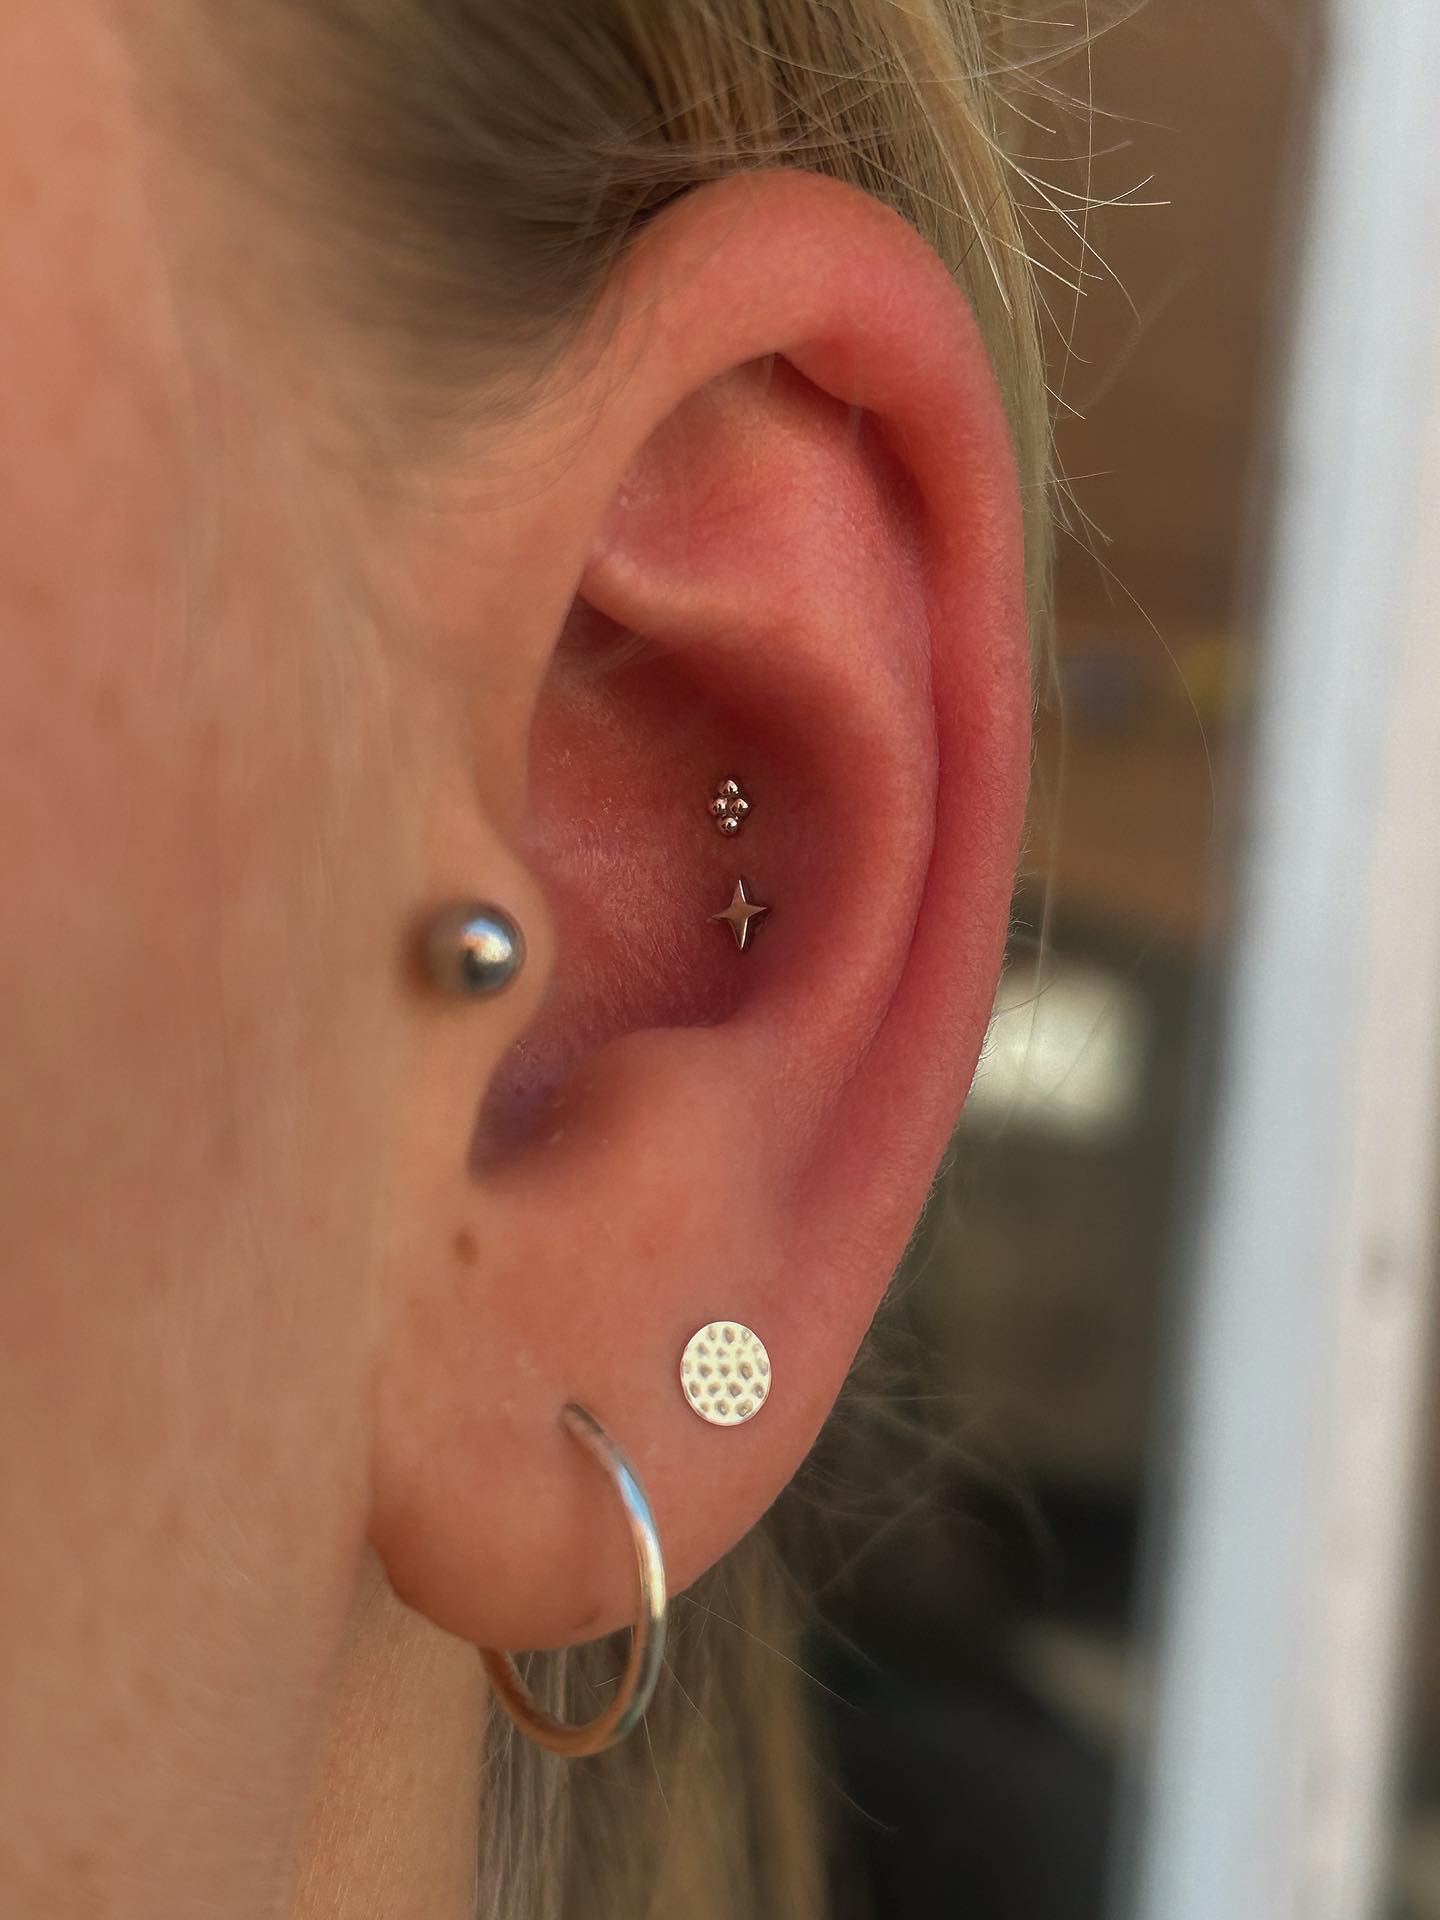
Silver tones cover this ear from top to bottom in a soft, understated set. A four dot cluster stud sits above a small star shaped stud, both placed inside the conch for a celestial touch. Below, a textured circle stud and a plain silver hoop finish the lobe.
Metal choice stays silver throughout, keeping the whole look calm and matched. The star stud brings a playful element into the conch area, something rarely seen in typical cartilage sets. Placement of the two conch pieces close together creates a mini constellation effect, offering a soft alternative to gold and diamond combinations.
8. Gold Marquise Cluster Conch with Layered Lobe
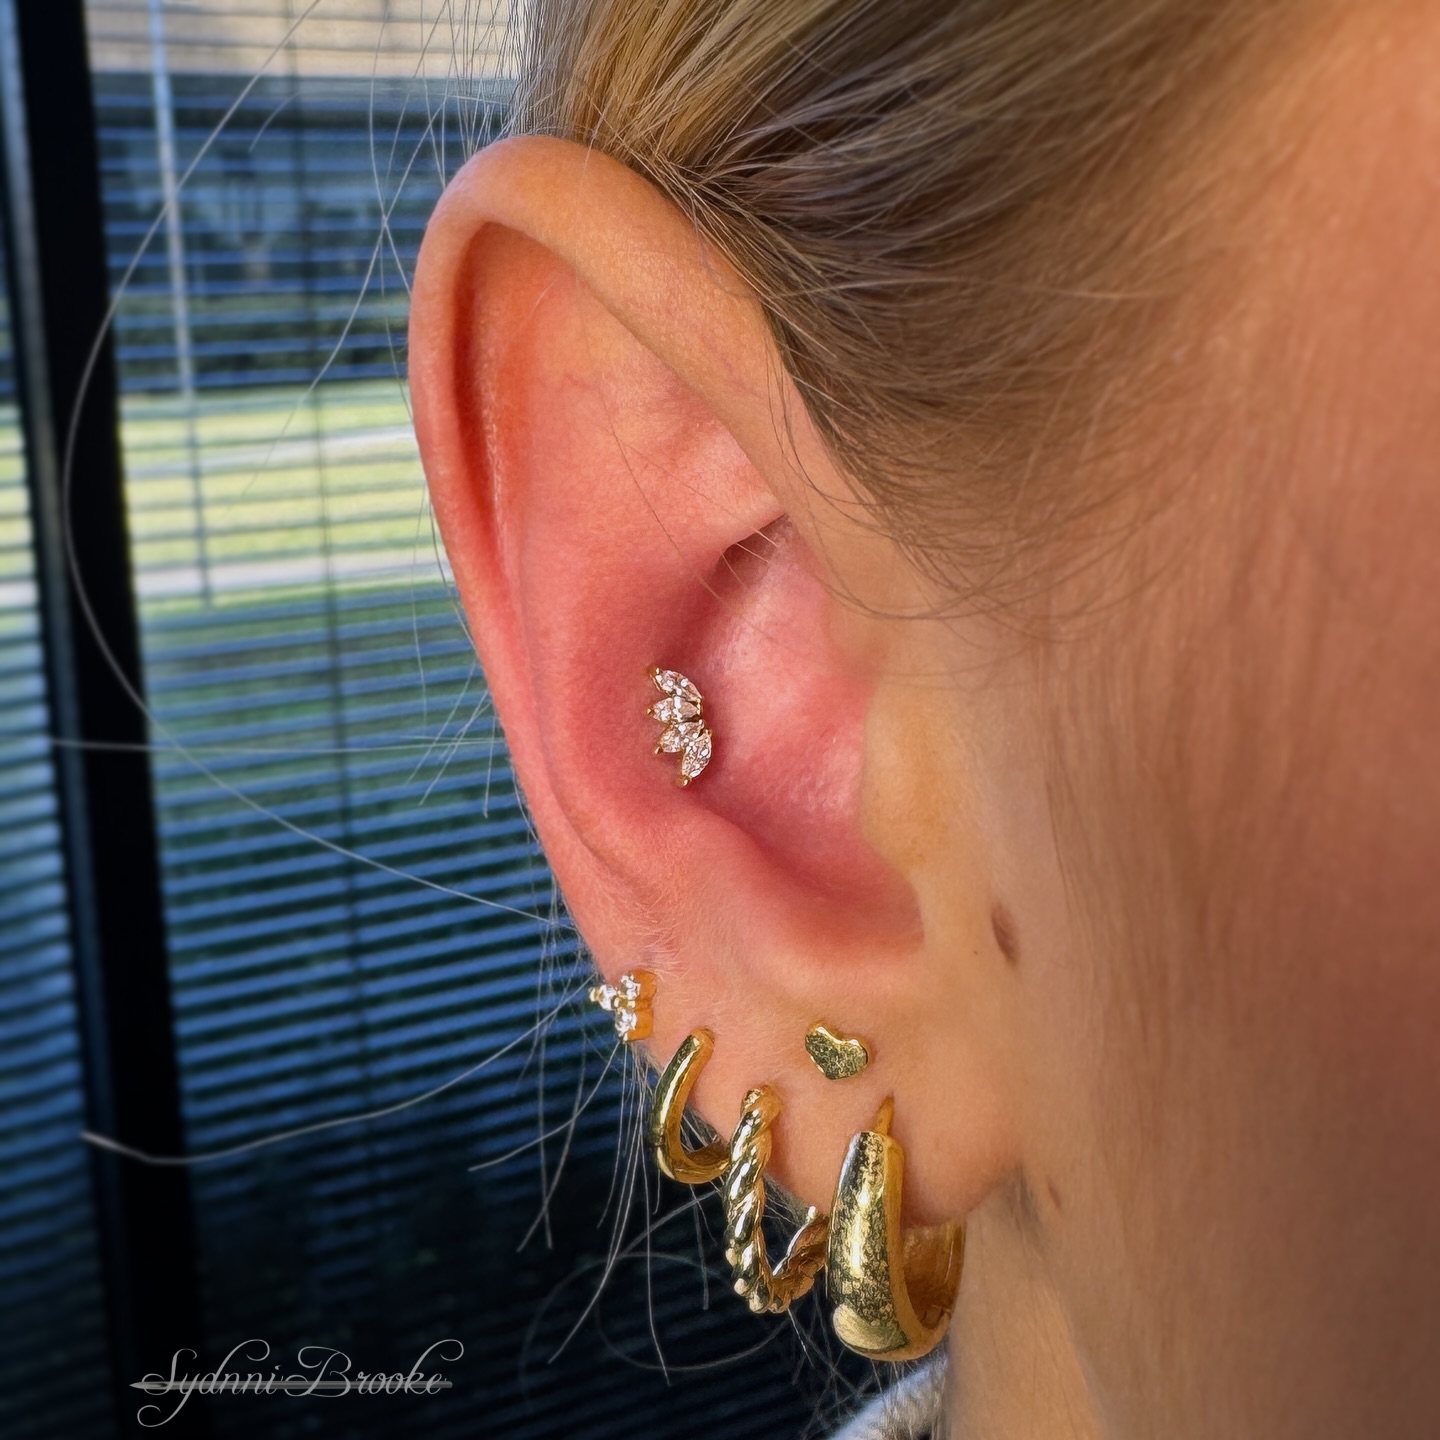
Six piercings sit together on this ear in warm gold shades. A leaf shaped cluster stud with marquise cut stones fills the conch, its curved design mimicking a small flower. Nearby, the lobe holds a tiny stone stud, a gold heart stud, and three textured hoops stacked in size.
Hoops range from a twisted rope design to a smooth polished band, giving the lower ear some dimension. The conch stud stands out as the softest, most floral piece in this set, matching the aesthetic well. Mixed hoop textures against small delicate studs keep this combination interesting without looking cluttered or overdone.
9. Celestial Chain Cartilage with Moon and Star Studs
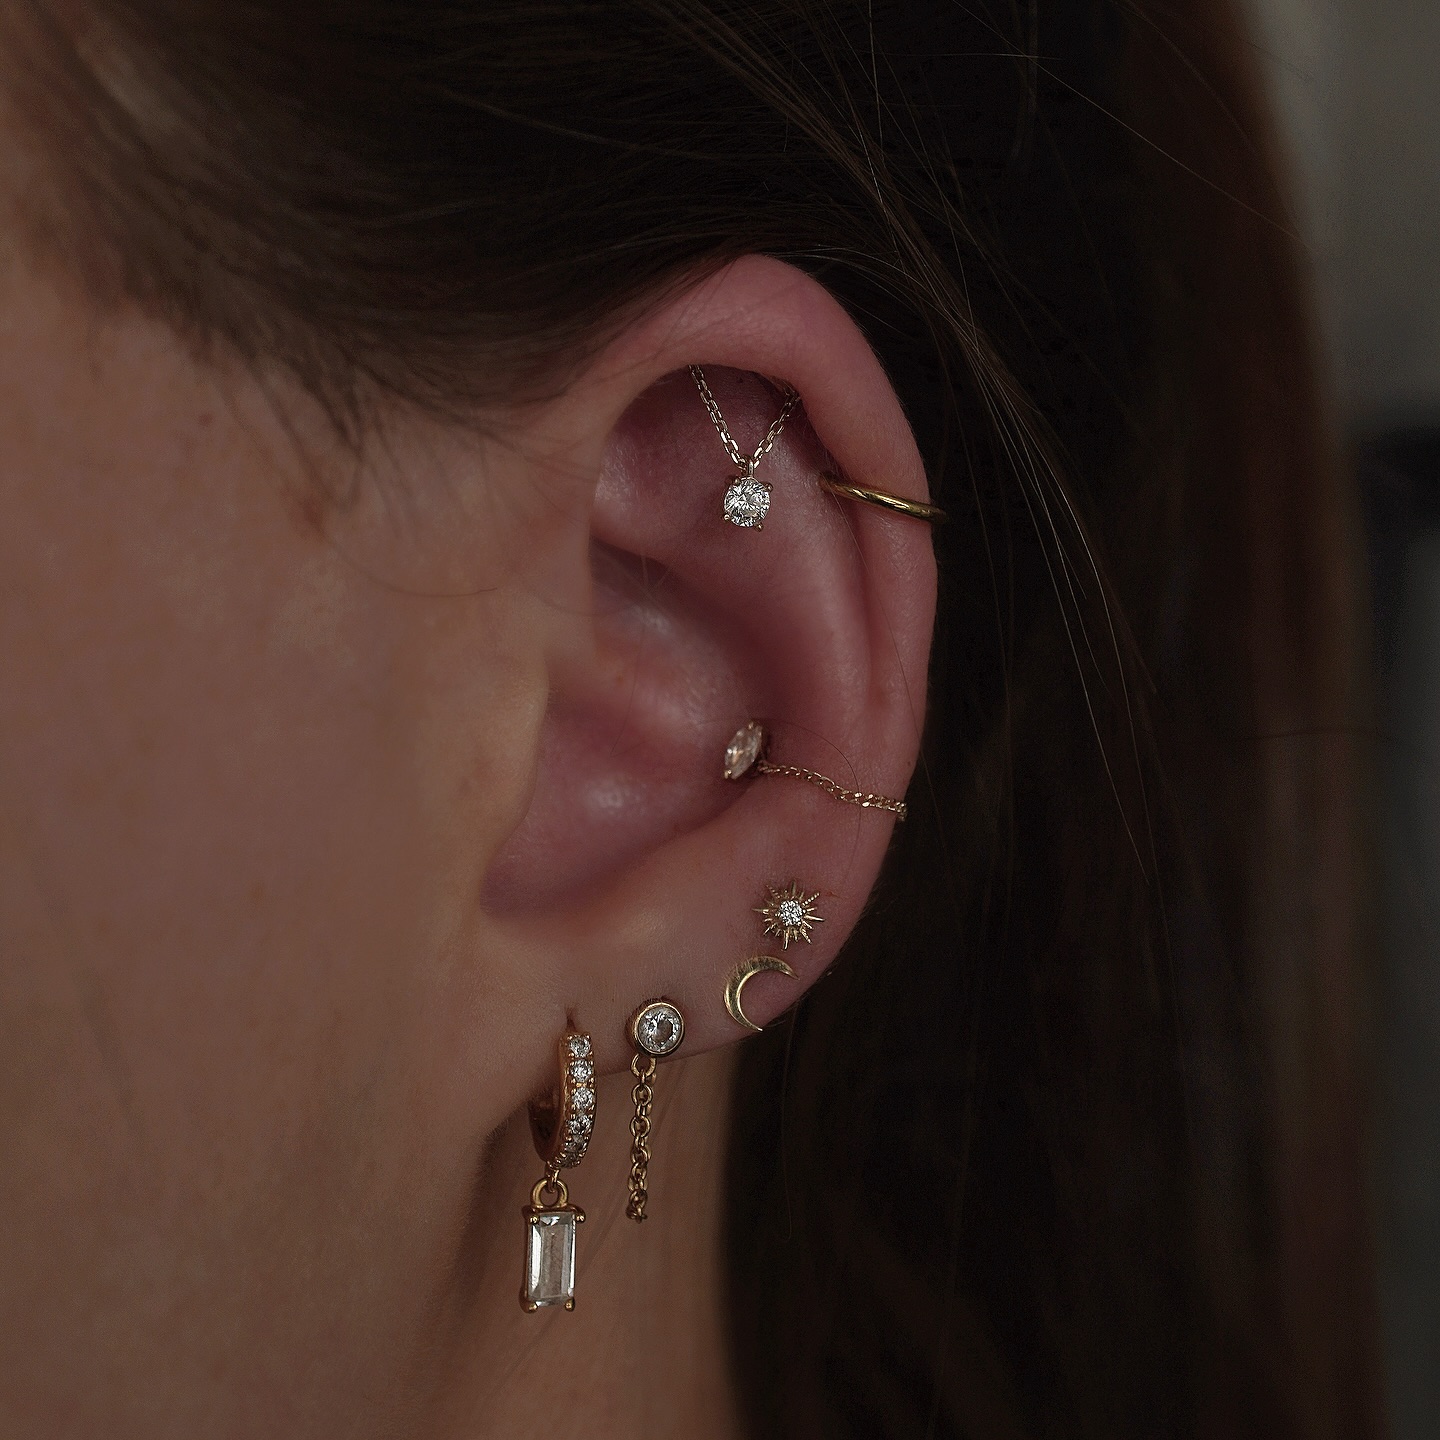
Eight pieces cover this ear in a dreamy gold arrangement. A chain drapes from the helix down to the conch, connecting a round stone stud to a marquise stone below it. Nearby, a tiny sunburst stud sits above a crescent moon charm, adding a celestial theme to the mix.
Lobe jewelry includes a pave hoop with a baguette drop, plus a bezel stud trailing its own thin chain. Chains linking two piercings give this ear a connected, storybook quality other setups lack. Moon and star charms bring whimsy into the design, making this arrangement feel dreamy and suited for those drawn to celestial motifs.
10. Marquise Petal Cluster Conch with Pave Hoop Trio
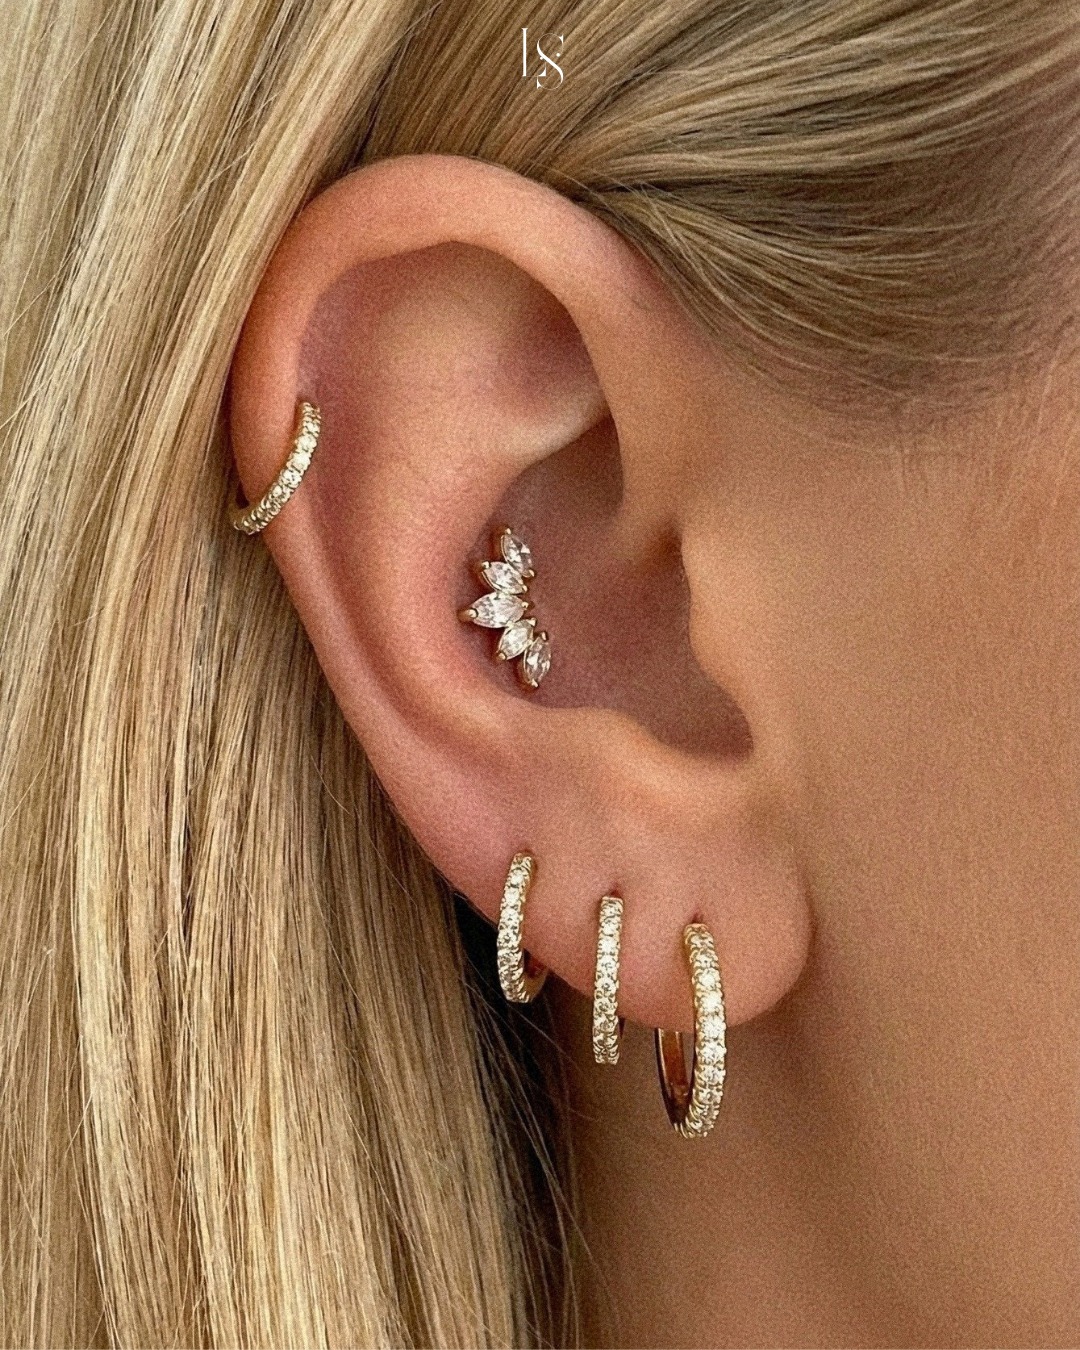
Five gold pieces come together on this ear in a clean, matching set. A pave cuff sits along the helix without a piercing, and a five stone marquise cluster fills the conch in a shape close to a small blooming flower. Petals of clear stones fan outward, giving the placement real floral character.
Three pave hoops line the lobe in graduated sizes, each catching light along its curved band. Sparkle stays consistent from top to bottom, tying the whole ear together. That marquise cluster earns its place as the star piece here, showing exactly how a conch stud can double as a flower inspired accent.
11. Golden Star Conch with Pave Rook Hoop
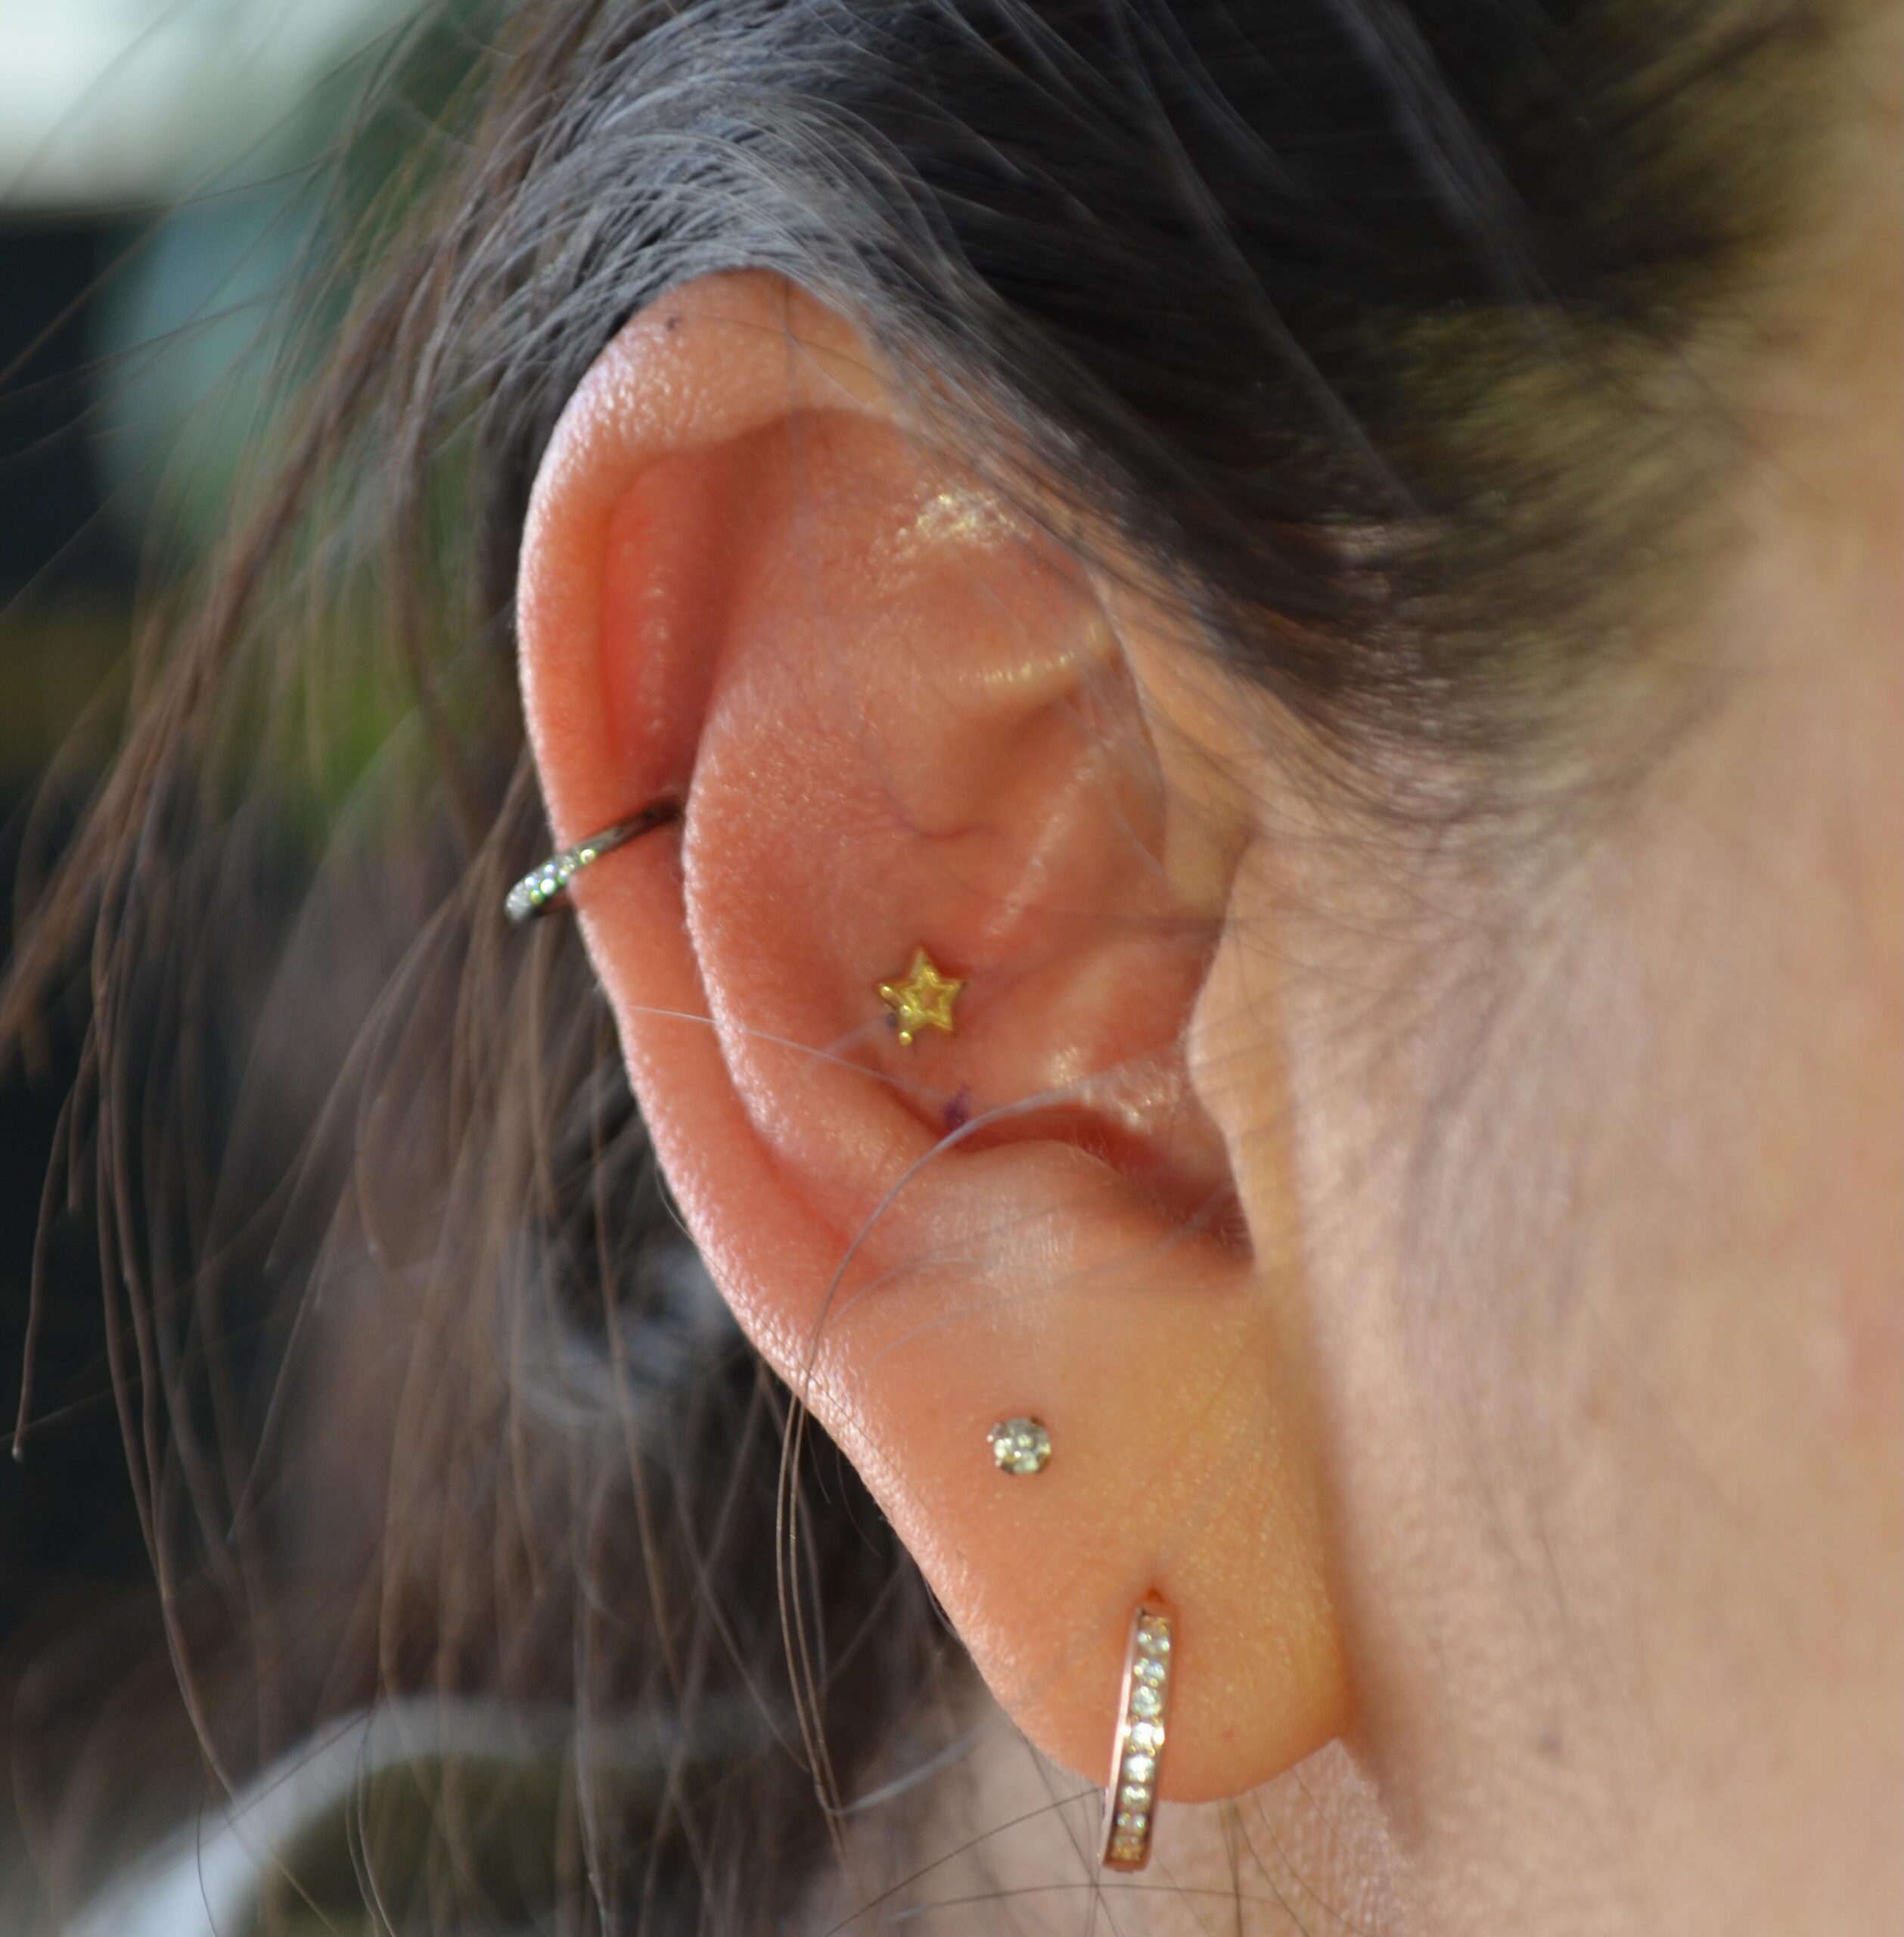
Three piercings sit here in a mix of gold and silver hardware. A small pave hoop with tiny colored stones wraps the rook, and a gold star shaped stud rests inside the conch, catching light from above. The star piece stands slightly apart from the other jewelry, giving the ear a whimsical focal point.
Lobe piercings include a small round stone stud and a pave hoop with clear stones lining its band. Colors mix gold and silver here, a departure from the single tone sets shown before. The star stud adds a charming, celestial detail to the conch, proving small playful shapes can carry an entire piercing arrangement.
12. Butterfly Helix with Marquise Cluster Conch
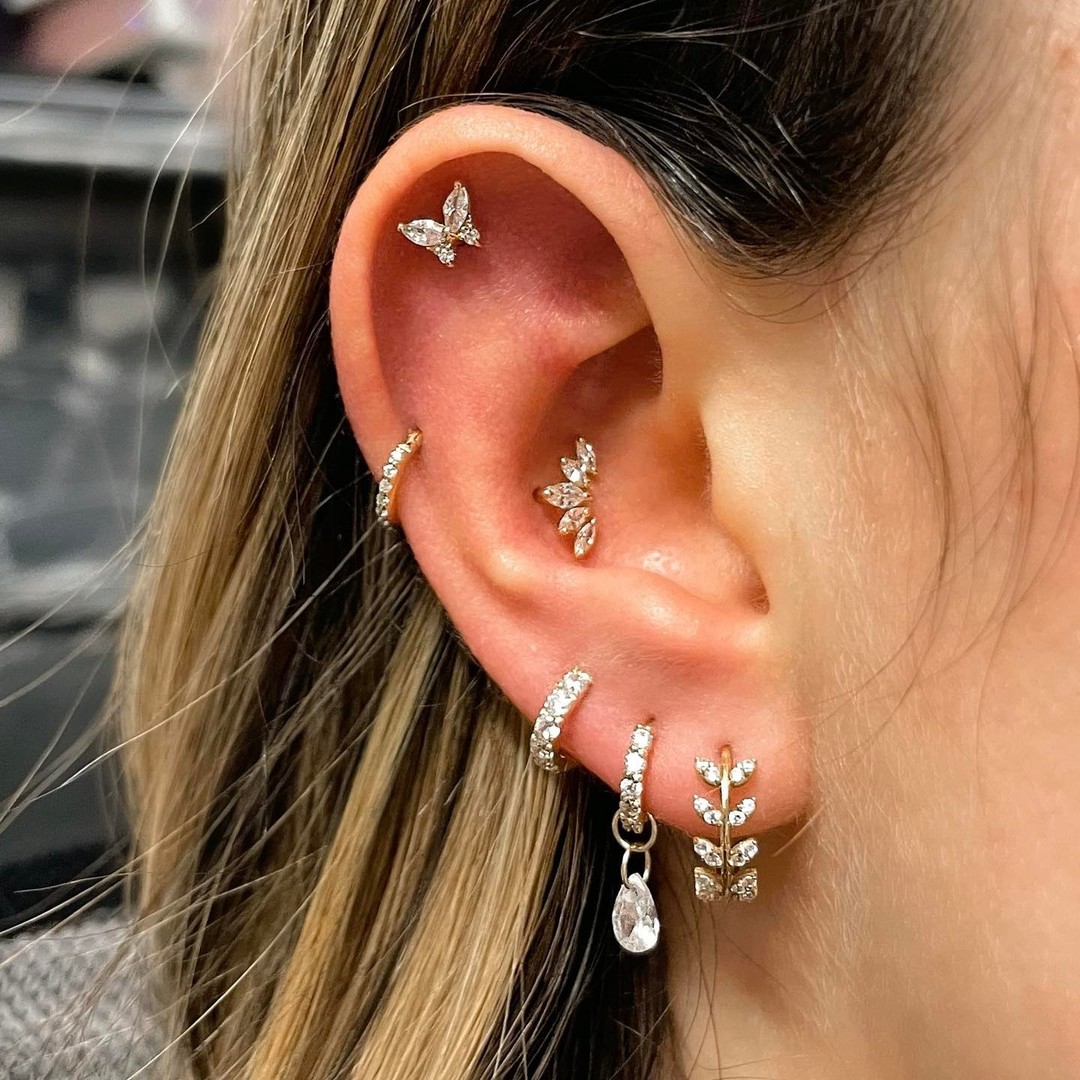
Six pieces fill this ear in bright, sparkling silver tones. A butterfly shaped stud with marquise wings rests on the helix, and a matching marquise cluster sits inside the conch below it. Small pave hoops line the tragus and lobe, keeping the sparkle consistent from top to bottom.
Nature themes carry through this set, from the butterfly stud to a vine shaped hoop with leaf details near the lobe. A teardrop charm dangles from one hoop, adding movement to the arrangement. Two floral inspired cluster pieces mirror each other, tying the whole ear together with a cohesive garden inspired story.
13. Minimalist Gold Disc with Double Hoop Helix
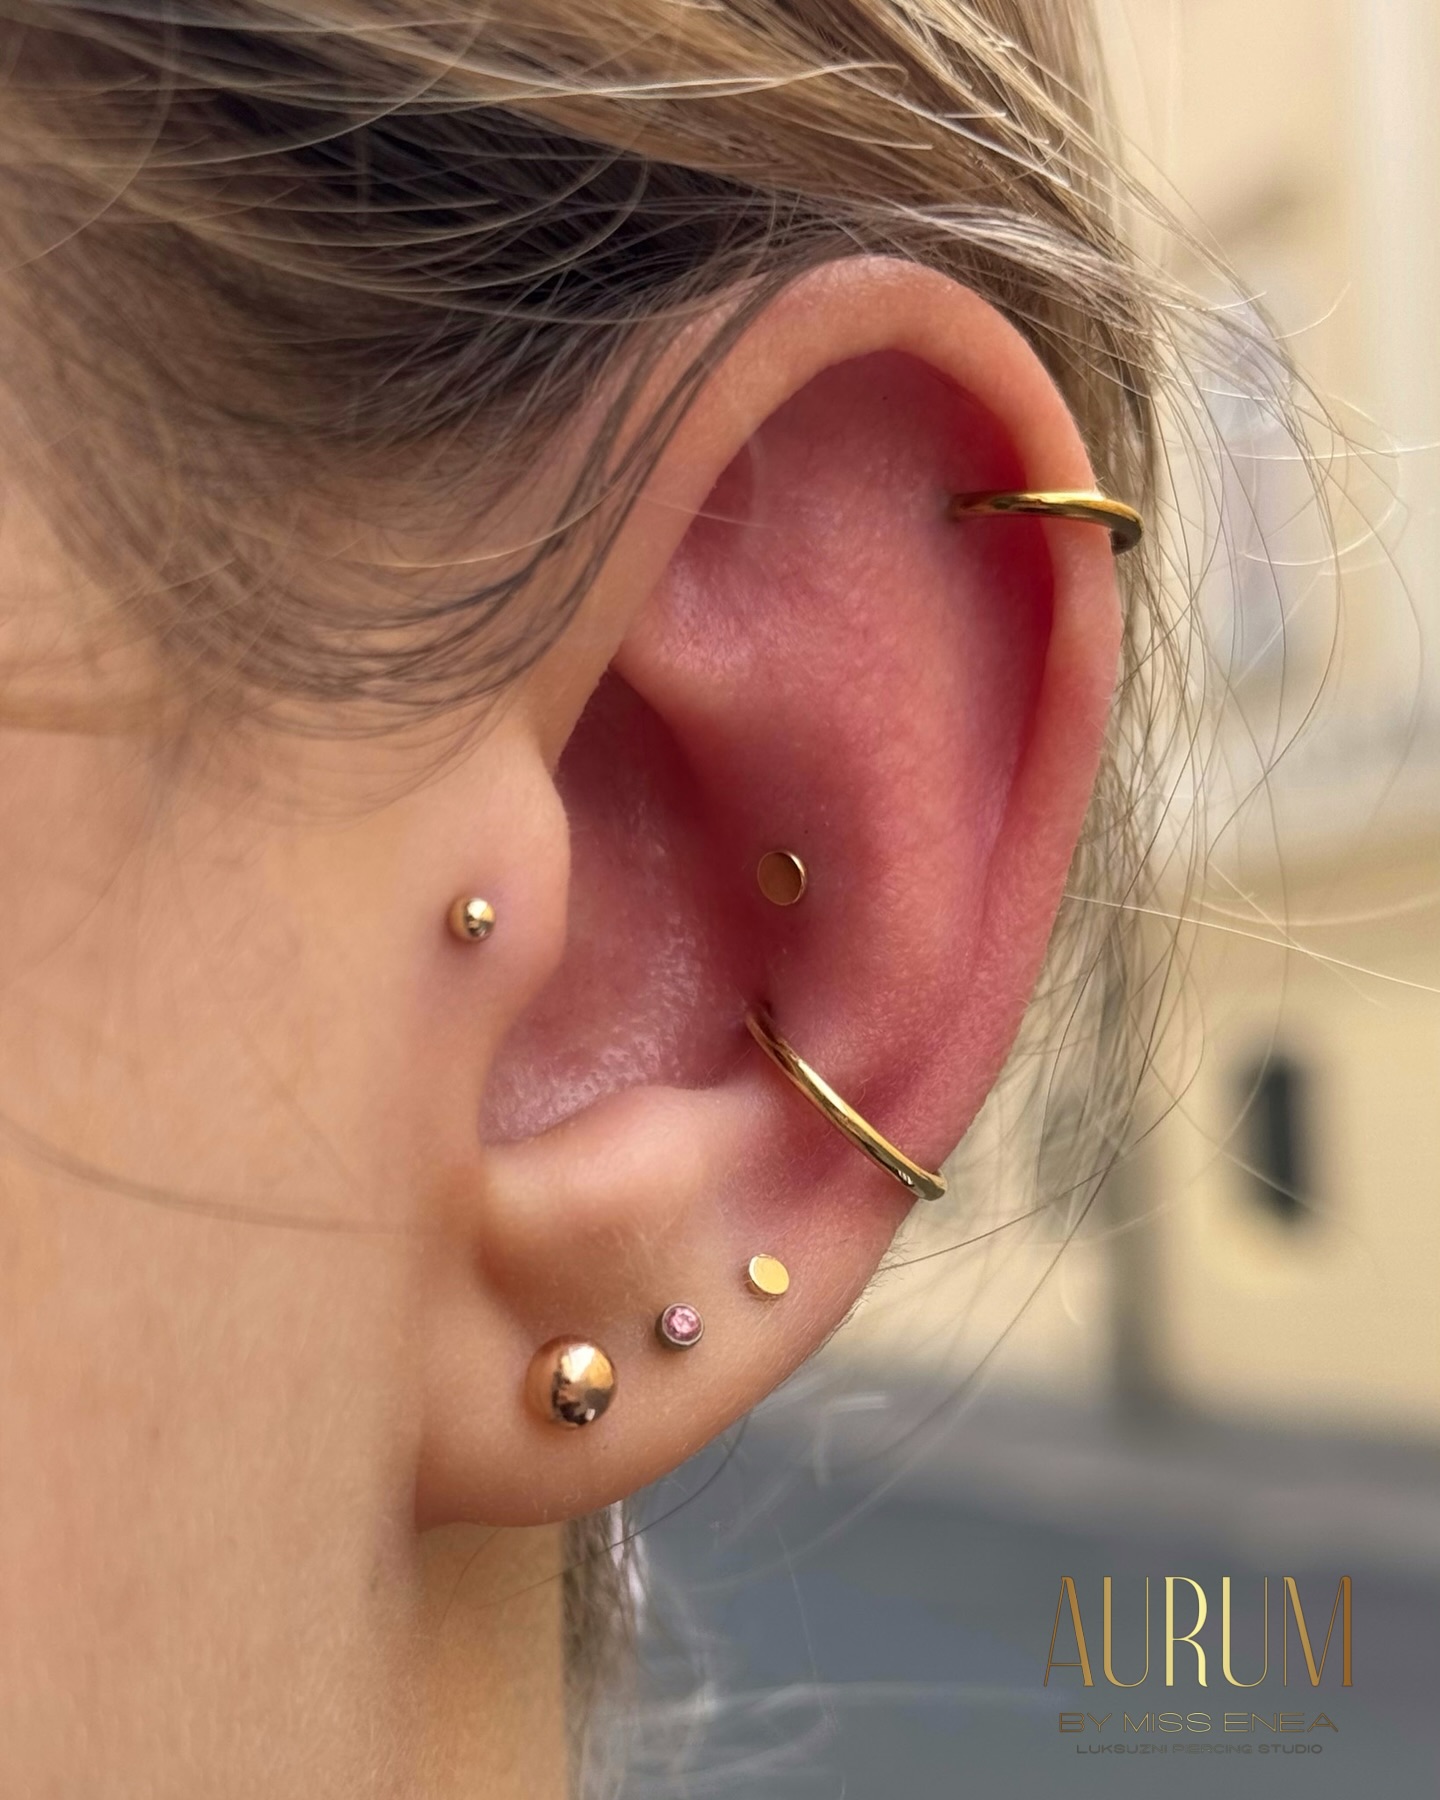
Six pieces of solid gold jewelry sit here in a quiet, minimal arrangement. A plain gold hoop wraps the helix, and a matching thinner hoop circles the lower conch area. Between them, a flat gold disc stud rests flush against the skin, adding subtle texture without extra sparkle.
Lobe piercings hold a domed gold ball, a tiny pink stone stud, and another flat disc matching the one above. Repetition of these disc shapes gives the set a cohesive, calm rhythm throughout. This arrangement proves that gold tones alone, without stones or clusters, can still bring warmth and softness to a curated ear.
14. Daisy Chain Helix with Bow Stud Lobe
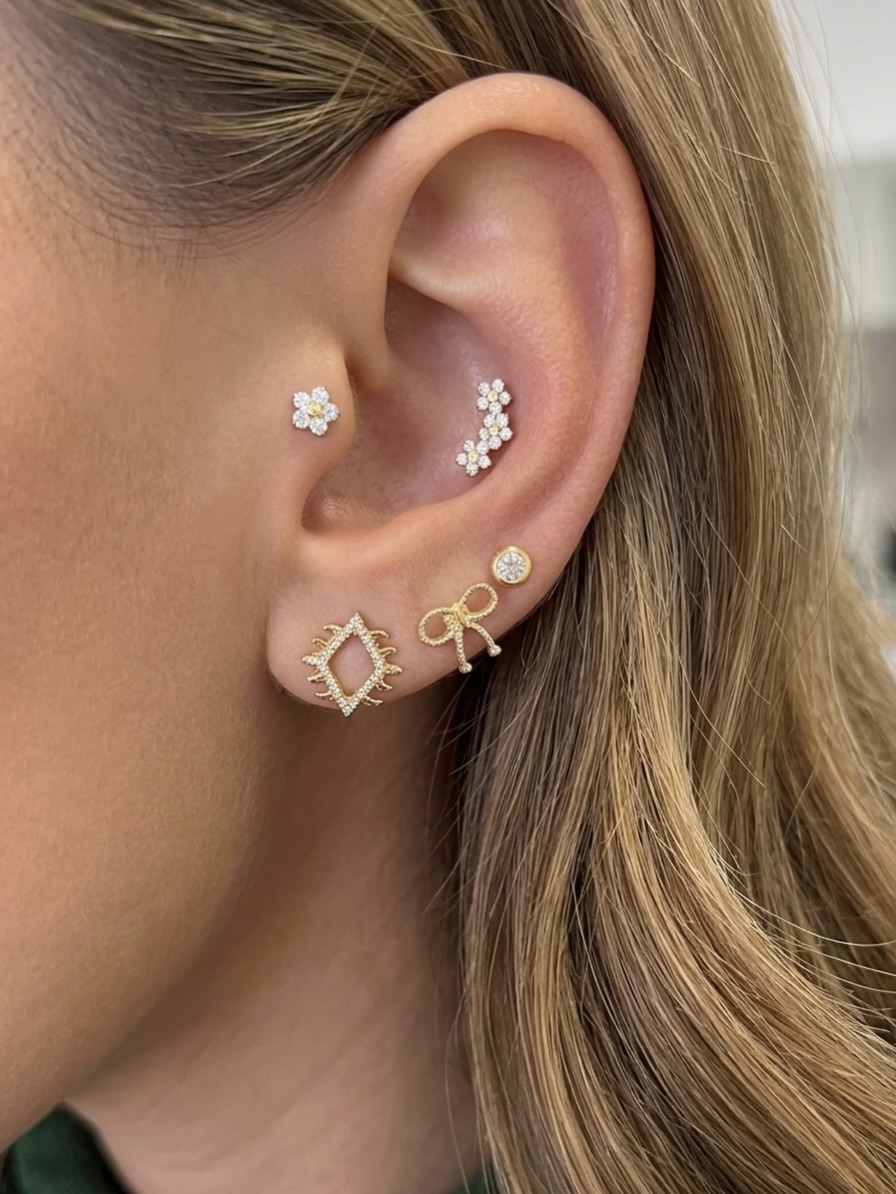
Five gold pieces bring a garden theme straight to this ear. A single daisy stud sits in the tragus area, and a three flower chain climbs along the helix, each blossom crafted with tiny pave petals. Together, these two pieces create the clearest floral statement of the whole collection.
Lobe piercings mix things up with a bow shaped stud, a bezel set stone, and a hollow diamond outline stud shaped like a sunburst. Charm varies here more than sparkle. Daisy details on the cartilage give this ear the strongest connection to a soft, romantic garden style piercing theme.
15. Crystal Flower Vine Helix with Pave Ear Cuff
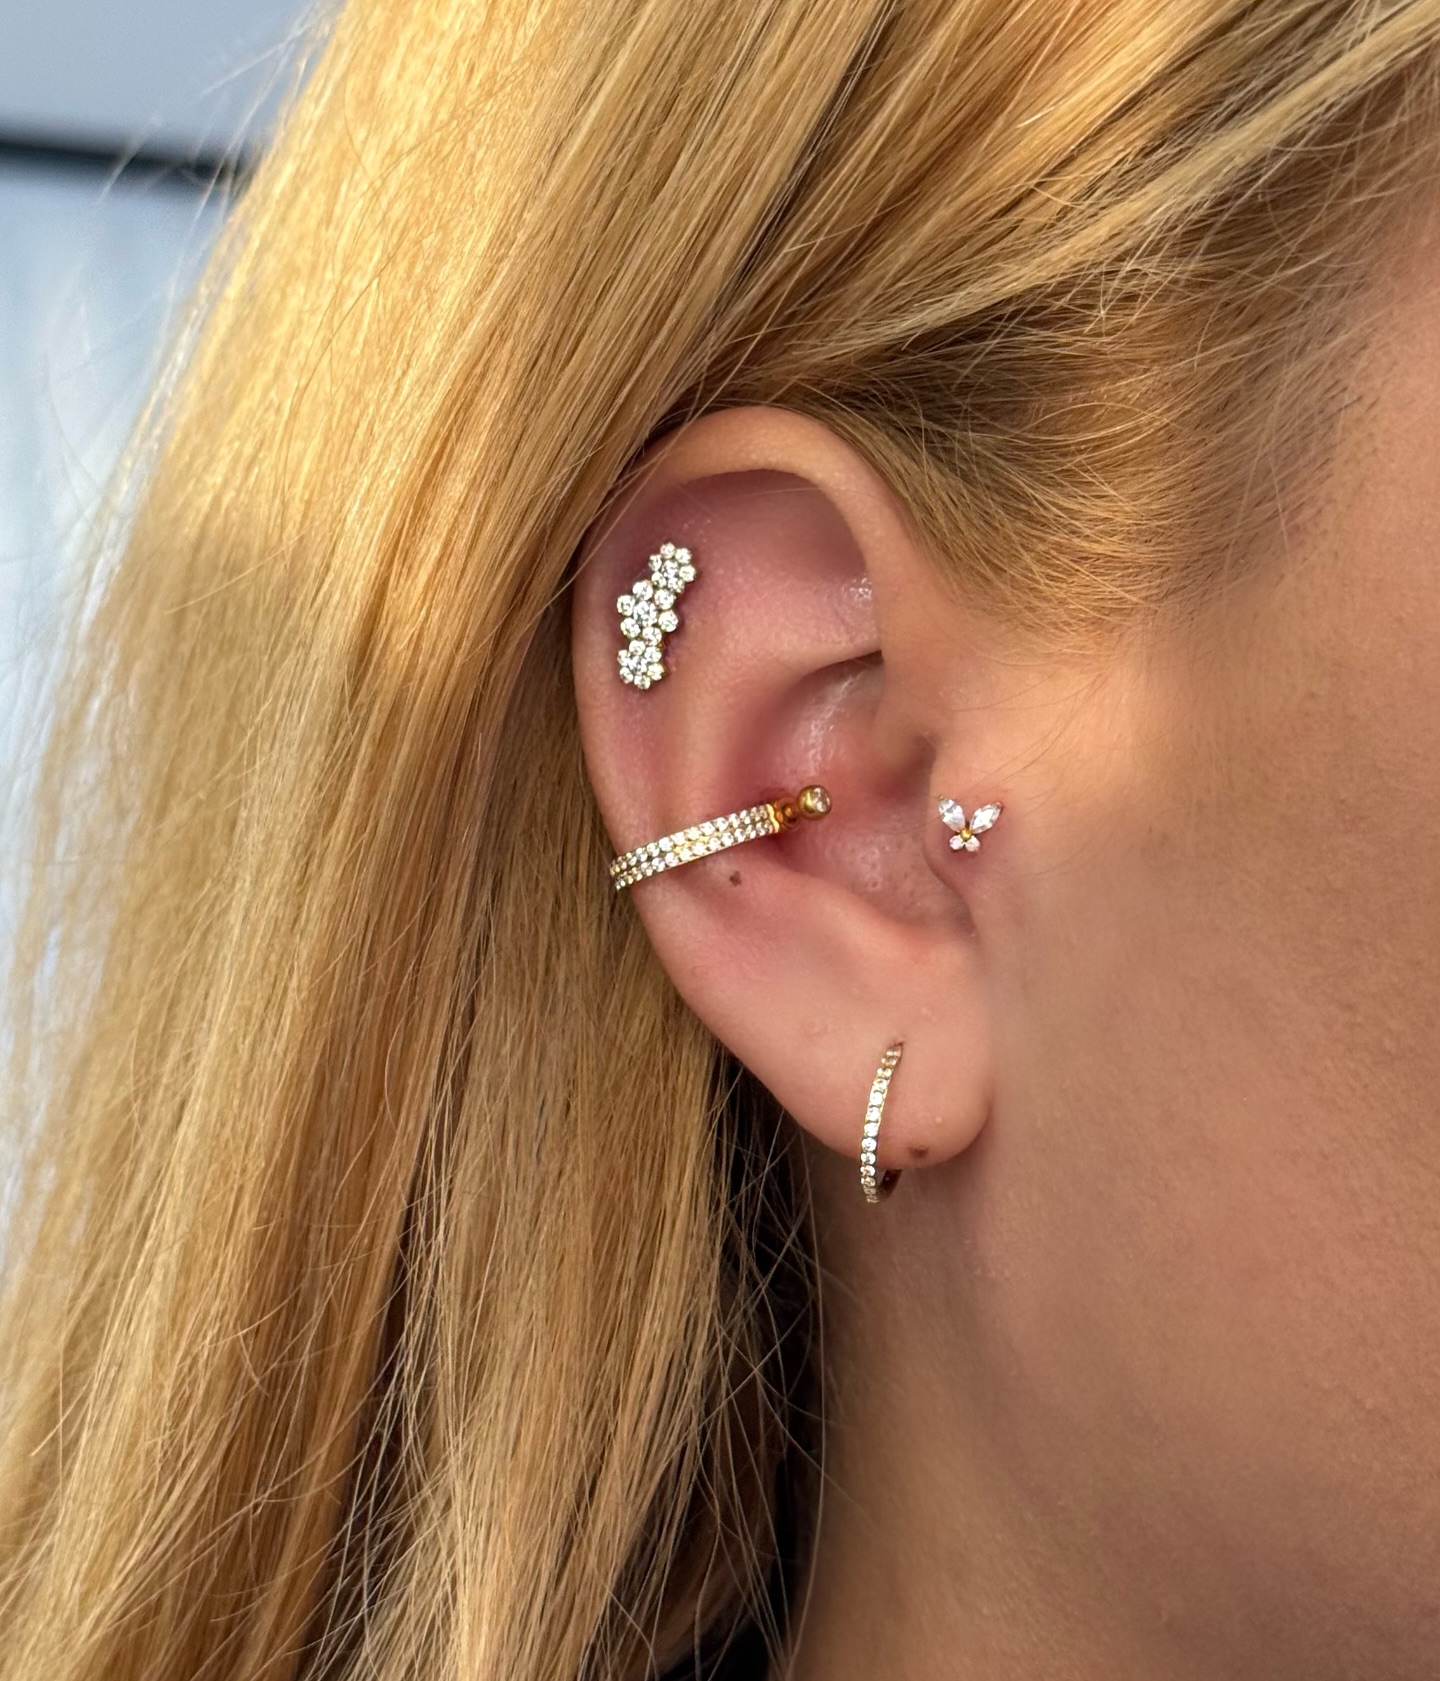
Four pieces sit here in bright crystal and gold combinations. Along the helix, a flower vine climbs upward, each blossom made from clustered round stones. A pave ear cuff with a gold ball detail wraps below it, adding width without another needle mark.
Conch jewelry brings a small marquise flower stud, echoing the vine above in a smaller scale. Down near the lobe, a pave hoop lined with crystals closes the set. Crystal flowers dominate this arrangement, giving the ear a bright, cohesive garden feel from helix through conch.
16. Bezel Trio Conch with Statement Gold Teardrop
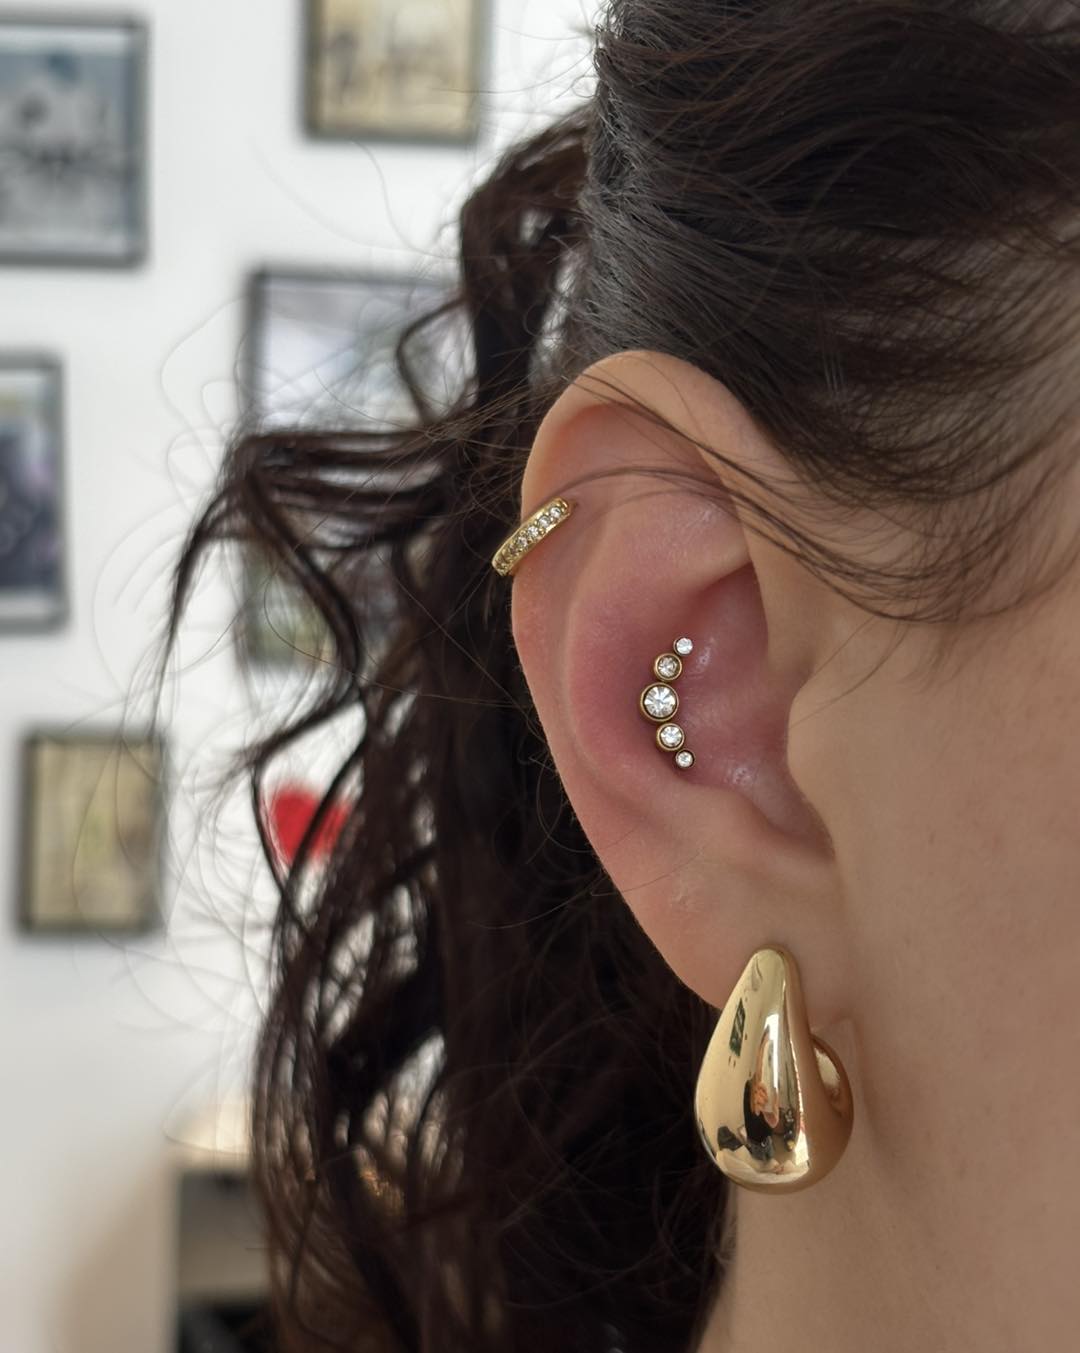
Three piercings pair with one bold statement earring here. A pave hoop wraps the helix in tiny clear stones, and three graduated bezel studs curve along the conch, each one holding a round stone in a stepped formation. That curved trio gives the ear a subtle waterfall effect.
Below the piercings, a large gold teardrop earring hangs from the lobe, its polished surface catching light without stones. Simple cartilage jewelry against one dramatic drop earring creates real contrast in scale. This pairing shows how understated piercings can support a single statement piece instead of competing with it.
17. Draping Chain Conch with Textured Gold Lobe Set
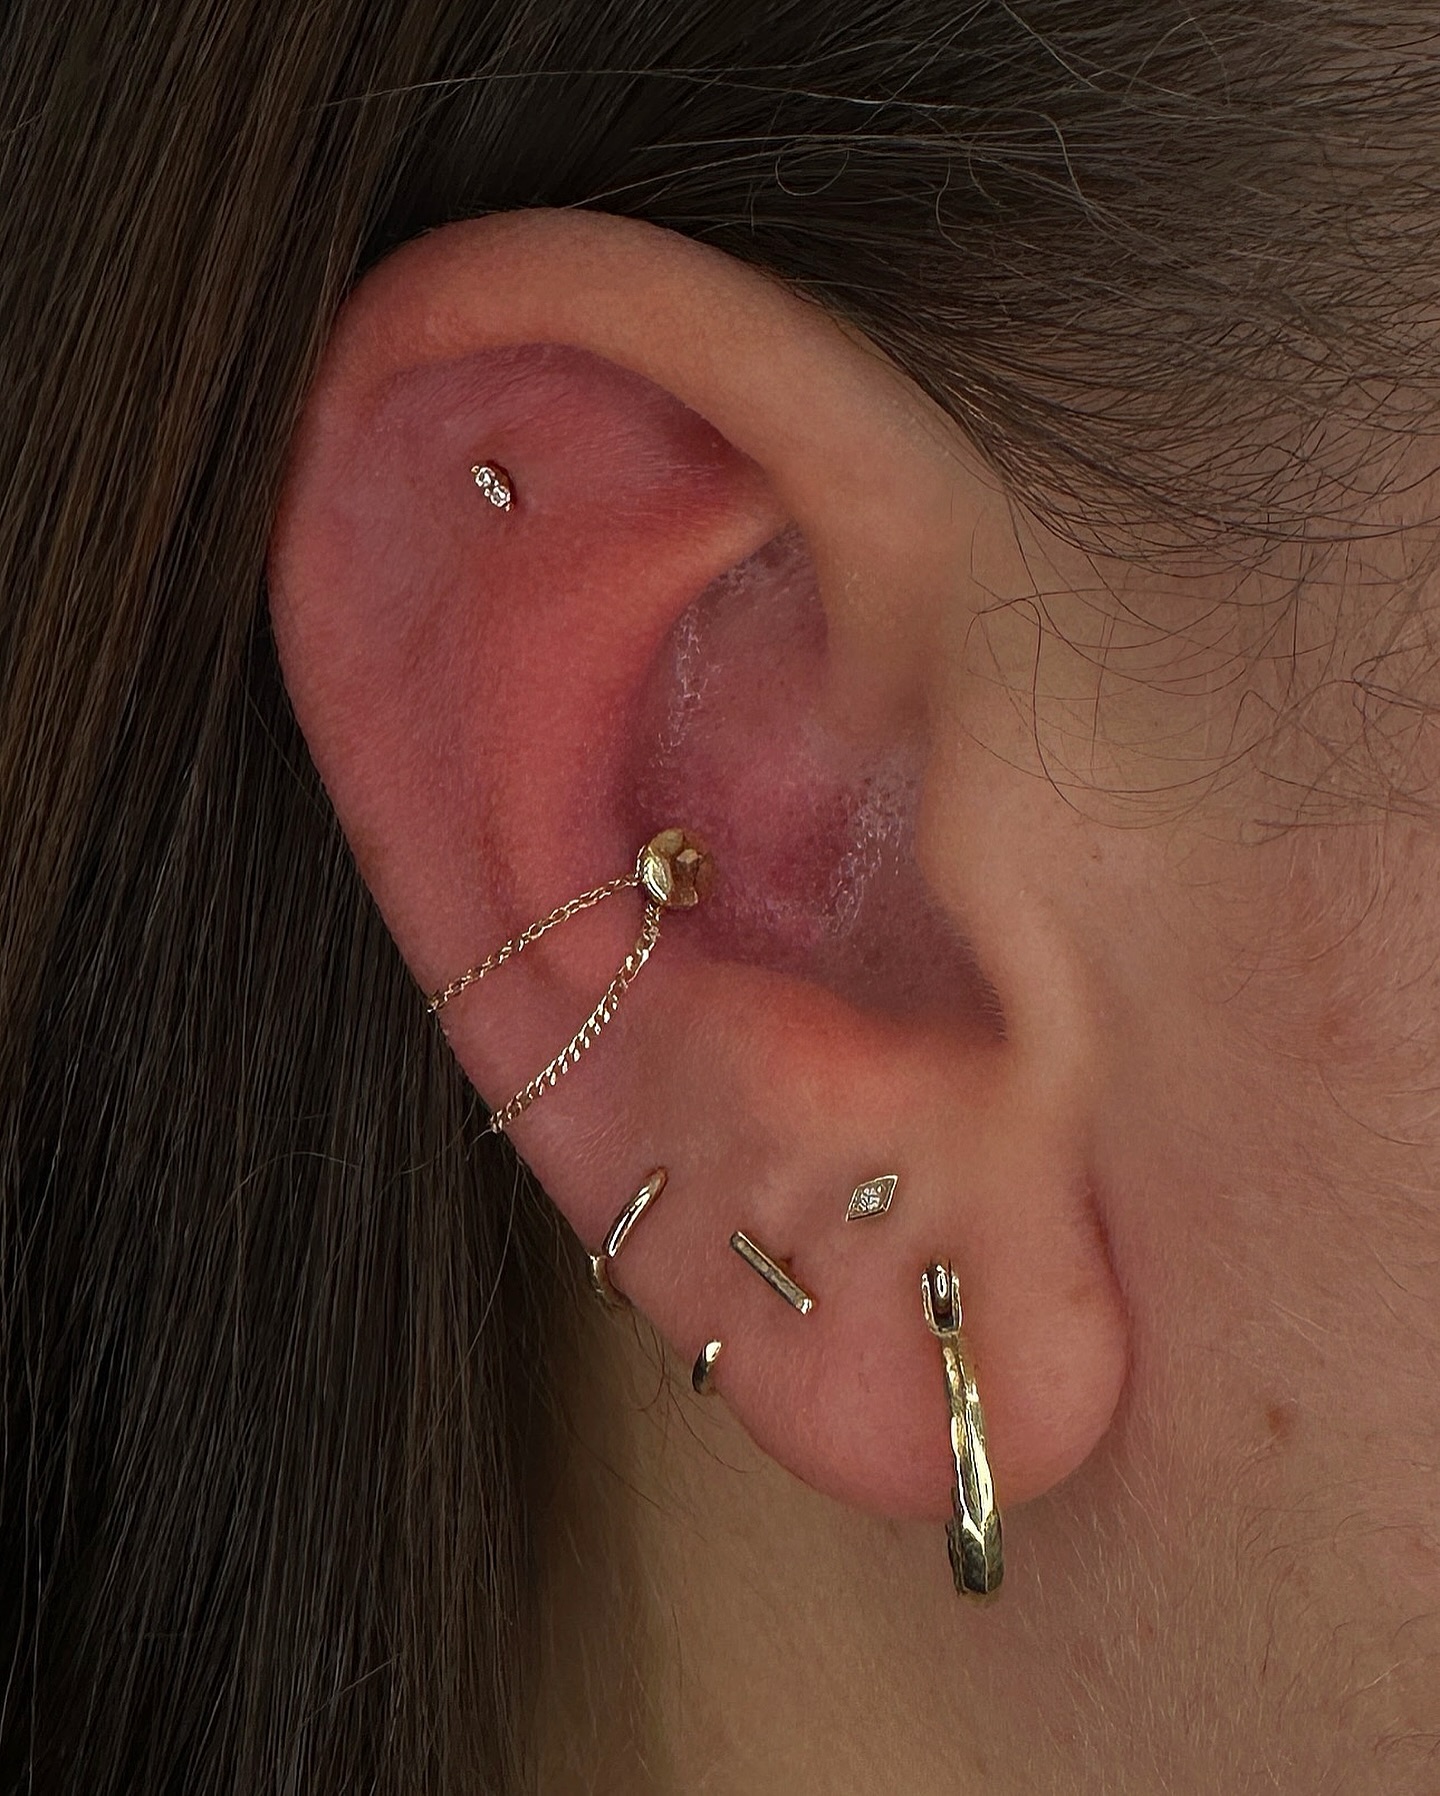
Seven pieces sit here in mixed metal textures. A tiny stud with a small stone marks the helix, and a nugget shaped conch piercing anchors two thin chains that drape down toward the tragus. That chain detail gives the ear a fluid, jewelry like quality other setups skip.
Down at the lobe, five pieces mix shapes freely, a smooth bar, a diamond outline stud, and hoops with hammered texture. Nothing here matches exactly, yet the gold tone keeps it unified. Draped chains connecting two piercings stand out most, showing how one linked detail can transform the whole ear.
18. Marquise Cluster Conch with Heart Charm Hoop
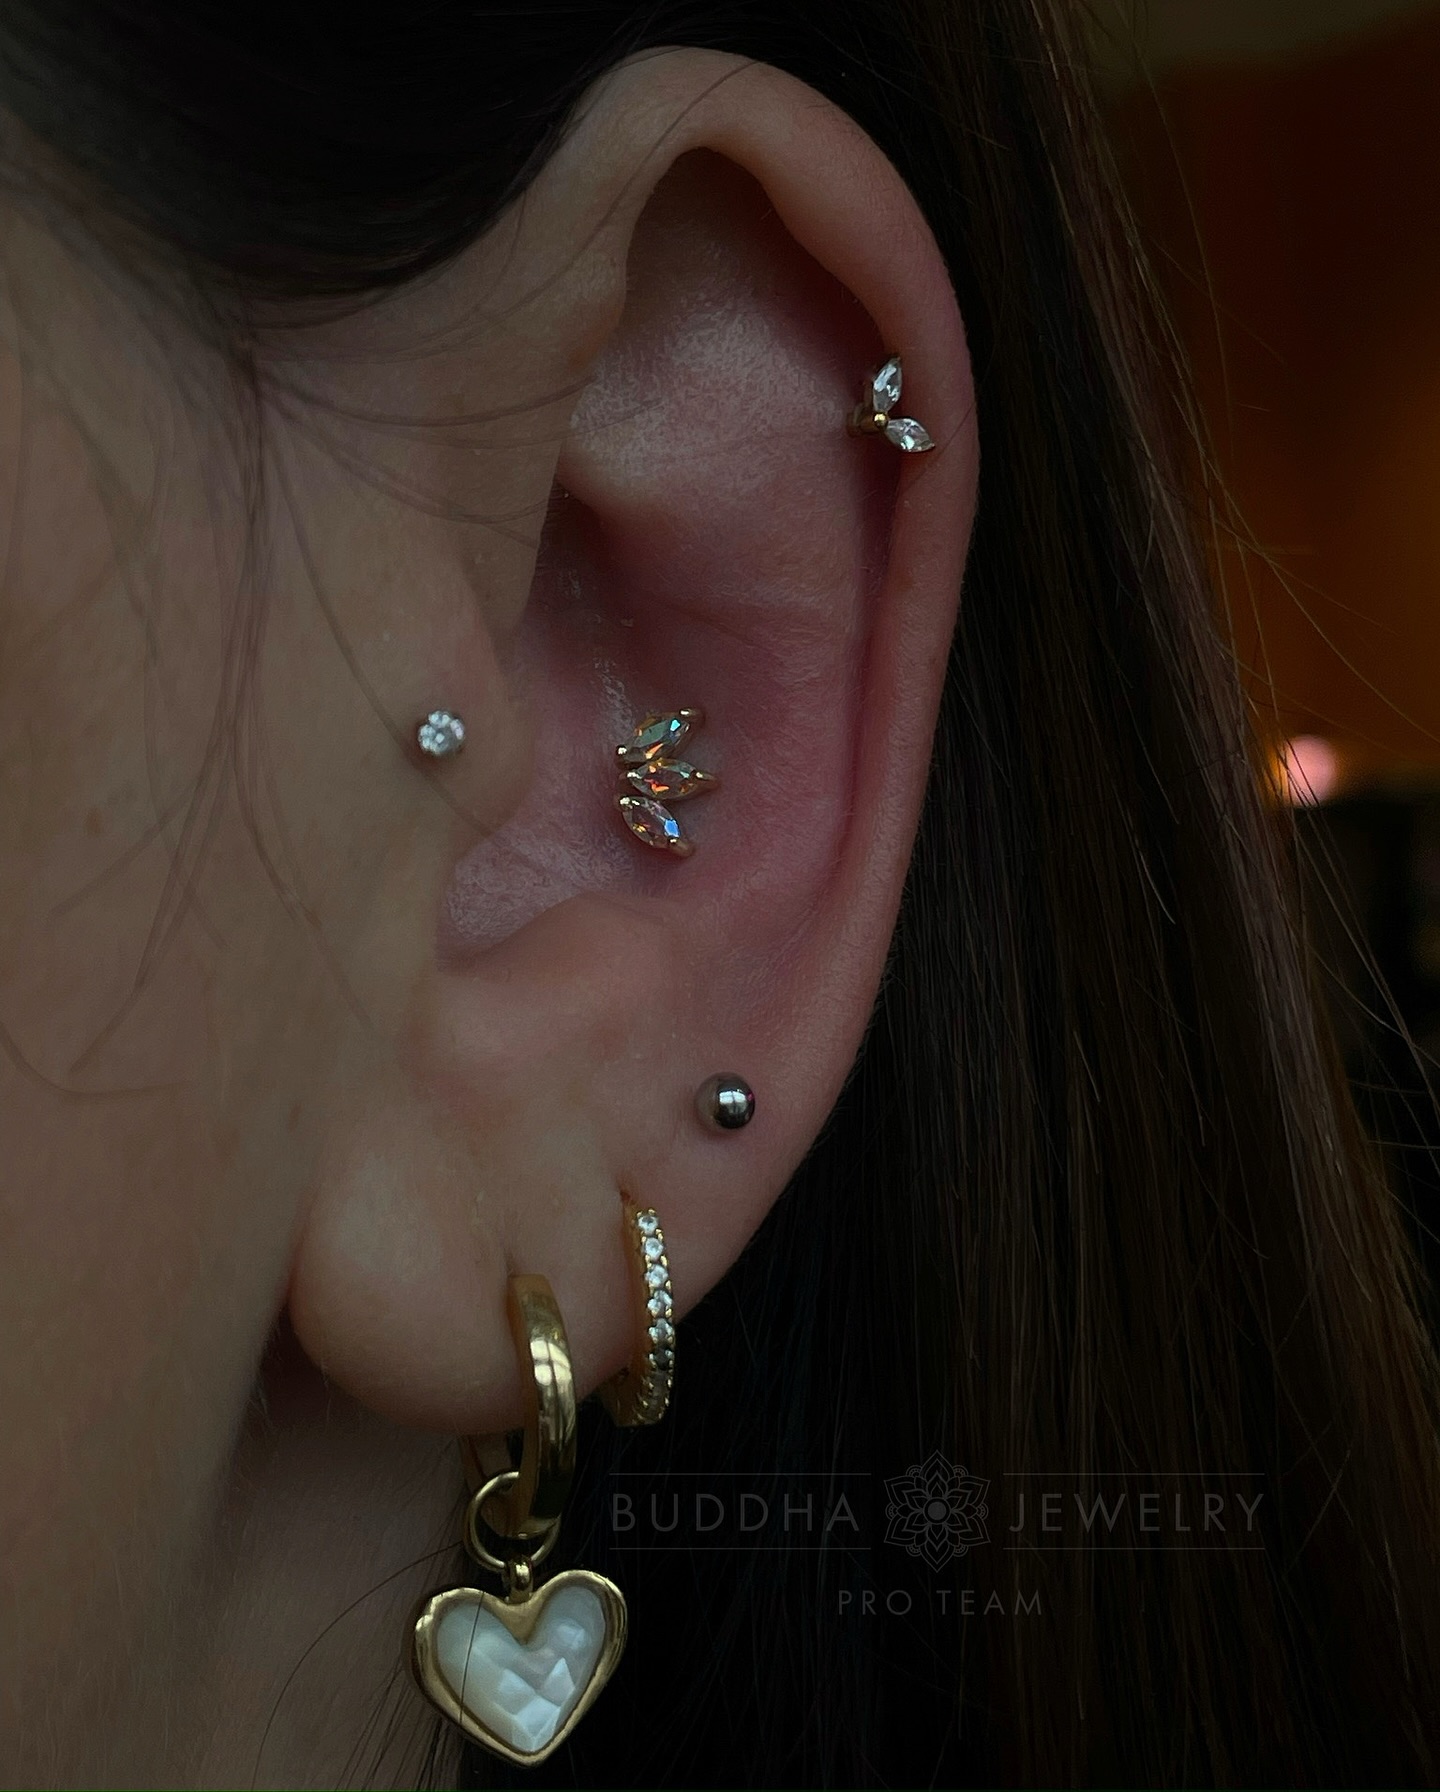
Photo Credit: holli.childs
Seven pieces fill this ear with sparkle and one sentimental drop. A small crystal stud sits on the helix, and a bright marquise cluster fills the conch with three faceted stones catching every color of light. Their arrangement forms a leaf like shape close to a flower.
Lobe jewelry mixes a dark ball stud, a pave hoop, and a plain gold hoop holding a heart shaped mother of pearl charm. Charm placement adds sentiment among the sparkle. That conch cluster carries the boldest color play here, proving multi stone pieces bring depth beyond plain clear settings.
19. Feather Vine Helix with Trinity Lobe Stud
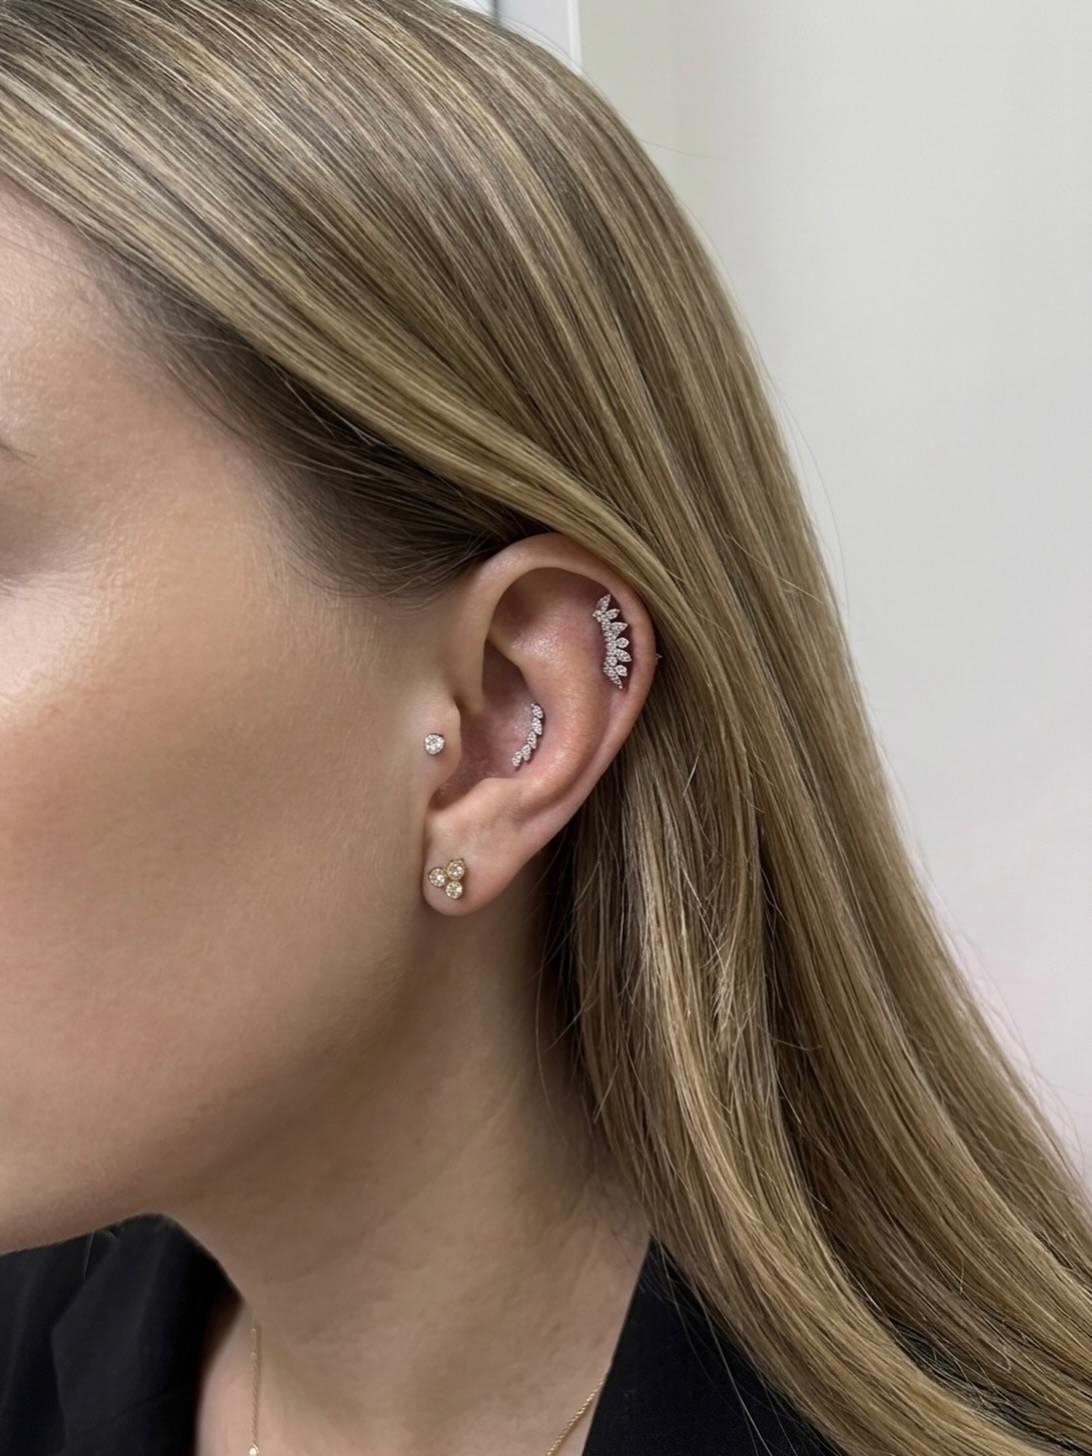
Four pieces sit here in soft, understated silver and gold tones. A feather shaped climber traces the outer helix, its graduated stones tapering into the ear like a delicate branch. Below it, a single small stone stud sits at the tragus, keeping the top of the ear light.
Lobe jewelry stays minimal with one three stone cluster stud, echoing a subtle trefoil shape. Nothing competes here, letting the feather climber take full focus. This pairing shows how one detailed cartilage piece and one simple lobe stud can create a quiet, effortless look without needing multiple hoops.
20. Mixed Metal Helix with Star Charm Hoops
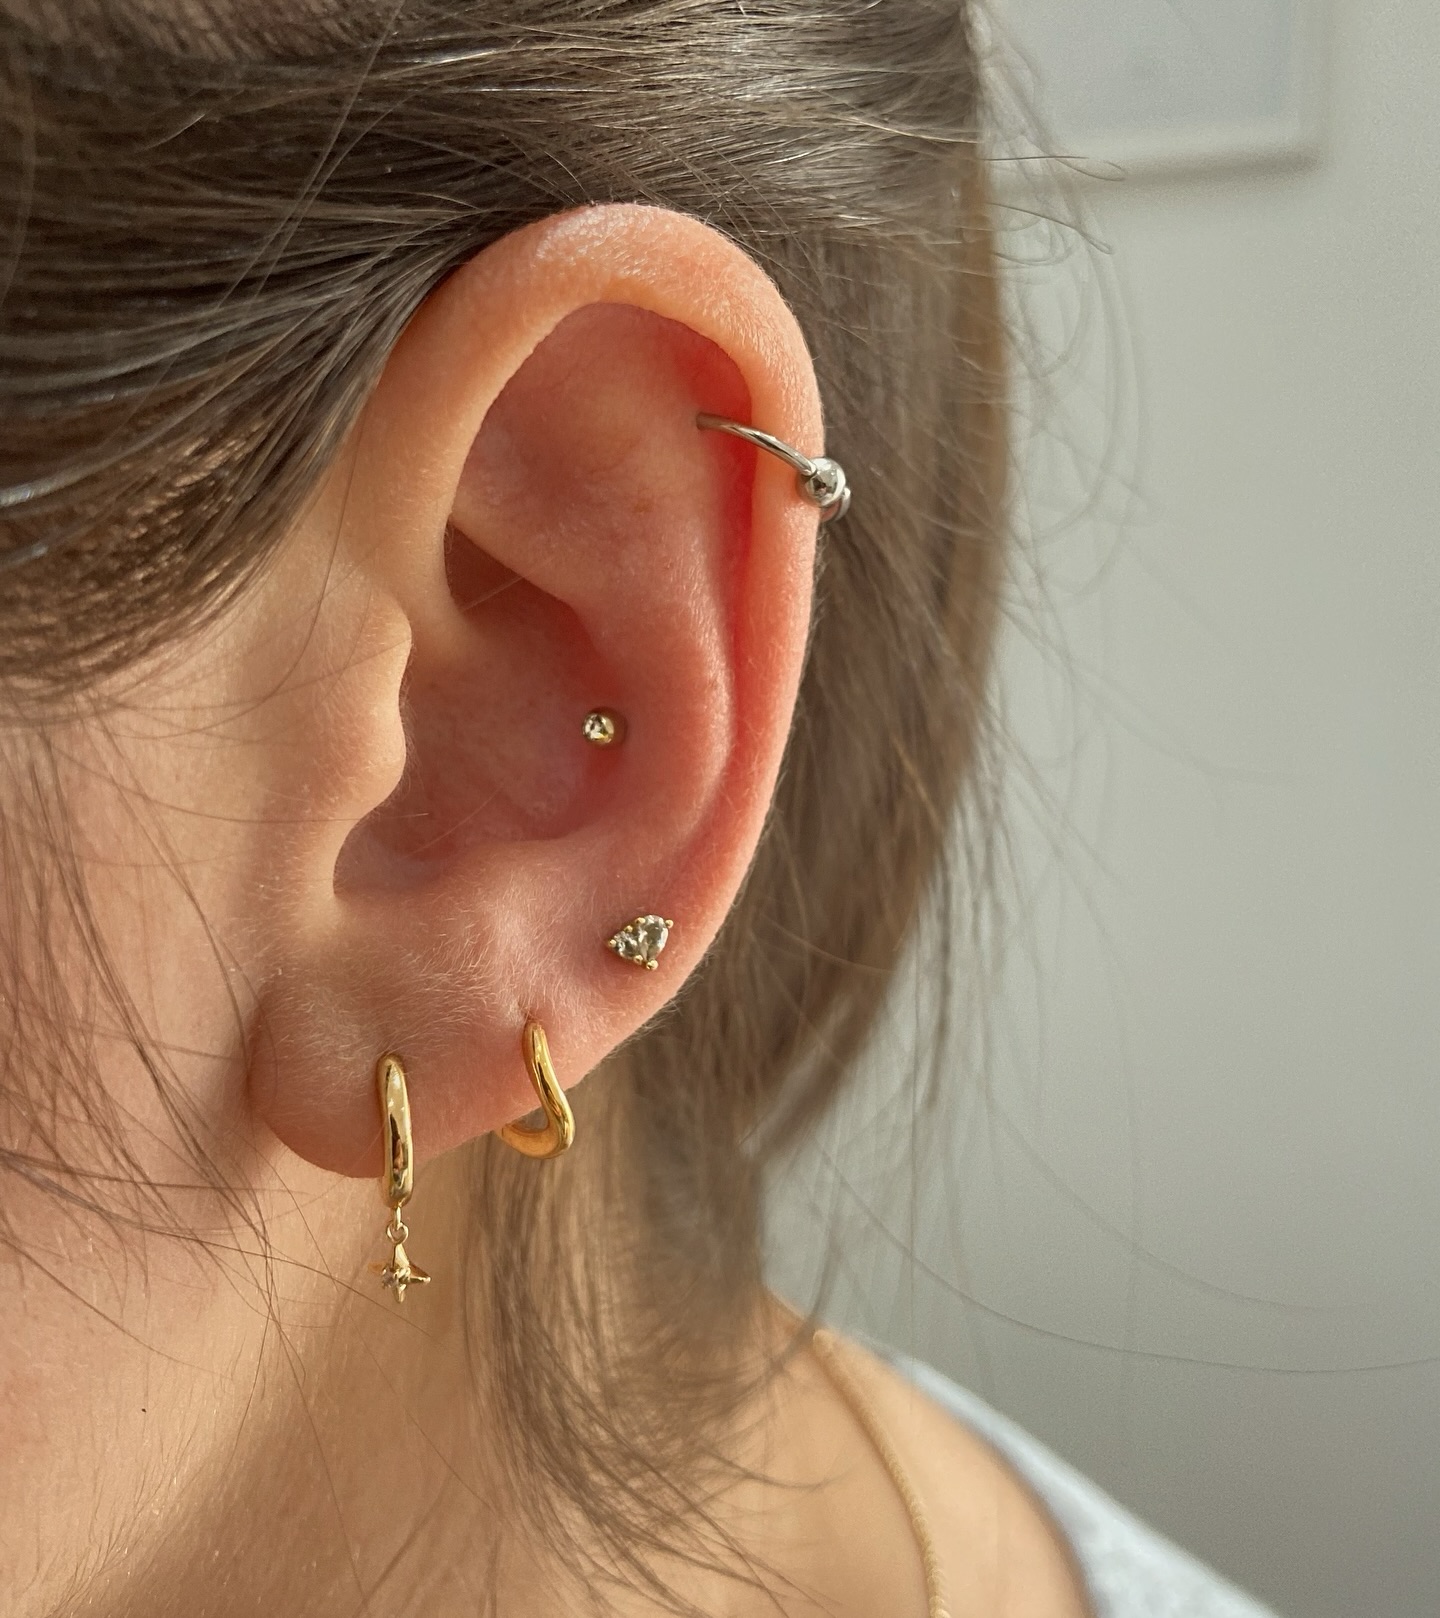
Five pieces sit here in a relaxed mix of silver and gold tones. A silver ball hoop wraps the helix, standing apart from the warmer gold jewelry below it. In the conch, a tiny gold ball stud rests plain and simple, followed by a triangle cut stone stud near the tragus.
Lobe piercings carry two gold hoops of different widths, one holding a small star charm that dangles freely below the ear. Mixing silver and gold gives this ear a casual, collected over time feel. That dangling star hoop adds gentle movement, making the whole combination look easy and unforced.
21. Curved Crystal Constellation Conch
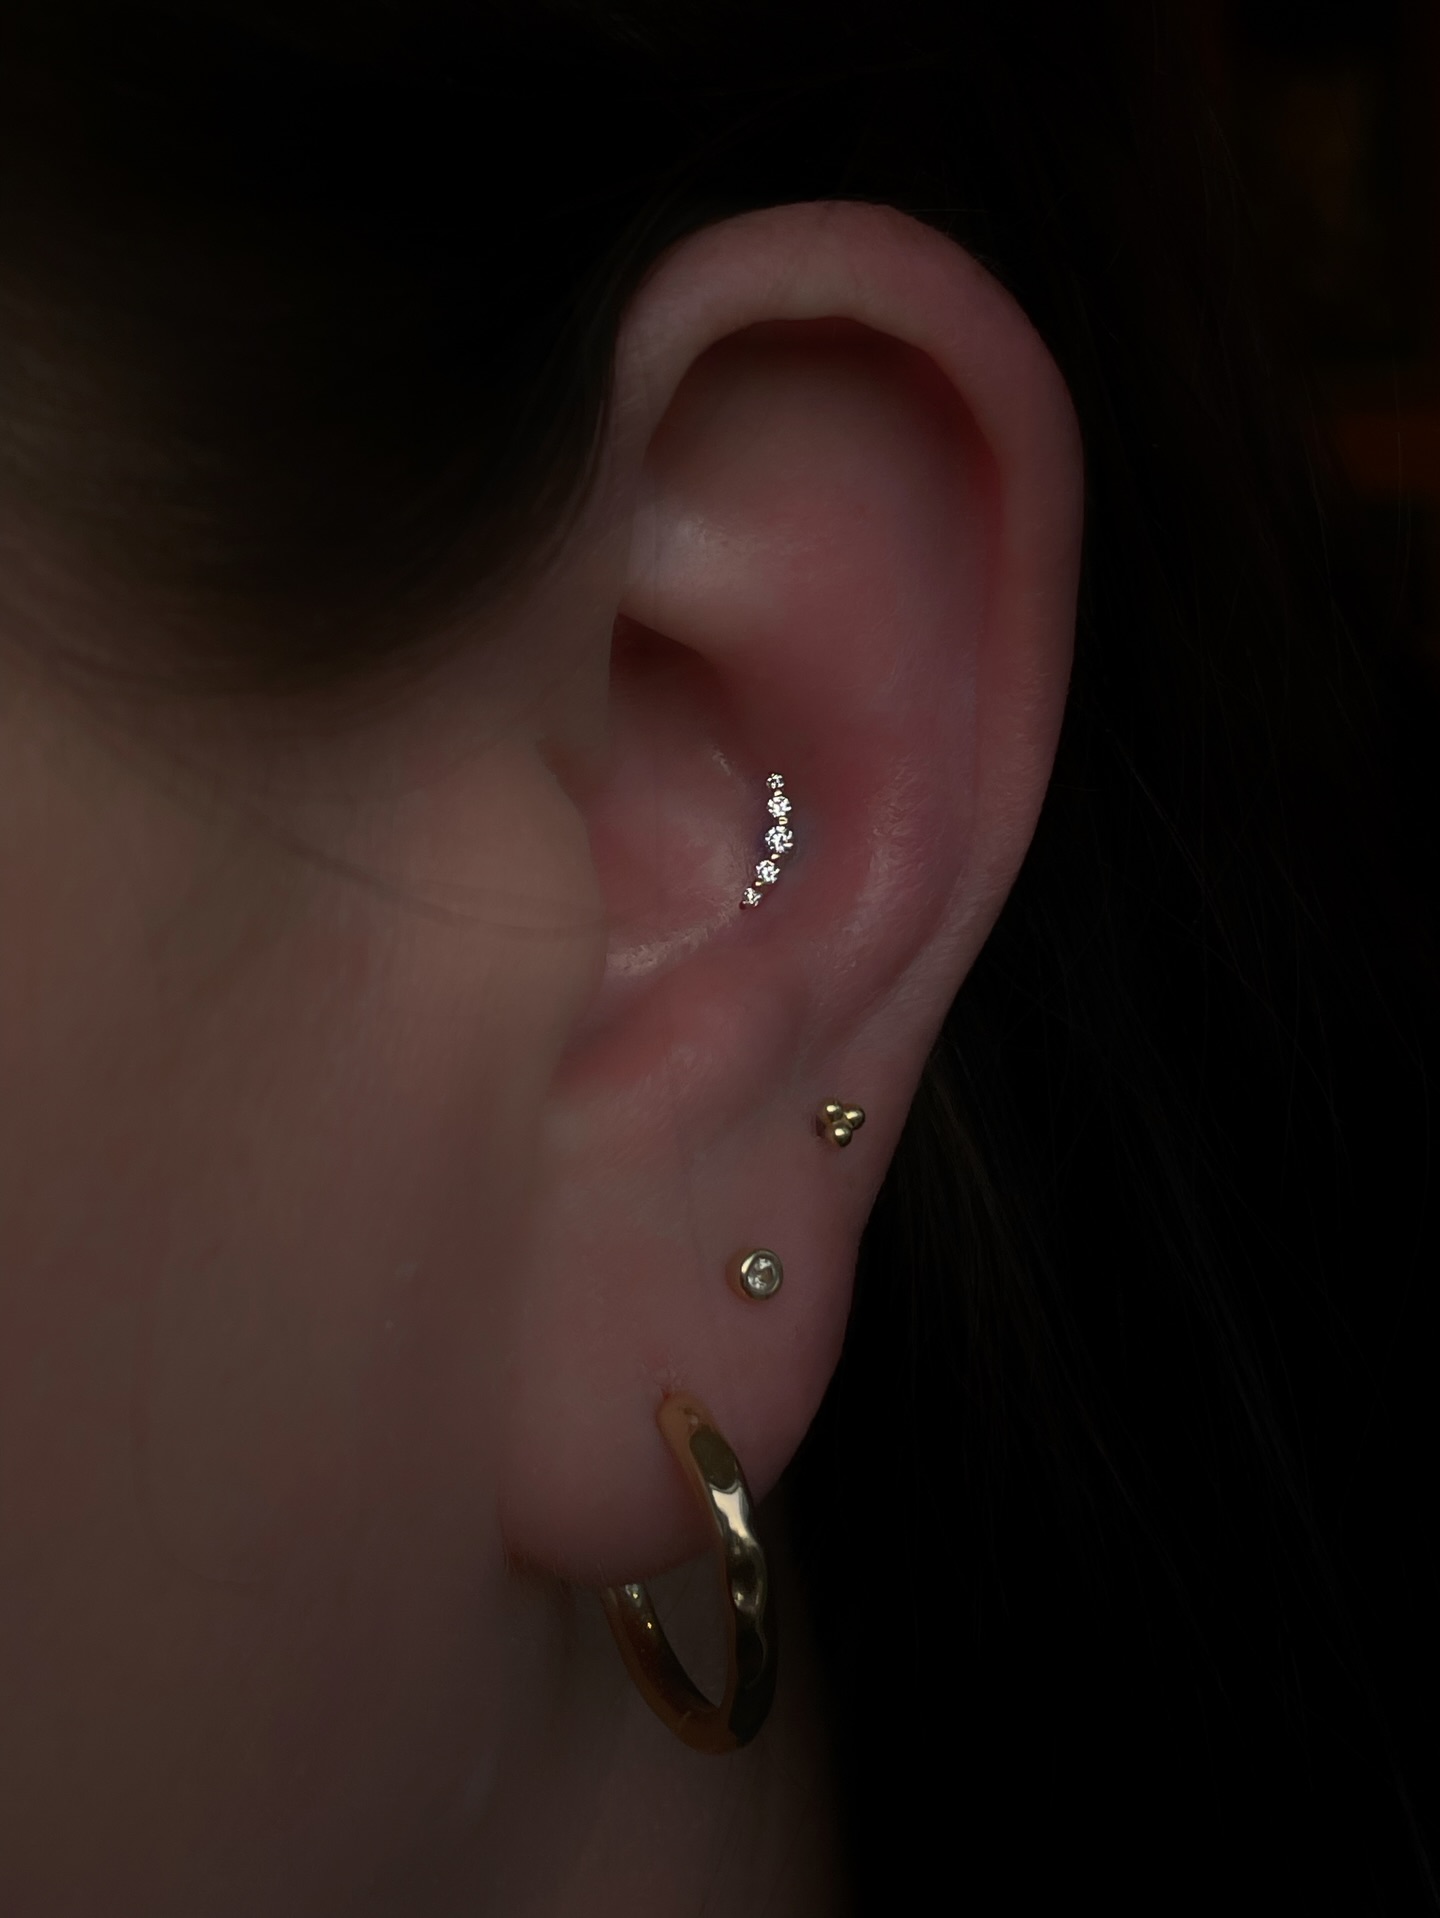
Four gold pieces sit quietly on this ear, letting soft lighting bring out their sparkle. A curved line of five graduated crystals traces the conch in a gentle arc, resembling a small shooting star or vine. Below it, a tiny trinity cluster stud and a bezel set stone keep the lobe simple.
One gold hoop closes the set at the bottom, plain and polished without extra detail. Warm lighting throughout gives every piece a soft glow rather than sharp shine. That curved crystal line stands as the clear focal point, showing how a simple gradient placement can read as elegant rather than busy.
22. Butterfly Wing Helix with Layered Lobe Studs
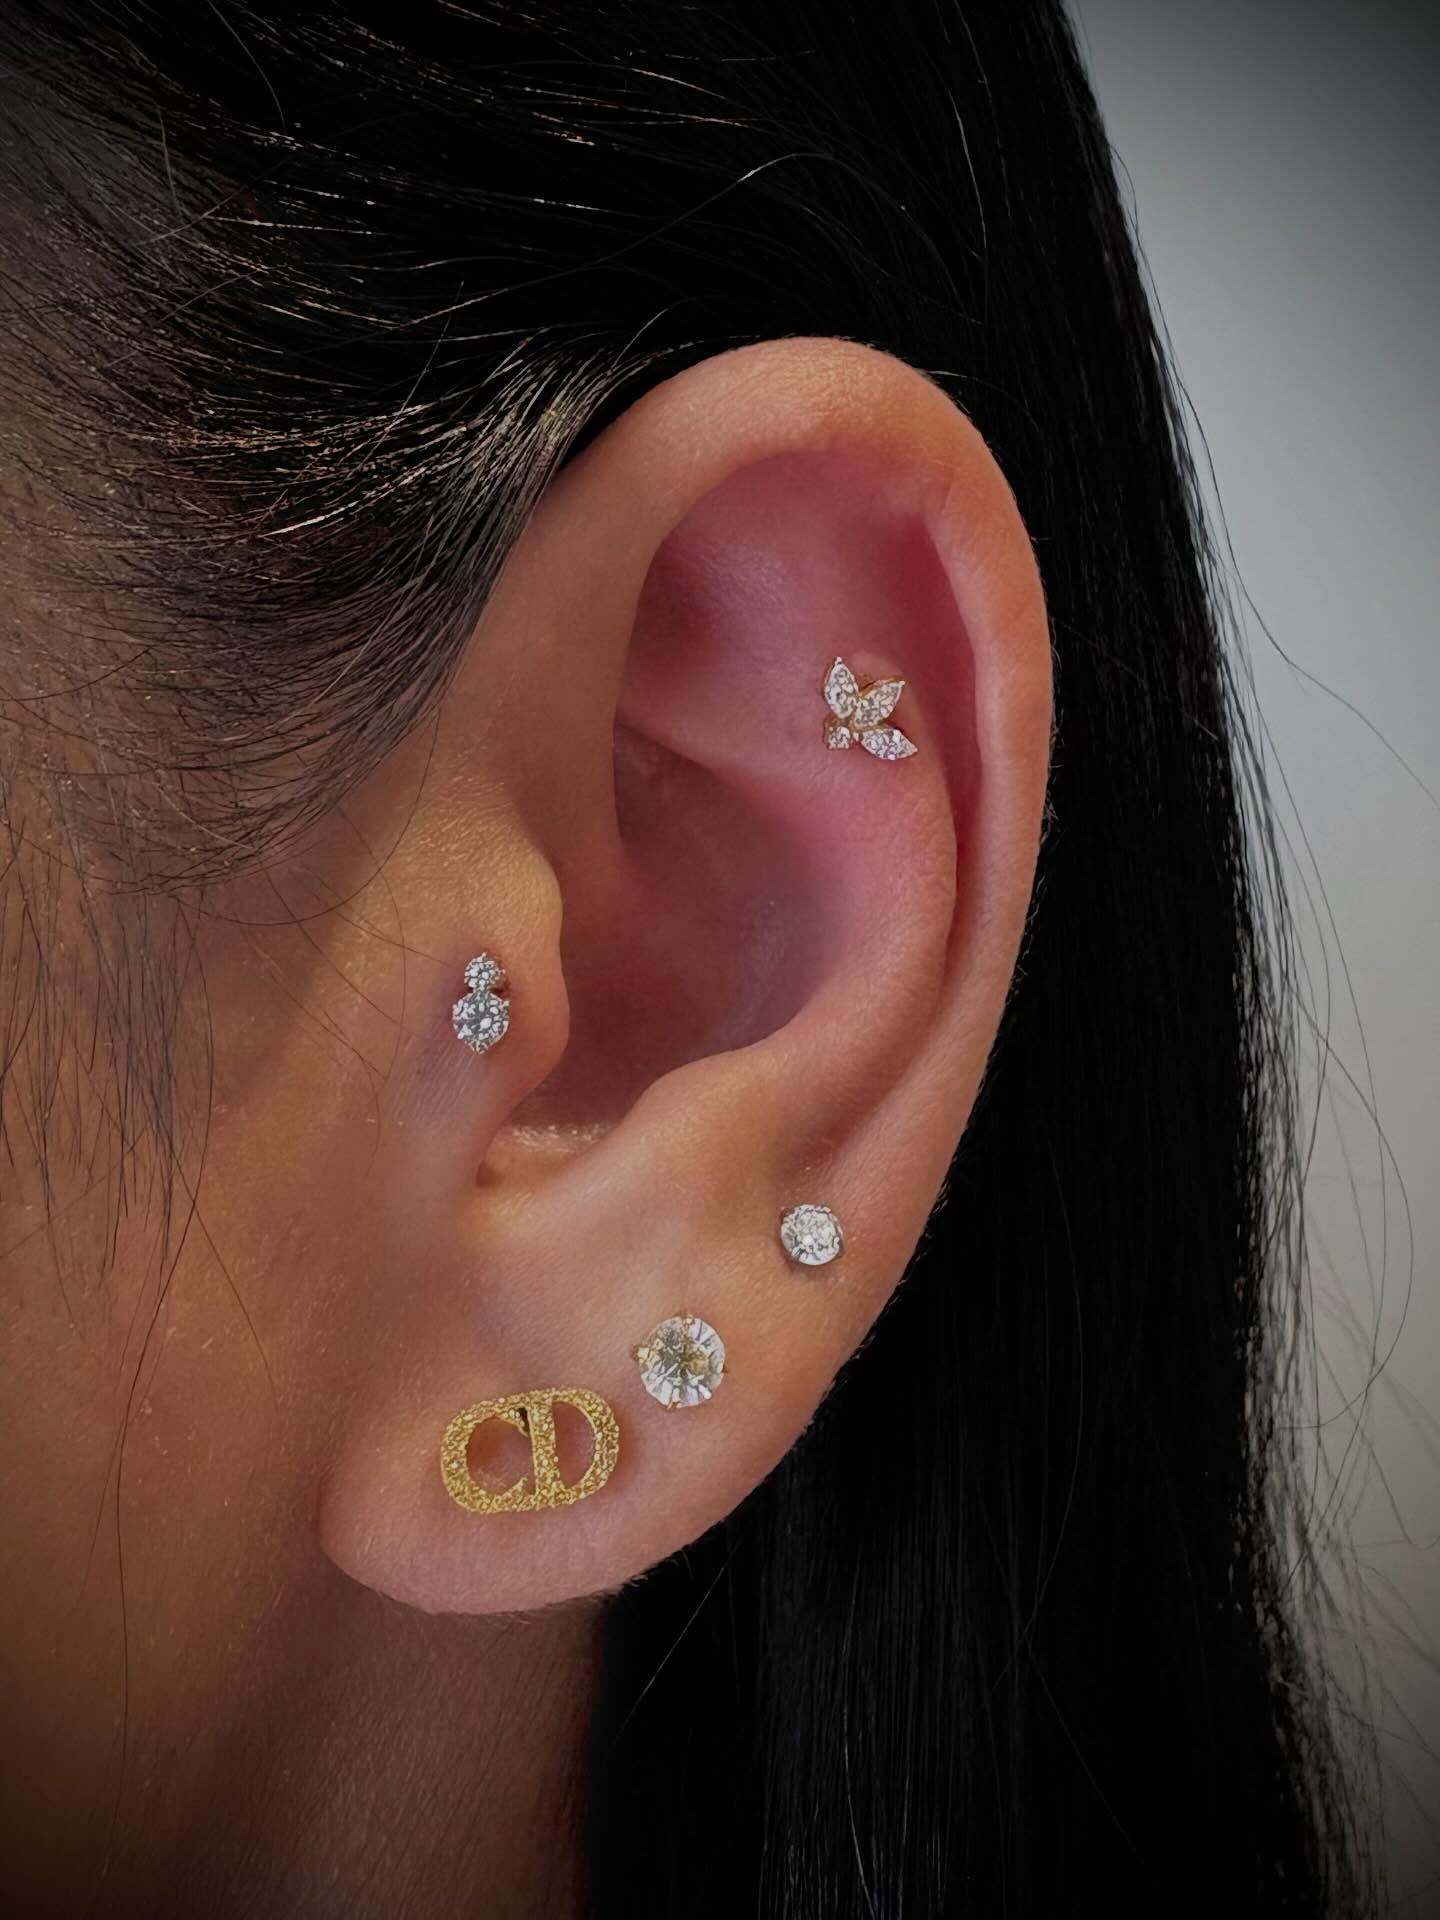
Five pieces sit here in warm gold and clear crystal tones. A textured butterfly stud with detailed wing patterns rests on the helix, its rough finish giving it a handmade quality. Below, a two stone stud lines the tragus with small round crystals stacked close together.
Lobe piercings hold three studs of increasing size, each set with a single round stone, plus a gold logo style stud near the bottom. Graduated stone sizes create a soft cascade down the ear. That textured butterfly stands out most, bringing genuine dimension against the flatter crystal studs surrounding it.
Final Words,
The conch holds more creative range than most people expect, fitting studs, hoops, and clusters with equal ease. Choosing a style comes down to personal taste and how much sparkle feels right. Whatever direction you pick, this spot rewards a little planning and turns into a lasting favorite.